Chery Tiggo T11 LHD. Manual - part 4


  Index      Chery     Chery Tiggo T11 LHD - service repair manual


Search            


Content   ..  1  2  3  4  5  ..


Chery Tiggo T11 LHD. Manual - part 4


Chery T11 Service Manual


Body and Accessories   


-14- 

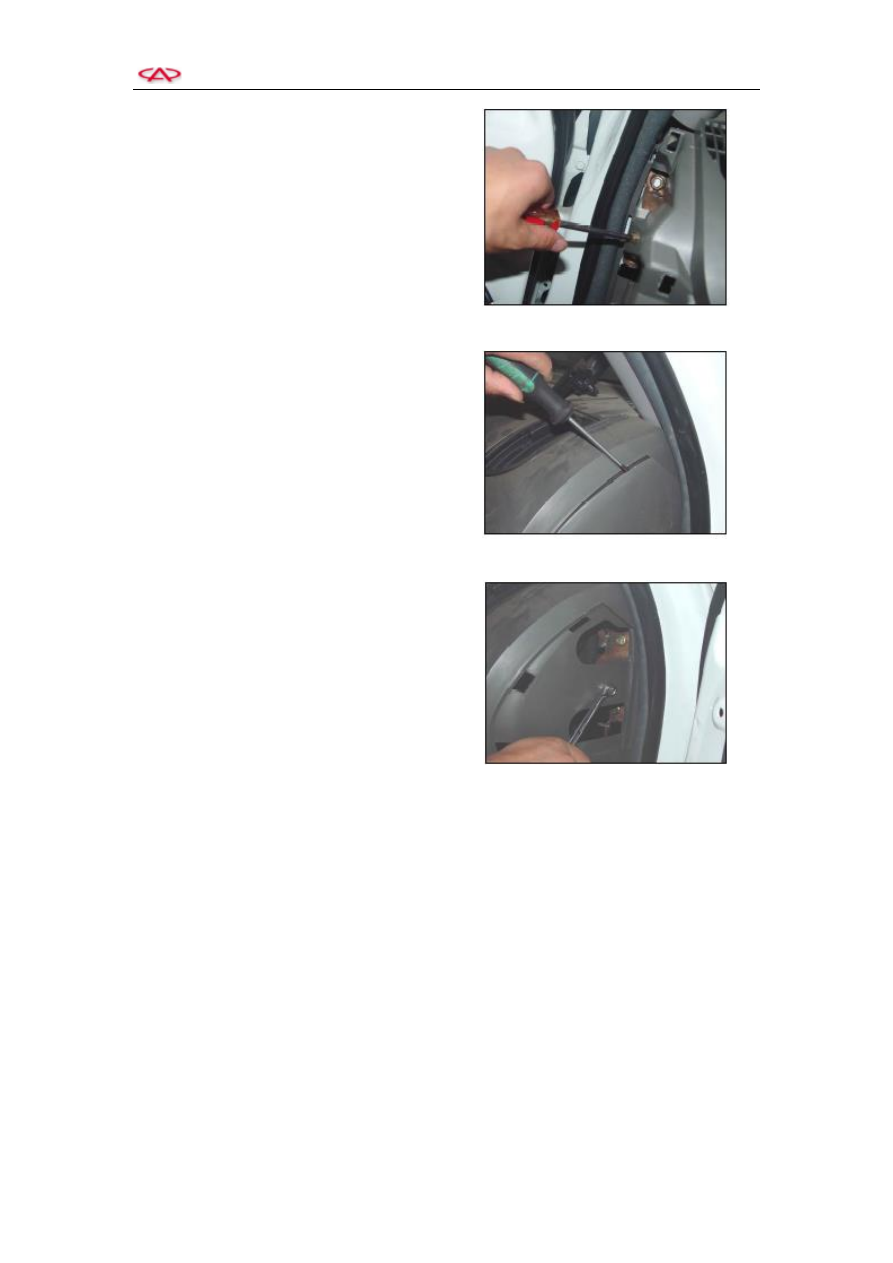
g.  Loosen  the  tapping  screw  and  fixing 

bolts of the lower fender at left. 


h.  Prize  up  the  right  end  board  of  the 

instrument panel. 


i. 

Loosen the fixing nut of the right end 
board. 

j. 

Remove the fender of Pole A. 

k.  Remove the instrument panel 


    Note: Install in the reversed sequence. 

    Torque:   

    Fixing bolts 7±1Nm 


Chery T11 Service Manual


Body and Accessories   


-15- 

6. Dismantle the Regulator of Right Front Door   

1)  Dismantle the fender of right front door.   


a.  Prize  up  the  protection  cover  of  door 

handle 


b.  Loosen the fixing screws 


c.  Unplug the wiring harness 

d.  Remove the shield inside the door 


Plug 

Fixing Screw 

Fixing Point 

Chery T11 Service Manual


Body and Accessories   


-16- 


2)  Loosen  the  cable  of  inner  handle,  and 

remove the protection film. 


3)  Dismantle the glass of door. 

    Loosen  the  fixing  bolt  for  glass  by  socket 

wrench. 


4)  Loosen the fixing bolts for regulator. 

5)  Remove the regulator. 

6)  Install in the reversed sequence. 

    Torque:   

    Fixing of door glass    11Nm     

B1460612 (2 pcs)   

    Fixing of regulator      11Nm     

B1840610 (6 pcs)   


Note:  Please  refer  to  the  removal  procedure 
of right front door for the disassembly of the 
rest three doors.   


Glass Fixing Bolt 

Bolt 

Chery T11 Service Manual


Body and Accessories   


-17- 

  Seat   

1. Left Front Seat   

1)  Move the seat to the furthest front end, and 

remove the protection cover of guide rail.   


2)  Loosen  the  fixing  bolts  at  the  back  end  of 

the guide rail.   


3)  Move  seat  to  the  furthest  back  end,  and 

remove the protection cover of guide rail. 

4)  Loosen  the  fixing  bolts  at  the  front  end  of 

the guide rail. 

5)  Unplug  seat  heating  element,  and  remove 

the left front seat.     

6)  Install in the reversed sequence. 


    Torque:   

    Seat guide rail fixing 32Nm 

    PART NO: T11-68000 15(4 pcs) 

    Note:  Please  refer  to  the  removal  procedure 

of  left  front  door  for  the  disassembly  of  the 
right front seat.   


Bolt 

Pull Rod of Guide Rail 

Fixing Point 


Content   ..  1  2  3  4  5  ..