Volkswagen Golf / Golf GTI / Golf Variant. Manual - part 933
4.2
Overview - Rear Lid Tail Lamps
⇒ “4.2.1 Overview - Rear Lid Tail Lamps, Sedan, with Bulbs”,
page 137
⇒ “4.2.2 Overview - Rear Lid Tail Lamps, Sedan, with LED”, page
138
⇒ “4.2.3 Overview - Rear Lid Tail Lamps, Wagon”, page 139
4.2.1
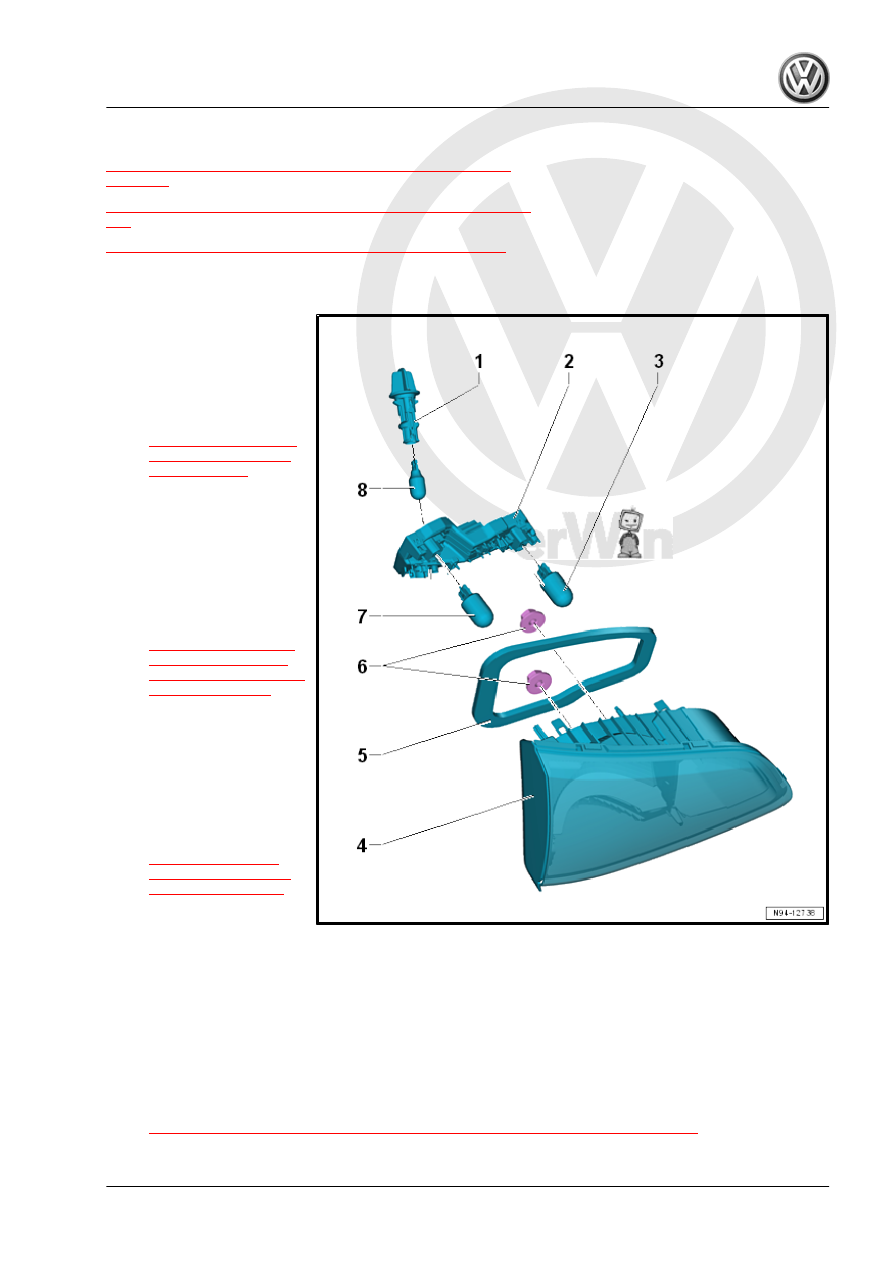
Overview - Rear Lid Tail Lamps, Sedan, with Bulbs
1 - Bulb Socket
❑ For Left Back-Up Lamp
Bulb - M16- / Right
Back-Up Lamp Bulb -
M17-
❑ Removing and instal‐
ling. Refer to
.
2 - Bulb Holder
3 - Rear Fog Lamp Bulb
❑ Left Rear Fog Lamp
Bulb - L46-
❑ Right Rear Fog Lamp
Bulb - L47-
❑ Removing and instal‐
ling. Refer to
.
4 - Tail Lamp
❑ Left Tail Lamp 2 - MX5-
❑ Right Tail Lamp 2 -
MX6-
❑ Tail lamp assembly in‐
side the rear lid
❑ Removing and instal‐
ling. Refer to
5 - Seal
❑ Self-adhesive
❑ Replace if damaged.
6 - Nut
❑ 3 Nm
❑ Quantity: 2
7 - Tail Lamp Bulb
❑ Right Tail Lamp Bulb - M2-
❑ Left Tail Lamp Bulb - M4-
❑ Removing and installing. Refer to
⇒ “4.6 Right and Left Tail Lamp Bulb M2 / M4 , Removing and Installing”, page 145
.