Volkswagen Golf / Golf GTI / Golf Variant. Manual - part 260


  Index      Volkswagen     Volkswagen Golf / Golf GTI / Golf Variant - service repair manual 2013 year


Search            copyright infringement  


Content   ..  258  259  260  261   ..


Volkswagen Golf / Golf GTI / Golf Variant. Manual - part 260


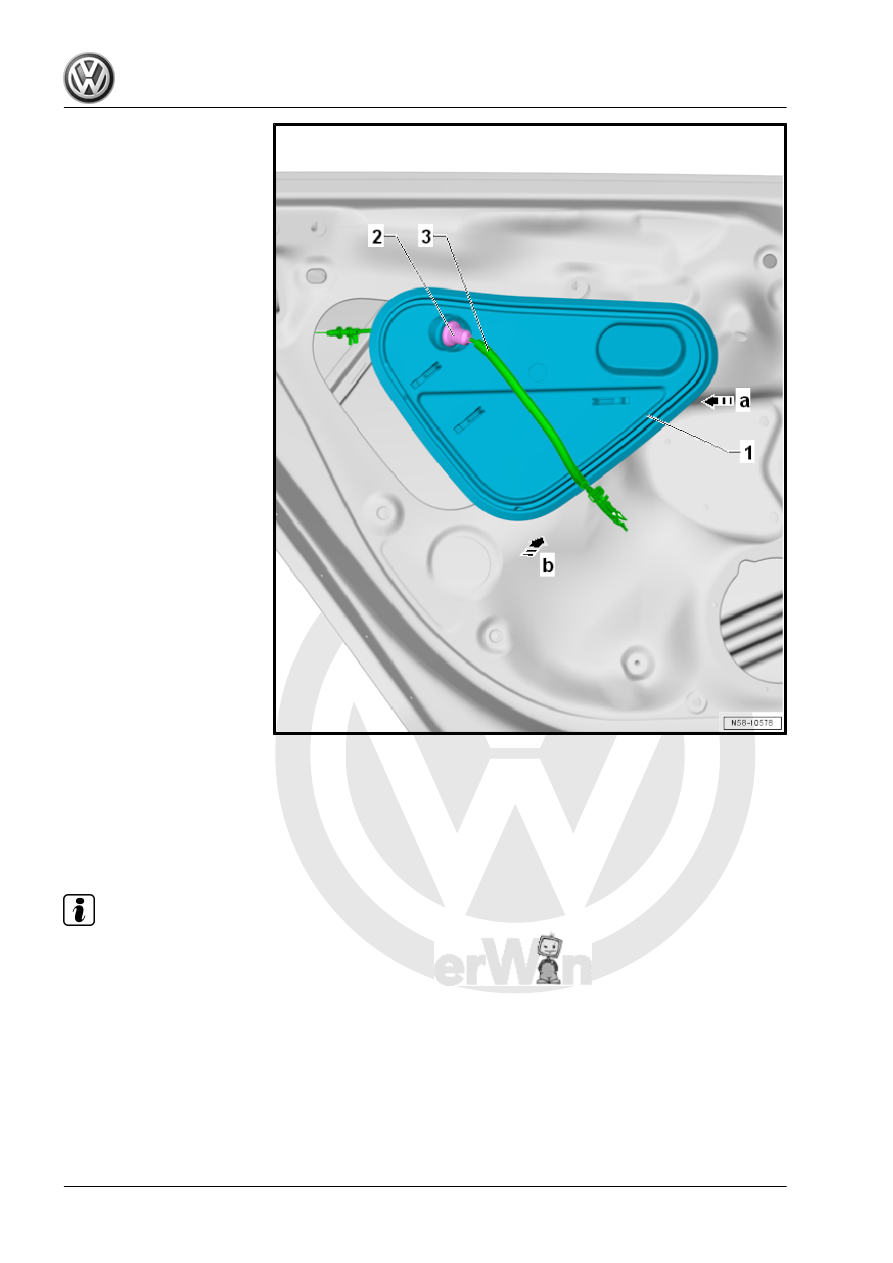
– Guide the release cable -3- with the grommet -2- into the cover

-1-.

– Install the grommet -2- into the cover -1-.
– Insert the cover -1- into the door -2- in direction of -arrow a-.
– Engage the cover -1- all around in direction of -arrow b-.

Note

Check the cover by running one's fingers along the edge.

– If equipped, install the wire on the cover -1-.
– Install the rear door trim panel. Refer to ⇒  Body Interior; Rep.

Gr.  70 ; Rear Door Trim Panels; Rear Door Trim Panel, Re‐

moving and Installing .

2.9

Catch, Removing and Installing

Special tools and workshop equipment required
♦ Torque Wrench 1331 5-50Nm - VAG1331-
♦ Cylinder Head Bolt Socket - 3410-

Note

The following describes removing and installing the left catch. The right side is identical.

Removing

– Remove the bolts -2- and the catch -1-.
Installing
– Position the striker pin -1- on the C-pillar and tighten the bolts

-2-.

– Adjust the catch. Refer to

⇒ “1.4 Catch, Adjusting”, page 151

 .

Component

Tightening Specification

Striker pin to the body

20 Nm

2.10

Cap, Removing and Installing

Special tools and workshop equipment required
♦ Lock Cylinder Housing Assembly Tool - T10389-

Removing

– Remove the plugs -3-.
– Guide the Lock Cylinder Housing Assembly Tool - T10389-

approximately 44 mm behind the bracket locking hook -2-.

– Pull the Lock Cylinder Housing Assembly Tool - T10389- ap‐

proximately 5 mm toward the rear in direction of -arrow- until

the hook releases.

– Remove the door handle from the door.
– Remove the cap -1- from the bracket.
Installing

– Remove the door handle from the door.
– Push the cap -1- into the bracket.
– Guide a screwdriver with a flat blade -4- approximately 40 mm

until the bracket locking hook -3-.

– Push the cap -1- onto the door.
– Push in the screwdriver approximately 5 mm in direction of

-arrow-, until the hook locks.

– Mount the plug -3-.


Content   ..  258  259  260  261   ..