Toyota Corolla (2019 year). Instruction - part 27
417
7-2. Maintenance
7
Mainten
ance an
d ca
re
COROLLA_TMMMS_TMMC_U
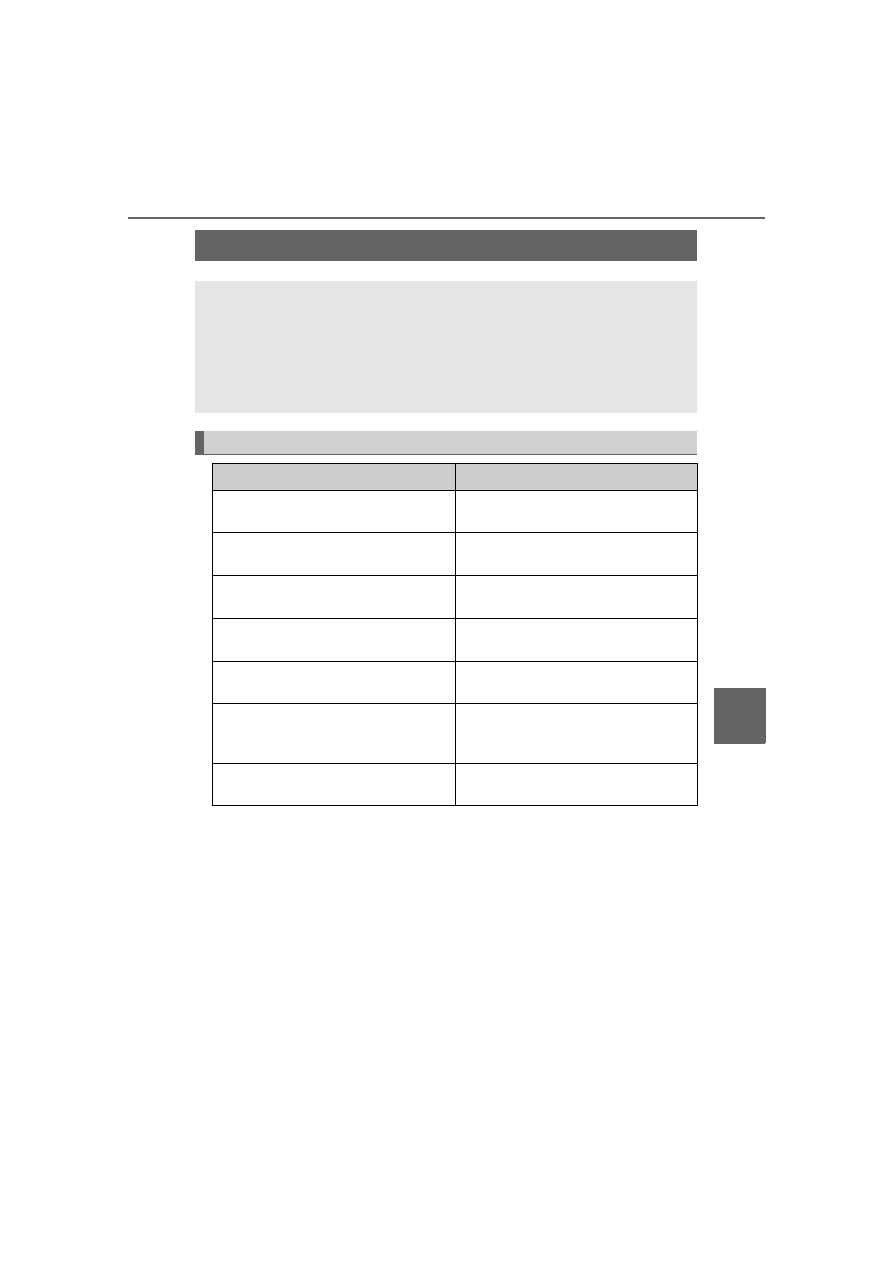
General maintenance
Listed below are the general maintenance items that should be
performed at the intervals specified in the “Owner’s Warranty
Information Booklet” or “Owner’s Manual Supplement/Sched-
uled Maintenance Guide”. It is recommended that any problem
you notice should be brought to the attention of your Toyota
dealer or qualified service shop for advice.
Engine compartment
Items
Check points
Battery
Check the battery fluid level and
connections.
(
Brake fluid
Is the brake fluid at the correct
level?
(
Engine coolant
Is the engine coolant at the correct
level?
(
Engine oil
Is the engine oil at the correct level?
(
Exhaust system
There should not be any fumes or
strange sounds.
Radiator/condenser
The radiator and condenser should
be free from foreign objects.
(
Washer fluid
Is there sufficient washer fluid?
(