Content .. 1749 1750 1751 1752 ..
Toyota Tundra (2015 year). Manual - part 1751
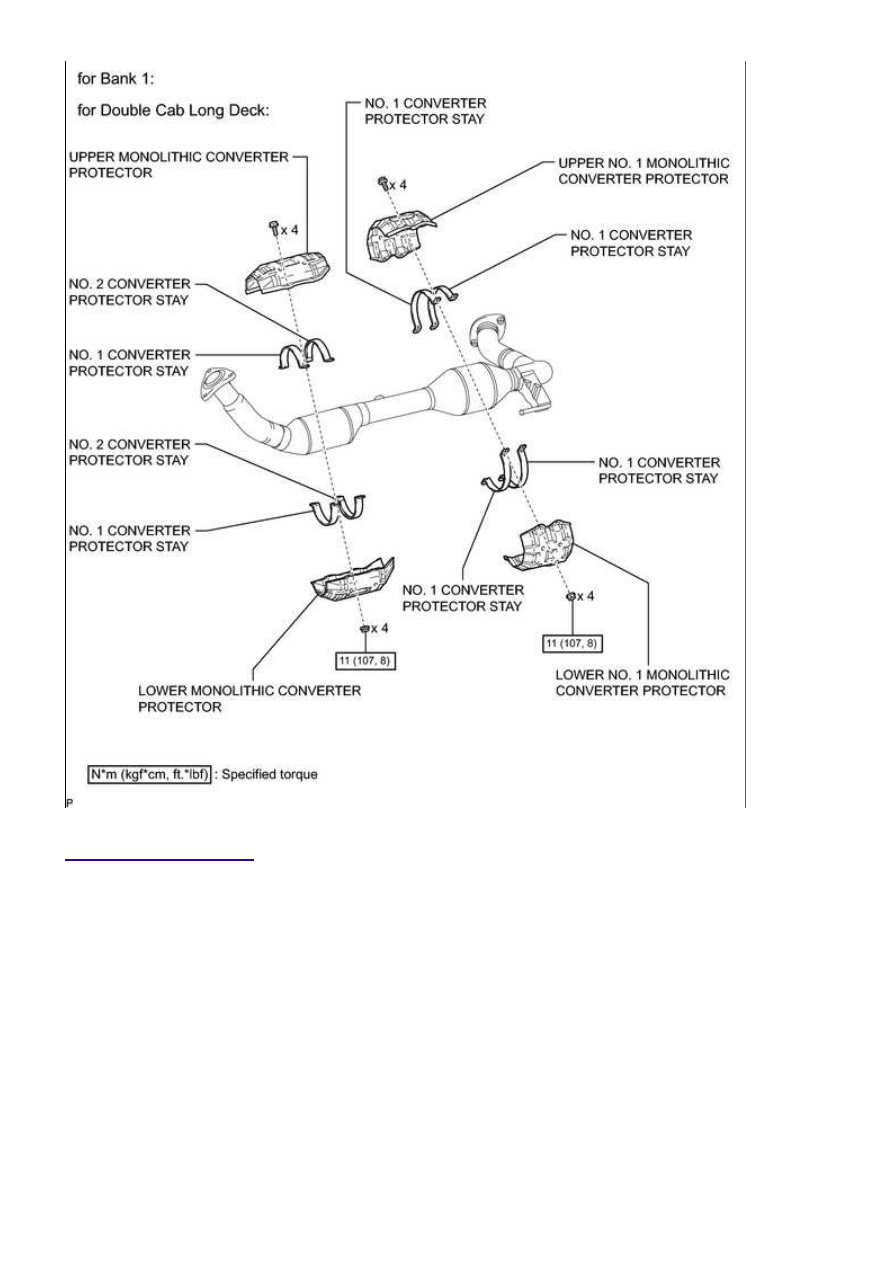
ILLUSTRATION
3UR-FBE EXHAUST: EXHAUST PIPE: COMPONENTS; 2015 MY T...
|
|
|
Content .. 1749 1750 1751 1752 ..
ILLUSTRATION 3UR-FBE EXHAUST: EXHAUST PIPE: COMPONENTS; 2015 MY T... |