Subaru Legacy IV (2008 year). Manual - part 1142


  Index      Subaru     Subaru Legacy IV - service repair manual 2008 year


Search            


Content   ..  1140  1141  1142  1143   ..


Subaru Legacy IV (2008 year). Manual - part 1142


EI-67

Roof Trim

EXTERIOR/INTERIOR TRIM

28.Roof Trim

A: REMOVAL

1. SEDAN MODEL

1) Disconnect the ground cable from the battery.
2) Remove the front seats. <Ref. to SE-9, REMOV-
AL, Front Seat.>
3) Remove the rear seat. <Ref. to SE-18, REMOV-
AL, Rear Seat.>
4) Remove the console box. <Ref. to EI-54, RE-
MOVAL, Console Box.>
5) Remove the center console. <Ref. to EI-55, RE-
MOVAL, Center Console.>
6) Remove the select lever. (AT model) <Ref. to
CS-23, REMOVAL, Select Lever.>
7) Remove the spot map light. <Ref. to LI-32, RE-
MOVAL, Spot Map Light.>
8) Remove the room light. <Ref. to LI-33, REMOV-
AL, Room Light.>
9) Remove the sun visor. <Ref. to EI-65, REMOV-
AL, Sun Visor.>
10) Remove the assist grip. <Ref. to EI-66, RE-
MOVAL, Assist Grip.>
11) Remove the upper inner trim. <Ref. to EI-62,
REMOVAL, Upper Inner Trim.>
12) Remove the rear quarter trim. <Ref. to EI-63,
SEDAN MODEL, REMOVAL, Rear Quarter Trim.>
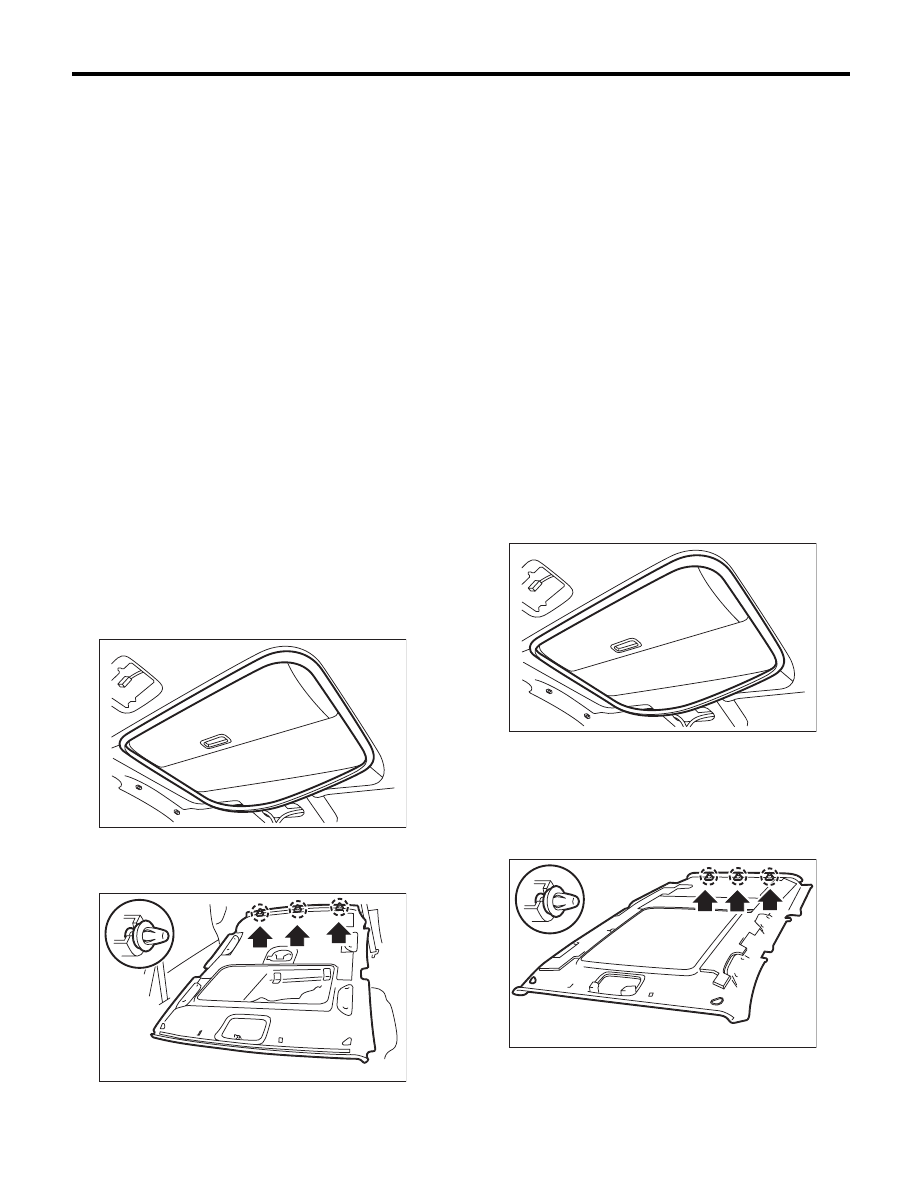
13) Remove the sunroof opening trim. (Model with
sunroof)

14) Remove the clips and harnesses, and remove
the roof trim.
15) Pull out the roof trim from the vehicle.

2. WAGON MODEL

1) Disconnect the ground cable from the battery.
2) Remove the spot map light. <Ref. to LI-32, RE-
MOVAL, Spot Map Light.>
3) Remove the room light. <Ref. to LI-33, REMOV-
AL, Room Light.>
4) Remove the luggage room light. <Ref. to LI-34,
REMOVAL, Luggage Room Light.>
5) Remove the sun visor. <Ref. to EI-65, REMOV-
AL, Sun Visor.>
6) Remove the assist grip. <Ref. to EI-66, REMOV-
AL, Assist Grip.>
7) Remove the upper inner trim. <Ref. to EI-62, RE-
MOVAL, Upper Inner Trim.>
8) Remove the rear quarter trim. <Ref. to EI-63,
WAGON MODEL, REMOVAL, Rear Quarter
Trim.>

CAUTION:
Do not remove the roof end trim with excessive
force. Otherwise the roof trim may become
damaged. Roof trim and roof end trim are fas-
tened by rivets.
9) Remove the sunroof opening trim. (Model with
sunroof)

10) Remove the clips and each harness, pull out
the rear center seat belt, and remove the roof trim.

CAUTION:
Do not remove the roof end trim with excessive
force. Otherwise the roof trim may become
damaged.

B: INSTALLATION

Install in the reverse order of removal.

EI-00501

EI-00667

EI-00501

EI-00669

EI-68

Rear Gate Trim

EXTERIOR/INTERIOR TRIM

29.Rear Gate Trim

A: REMOVAL

1) Remove clips (A), and remove the rear gate pil-
lar trim.

2) Remove the clips, and remove the rear gate up-
per trim.

3) Remove the cover in the inner handle, and loos-
en the inside screw.
4) Turn over the weather strip, and remove the
clips.

5) Remove the clips (A), and remove the rear gate
lower trim.

6) Remove the rear gate weather strip.

NOTE:
If the weather strip clip is removed with excessive
force, the weather strip may be damaged. Be sure
to use a clip remover to remove.

B: INSTALLATION

Install in the reverse order of removal.

EI-00670

:(A)

EI-00671

EI-00674

EI-01066

(A)

(A)

EI-00673

EB-00141

EI-69

Rear Shelf Trim

EXTERIOR/INTERIOR TRIM

30.Rear Shelf Trim

A: REMOVAL

1) Disconnect the ground cable from the battery.
2) Remove the rear seat cushion. <Ref. to SE-18,
SEDAN MODEL, REMOVAL, Rear Seat.>
3) Remove the backrest shoulder. (Right and left)

(1) Remove the bolt.
(2) Moving the lower side of backrest shoulder
to the direction of arrow, and remove it from the
stud bolt.
(3) Lift to remove the backrest shoulder.

4) Tilt the seat backrest forward.
5) Remove the clip, and remove the rear bulkhead
panel upper.

6) Remove the rear quarter trim. <Ref. to EI-63,
SEDAN MODEL, REMOVAL, Rear Quarter Trim.>
7) Remove the high-mounted stop light. <Ref. to LI-
31, REMOVAL, High-mounted Stop Light.>
8) After disconnecting the high-mounted stop light
harness connector (A) and removing the five clips,
remove the rear shelf trim by pulling it frontward.

B: INSTALLATION

Install in the reverse order of removal.

NOTE:
Securely insert the vehicle body panel into the hook
of the rear shelf trim center, and install the rear
shelf trim.

SE-00760

(1)

(3)

(2)

EI-02223

(A)

EI-00676

(1) Hook

(2) Rear Shelf Trim

(3) Vehicle body panel

(3)

(1)

EI-00739

(2)

EI-70

Trunk Room Trim

EXTERIOR/INTERIOR TRIM

31.Trunk Room Trim

A: REMOVAL

1. TRUNK LID TRIM

1) Remove the trim clips and stopper rubber, and
remove the trunk lid trim.

2) Remove the four claws, and remove the trunk
handle cover (1).

3) Remove clip (A) of the trunk side trim, and re-
move the trunk lid arm cover.

2. TRUNK ROOM TRIM

1) Remove the trunk room mat.

2) Remove the trim clips (A), and remove the trunk
room end cover.

3) Insert the flat tip screwdriver from the lower side
of the trunk hook, and then remove the trunk hook
by rotating it 90°.

(1) Trunk handle cover

(2) Trunk lid trim

(3) Trunk release handle

EI-00628

(1)

(2)

(3)

EI-01030

(1)

A

A

A-A

(B) Clip

EI-00629

(A)

EI-01067

EI-00624

(A)

:(B)

EI-01751


Content   ..  1140  1141  1142  1143   ..