Peugeot Boxer Benne (2012 year). Instruction - part 5


  Index      Peugeot     Peugeot Boxer Benne - instruction 2012 year in english


Search            


Content   ..  3  4  5  6   ..


Peugeot Boxer Benne (2012 year). Instruction - part 5


63

3

E

ASE OF USE

and

 COMFOR

T

Ventilation

Setting the time of the internal clock 

 Set the clock on the control panel before 
programming the deferred switching on of 
the heating. 

  Immediate switching on of the 

heating 

 Before switching on the heating, check that: 
   -  

the temperature setting control is in the 
"Hot air" position (red). 

  -  

the air flow setting control is in 
position 2.  

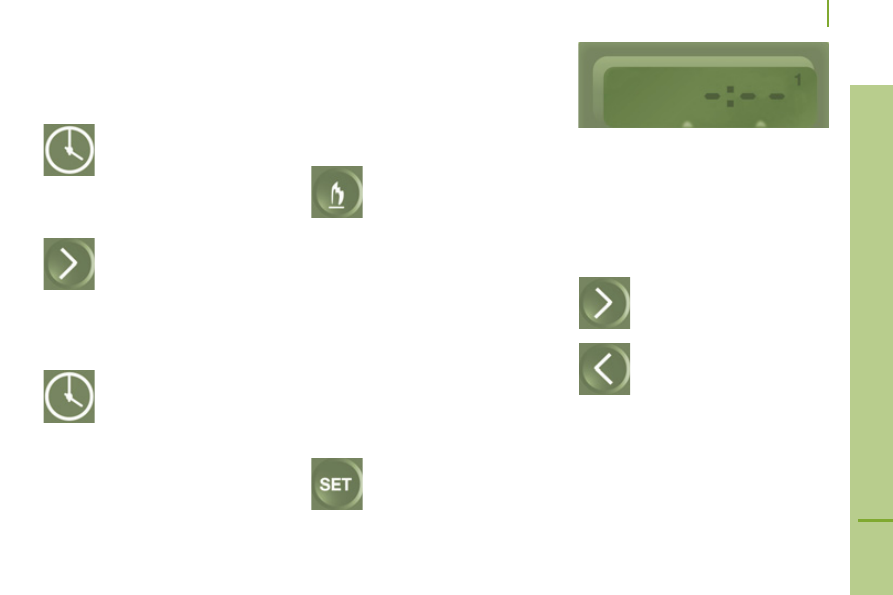
 This symbol or the previous stored time and 
the number (e.g. 1) corresponding to the 
recalled pre-selection are displayed for ten 
seconds. 
  Note:  if you wish to recall the other pre-
selected times, press the SET button several 
times before the ten seconds have elapsed. 

 Press this button. 
 The screen and the associated 
indicator come on. 

 Within ten seconds, press these two setting 
buttons until the correct time is displayed. 

 Press ">" to increase the hours or 
"<" to decrease. 
 Press and hold the button for 
more rapid scrolling of the digits.  

Reading the time 

 Press this button. 
 This indicator comes on, the time 
is displayed for approximately 
ten seconds.  

 Press this button. 
 The screen and the heating cycle 
indicator come on and remain 
on throughout the duration of 
operation.  

  Switching on the deferred heating 

 Switching on can be programmed between 
one minute and twenty-four hours in 
advance. 
 You can store up to three different start 
times, but programme one deferred start 
only. 
  Note:  if you wish to start the heating at a 
fixed time each day, simply reprogramme 
the stored time each day. 

 Press this button, the screen 
becomes brighter. 

 Within the ten seconds, press 
these two setting buttons to 
select the required start time. 

 Setting of the stored time is 
confirmed by clearing of the 
start time, displaying of the 
pre-selection number (e.g. 1) 

and increased brightness of the screen 
illumination.  

   Ventilation 

  Cancelling the programming

 Press this button briefly to clear 
the programmed start time. 
  The scren illumination and the 
pre-selection number (e.g. 1) are 
switched off.  

Good practice

 To avoid any risk of poisoning or 
asphyxiation, the additional heating must 
not be used, even for short periods, in 
an enclosed space such as a garage or 
workshop which is not fitted with an exhaust 
gas extraction system. 
 The additional heating is supplied by the 
vehicle's fuel tank. Ensure that the fuel 
gauge indicator lamp is not at reserve. 
 Always switch off the additional heating 
when filling with fuel to avoid any risk of fire 
or explosion. 
 Do not park the vehicle on an inflammable 
surface (dry grass, dead leaves, paper…), 
there is a risk of fire. 
 The temperature near the heater must not 
exceed 120 °C. A temperature higher than 
this (for example in the case of painting in 
an oven) could damage the components of 
the electronic circuits. 
 The additional heating system is fitted with 
a temperature limiter which cuts off the 
combustion in the event of overheating due 
to a lack of coolant. Top up the coolant, 
then press the programme selection control 
before switching the heating on again. 

 Have the additional heating system 
checked at least once a year at the 

beginning of winter. Maintenance and 
repairs should only be carried out by a 
PEUGEOT dealer. 
 Use only genuine replacement parts.  

  Recalling one of the pre-selected 

start times 

  Press this button as many times 
as necessary until the number 
corresponding to the required 
pre-selected start time (e.g. 2) 
appears. 

 After ten seconds, the time is cleared but 
remains stored for as long as the number 
(e.g. 2) and the screen remain lit.  

  Switching off the heating 

 Press this button. 
 The heating cycle indicator and 
the screen are switched off.  

  Two different types of equipment 

 The additional heating is separate and 
programmable. Before you enter the vehicle, 
it gradually increases the temperature of the 
engine to make starting easier. This also 
facilitates passenger compartment heating, 
demisting and defrosting. 

 The additional passenger compartment 
heating system supplements the 
standard equipment. Its operation may be 
independent of the engine. Switching on of 
the heating may be programmable.  

65

3

E

ASE OF USE

and

 COMFOR

T

Seats

DRIVER'S SEAT

SEATS

Head restraint 

 Press the tab to adjust the height of the 
head restraint. 
 To remove the head restraint, press the tabs 
and raise the head restraint.  

Adjustable armrest 

 Turn the control located under the end of the 
armrest.  

   Seats 

  Lumbar support 

 Turn the control.  

Seat cushion height adjustment

 Lift the handle  1  to raise   
or lower the front of the seat. 
 Lift the handle  2  to raise   
or lower the rear of the seat.  

  Heated seat 

 Use this control to switch the heating of the 
seat on or off.  

  Seat with variable damping 

 If your seat is fitted with this system, turn the 
control to adjust the level of damping to suit 
the driver's weight.  

  Seat back angle

 Turn the control to adjust the angle of the 
seat back.  

Forwards-backwards adjustment 

 Lift the control bar, located under the seat, 
and adjust to the required position.  

  Rotating seat

 If fitted on your seat, press the control to 
rotate the seat by 180°.  

67

3

E

ASE OF USE

and

 COMFOR

T

Seats

2-SEAT FRONT BENCH 

 This is fitted with two seat belts. 

Grab handle 

 This is located above the centre passenger.  

Writing table 

 The back of the centre seat folds to form a 
writing table. 
 Pull the handle located at the top of the seat 
back cushion.  

68

   Seats 

 REAR SEATS
  Seat back angle 

 Turn the control to adjust the 
angle of the seat back.  

  Access to the rear seats 

 To gain access to row 3, manoeuvre the 
control on the outer seat of row 2 and tilt the 
seat back forwards. 
 To return the seat back to its initial position, 
bring it to the vertical position without 
touching the control.  

  Seat back folded position of the 

central seat (rows 2 and 3)

 The back of the central seat can be folded 
fully onto the cushion and used as a cup 
holder table. 
 Lower the head restraint then raise the 
control and fold the seat back forwards. 
 To return the seat back to its initial position, 
raise the control again.  

69

3

E

ASE OF USE

and

 COMFOR

T

Seats

REAR BENCH SEATS

  Removing the bench seat

 At least two people are required to 
remove the bench seat. 

 Fold the seat back onto the cushion as 
described above. 
 Turn the two levers forwards. 
 Tilt the base of the bench seat forwards to 
place the assembly in the vertical position. 

Good practice

 Following the various operations: 
   -  

do not remove a head restraint without 
storing it securely, 

  -  

do not travel in row 3 with the row 2 
bench seat in the vertical position, 

  -  

do not store any kind of object on the 
folded seat back of row 2, 

  -  

check that the seat belts are always 
accessible and easy for the passenger 
to use, 

  -  

a passenger must not take their seat 
without correctly adjusting their seat's 
head restraint and adjusting and 
fastening their seat belt.   

Access to the rear seats

 Lower the head restraints then raise the 
control and tilt the seat back forwards.  

Seat back folded position 

 Remove the head restraints then tilt the seat 
back as described above. 
 With your right hand, raise the lever then tilt 
the seat back 5° towards the rear. 
 With your left hand, tilt the seat back 
forwards onto the cushion.  

 Turn the two levers upwards. 
 Raise the bench seat and remove it.  

70

   Seats 

 CREW CAB 

 Consisting of an ergonomic 4-seat bench 
and a high-strength partition, it offers 
comfort and safety. 
 Each seat of the bench is fitted with an 
inertia reel seat belt. 
 Refer to section 5 to read the "Good 
practice" recommendations. 

Access to the box under the bench seat 

  From the cab 
 Tilt the seat cushion forwards to gain access 
to the large box.  

  From the load space 
 Raise the two flaps which make the full 
length at the floor available. The flaps are 
retained in the raised position by magnets 
on the back of the partition.   

  Good pratice 

 Do not tilt the bench seat cushion during 
transportation. 
 No not attach anything to the cab fixing 
structure. 
 Do not exceed the number of passengers 
indicated on the registration certificate. 
 Do not install child seats, booster cushions 
or carrycots on the rear seats of the crew 
cab. 
 In the rear, the load space is intended for 
the transportation of goods only. 
 You are advised to place the goods or heavy 
objects as far forwards as possible in the 
load space (towards the cab) and secure 
them by means of straps using the stowing 
rings on the floor.  

71

3

E

ASE OF USE

and

 COMFOR

T

Practical information

CABIN FITTINGS

  Front seat storage 

 A storage drawer is provided under the front 
seat (driver's). 
 The space under the passenger's seat is 
used to store the tools required in order to 
change a wheel. 
 If your vehicle is fitted with a seat with 
variable damping, it does not have any 
storage compartments.  

Folding writing table

 This is located in the centre of the 
dashboard. 
 The clip can be used to secure documents, 
slips, ... 
 Pull or push the top of the table to unfold or 
fold it. 

PRACTICAL INFORMATION

Central storage tray 

 This may be lockable (according to 
specification).  

 If your vehicle is fitted with a front 
passenger airbag, the table cannot be 
raised.  

72

   Practical information 

  Glove box  Cooled 

glove box

 This is located on the top right part of the 
fascia panel. 
 The air blown into the glove box is the same 
as that blown out via the vents.  

  Sun visor 

 To avoid glare from ahead, fold the sun visor 
down. 
 Pockets are arranged in the sun visors for 
storing toll cards, tickets, ...  

73

3

E

ASE OF USE

and

 COMFOR

T

Practical information

12 volt socket

 Press and wait a few moments until the 
lighter pops out automatically. 
 When used as a socket: 180 W max.  

  Cigarette lighter / Portable ashtray

 After opening the ashtray, pull it upwards 
then empty it into a bin.  

Overhead storage compartment 

 This is located above the sun visors. 
Maximum load: approximately 20 kg.  

74

   Practical information 

Courtesy lamp 

 This is a double courtesy lamp located in 
the centre of the roof. It can be activated by 
means of: 
   -  

the switches located on the courtesy lamp, 
with the ignition on - RUNNING position, 

  -  

opening or closing one of the front doors, 

  -  

locking/unlocking the vehicle.  

 It switches off automatically: 
   -  

if the switch is not pressed to the right or 
to the left, 

  -  

in all cases after 15 minutes, if the doors 
remain open or when the ignition is 
switched on.   

  Reading lamps 

 These are controlled by the switches. 
 The driver's switch controls both reading 
lamps simultaneously. 
 The passenger switch controls either the 
driver's reading lamp or the passenger's 
reading lamp. 

  Fittings/storage compartment in the 

door trays 

  Controls located at bottom left of 
the dashboard allow the driver to 
activate/deactivate the passenger 
spotlamp.   

75

3

E

ASE OF USE

and

 COMFOR

T

Practical information

LOAD SPACE FITTINGS 

  Support for stowing rail 

 Supports for securing a stowing rail are 
available above the trims, on each side of 
the vehicle.  

12 volt socket

 When used as a power socket: 180 W max.  

Stowing rings

 Eight stowing rings are provided for securing 
your loads. Six rings are located on the floor 
and two on the partition behind the cab. 
 As a safety precaution in case of sharp 
braking, you are advised to place heavy 
objects as far forwards towards the cab as 
possible.  

  Trims

 The lower parts of the sides are fitted with 
load protection trims.  

76

   Practical information 

  Sliding side windows 

 Depending on the vehicle's 
equipment, the side windows of 
row 2 can be opened. 
 Squeeze the two controls then 
slide the window. 

 While driving, the window must be closed or 
secured in an intermediate position.  

Step 

 To make access and exit easier, your vehicle 
may be fitted with a step which unfolds when 
the sliding side door is opened.  

  Courtesy lamps 

 If fitted on your vehicle, one or two courtesy 
lamps are located above the rear and side 
doors. 
 They can be activated by: 
   -  

tilting the courtesy lamp (to the left or to 
the right), 

  -  

opening or closing the rear or side 
doors.  

 This lighting switches off automatically, after 
a few minutes, if the doors are left open.  

  Reading lamps 

 They are located above each row of seats.  

Roof box

 This is a storage compartment located in the 
load space, above the cab roof. Its capacity 
varies depending on the height of the van 
roof.  

Torch 

 If provided in your vehicle.  

Ladder type vertical partition 

 Behind the driver's seat, a ladder type 
vertical partition protects the driver against 
the risk of load movement.  

Load retainer 

 On the floor, behind the front seats, a 
horizontal partition protects the driver and 
front passengers against the risk of load 
movement.  

Glazed separation partition 

 Use the control to open/close the sliding 
window of the separation partition.  

77

3

E

ASE OF USE

and

 COMFOR

T

   Mirrors and windows

MIRRORS AND WINDOWS 

MIRRORS 

  Door mirrors

 These are divided into two zones: 
  A -  Upper mirror 
  B -  Lower mirror 
 The mirror glass is spherical in order to 
widen the lateral field of vision. Objects 
seen in the mirror are in reality closer than 
they appear. Therefore, this must be taken 
into account in order to assess the distance 
correctly. 
 The shell incorporates the direction indicator 
side repeater and the aerials, according to 
the equipment available on board (GPS, 
GSM, Radio, ...).  

Electrical controls

 The ignition switch must be in the  MAR  position. 
 Turn the control to select the mirror zone. 
  1  Driver's mirror: 
  A1 -  Upper mirror 
  B1 -  Lower mirror 
 Then move the control in the direction of the 
adjustment required. 
  2  Passenger mirror: 
  A2 -  Upper mirror 
  B2 -  Lower mirror 
 Then move the control in the direction of the 
adjustment required.  

Rear view mirror 

 The lever located on the lower edge moves 
the mirror into two positions. 
 For the day position, the lever is pushed. 
 For the night position to prevent dazzle, pull 
the lever towards you.  

Electric folding 

 Press this control.  

Defrosting the mirrors

 Press the rear screen defrosting 
button.  

78

   Mirrors and windows   

 ELECTRIC WINDOWS 

   A.    Driver's electric window control  
  B.    Passenger's electric window control   

 You have two options: 

  Automatic operation 

 Press or pull control  A/B , beyond the point of 
resistance: the window opens or closes fully 
when the control is released. 
 Pressing the control again stops the 
movement of the window.  

Manual operation 

 Press or pull control  A , without passing the 
point of resistance. 
 The window stops when you release the 
control.  

  Good practice 

 Always remove the key from the ignition 
when leaving the vehicle, even for a short 
time. 
 If the electric windows meet an obstacle 
during operation, you must reverse the 
movement of the window. To do this, press 
the control concerned. 
 When the driver operates the passenger 
electric window controls, they must ensure 
that no one is preventing correct closing of 
the windows. 
 The driver must ensure that the passengers 
use the electric windows correctly. 
 Be aware of children when operating the 
windows.  


Content   ..  3  4  5  6   ..