Nissan Terrano model r20 series 2004. Manual - part 246


  Index      Nissan     Nissan Terrano model r20 series 2004 - Service and Repair Manual


Search            


Content   ..  244  245  246  247   ..


Nissan Terrano model r20 series 2004. Manual - part 246


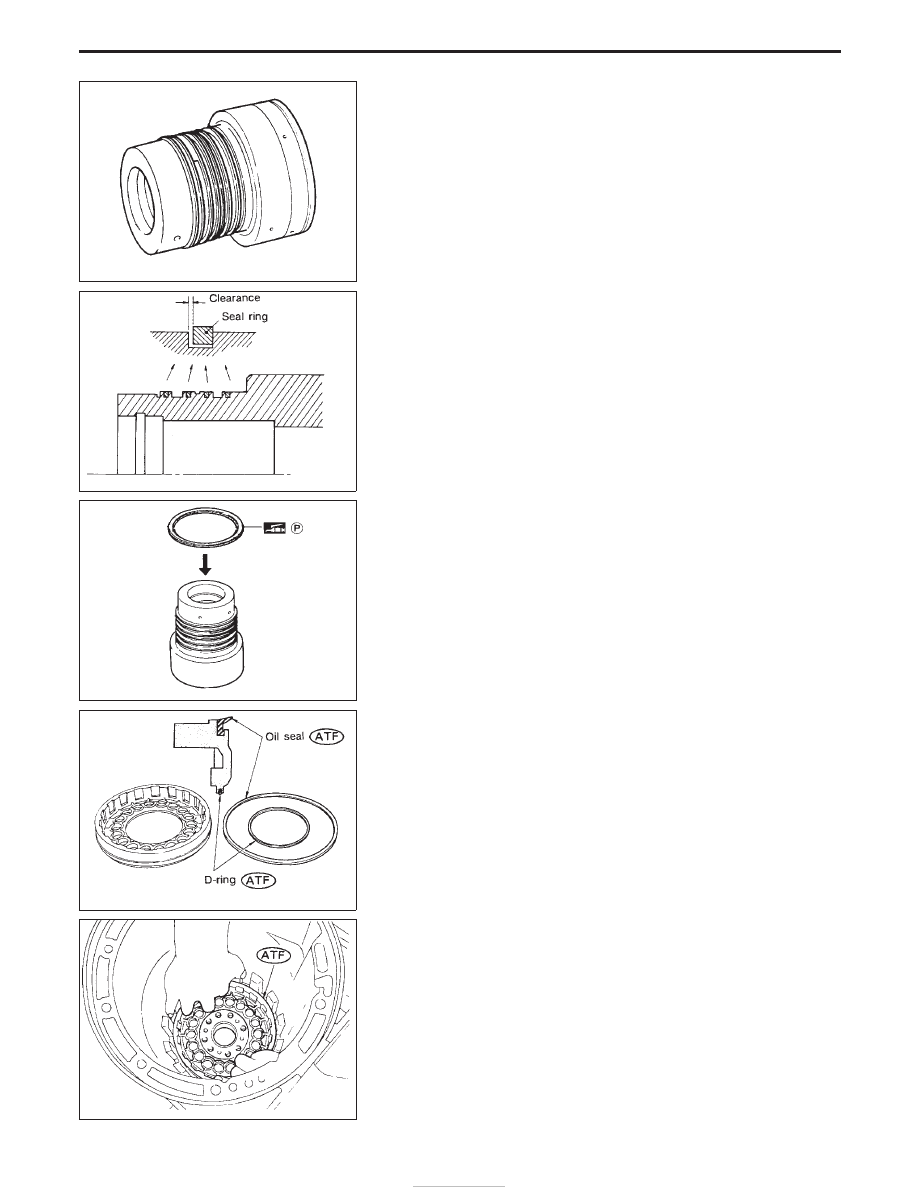
Low one-way clutch inner race

I

Check frictional surface of inner race for wear or damage.

I

Install a new seal rings onto low one-way clutch inner race.

I

Be careful not to expand seal ring gap excessively.

I

Measure seal ring-to-groove clearance.

Inspection standard:

Standard value: 0.10 - 0.25 mm (0.0039 - 0.0098 in)
Allowable limit: 0.25 mm (0.0098 in)

I

If not within allowable limit, replace low one-way clutch inner
race.

ASSEMBLY

1. Install needle bearing onto one-way clutch inner race.

I

Pay attention to its direction — Black surface goes to rear
side.

I

Apply petroleum jelly to needle bearing.

2. Install oil seal and D-ring onto piston.

I

Apply ATF to oil seal and D-ring.

3. Install piston by rotating it slowly and evenly.

I

Apply ATF to inner surface of transmission case.

SAT877A

SAT878A

SAT112B

SAT879A

SAT880A

REPAIR FOR COMPONENT PARTS

Low & Reverse Brake (Cont’d)

AT-168

4. Install return springs, spring retainer and low one-way clutch

inner race onto transmission case.

5. Install dish plate, low and reverse brake drive plates, driven

plates and retaining plate.

6. Install snap ring on transmission case.

7. Check operation of low and reverse brake clutch piston. Refer

to “DISASSEMBLY”, AT-166.

8. Measure clearance between retaining plate and snap ring.

If not within allowable limit, select proper retaining plate.

Specified clearance:

Standard

0.8 - 1.1 mm (0.031 - 0.043 in)

Allowable limit

2.5 mm (0.098 in)

Retaining plate:

Refer to SDS, AT-203.

9. Install low one-way clutch inner race seal ring.

I

Apply petroleum jelly to seal ring.

I

Make sure seal rings are pressed firmly into place and held
by petroleum jelly.

SAT881A

SAT872A

SAT885A

SAT884A

REPAIR FOR COMPONENT PARTS

Low & Reverse Brake (Cont’d)

AT-169

Forward Clutch Drum Assembly

DISASSEMBLY

1. Remove snap ring from forward clutch drum.
2. Remove side plate from forward clutch drum.

3. Remove low one-way clutch from forward clutch drum.
4. Remove snap ring from forward clutch drum.

5. Remove needle bearing from forward clutch drum.

SAT211GA

SAT212G

SAT213G

SAT891A

REPAIR FOR COMPONENT PARTS

AT-170

INSPECTION

Forward clutch drum

I

Check spline portion for wear or damage.

I

Check frictional surfaces of low one-way clutch and needle
bearing for wear or damage.

Needle bearing and low one-way clutch

I

Check frictional surface for wear or damage.

ASSEMBLY

1. Install needle bearing in forward clutch drum.
2. Install snap ring onto forward clutch drum.

3. Install low one-way clutch onto forward clutch drum by pushing

the roller in evenly.

I

Install low one-way clutch with flange facing rearward.

SAT892A

SAT893A

SAT214G

SAT894A

SAT895A

REPAIR FOR COMPONENT PARTS

Forward Clutch Drum Assembly (Cont’d)

AT-171


Content   ..  244  245  246  247   ..