Nissan Quest E52. Manual - part 663


  Index      Nissan     Nissan Quest E52 (2011-2014 year) - Service and Repair Manual


Search            


Content   ..  661  662  663  664   ..


Nissan Quest E52. Manual - part 663


SIDE PROTECT MOLDING

EXT-27

< REMOVAL AND INSTALLATION >

C

D

E

F

G

H

I

J

L

M

A

B

EXT

N

O

P

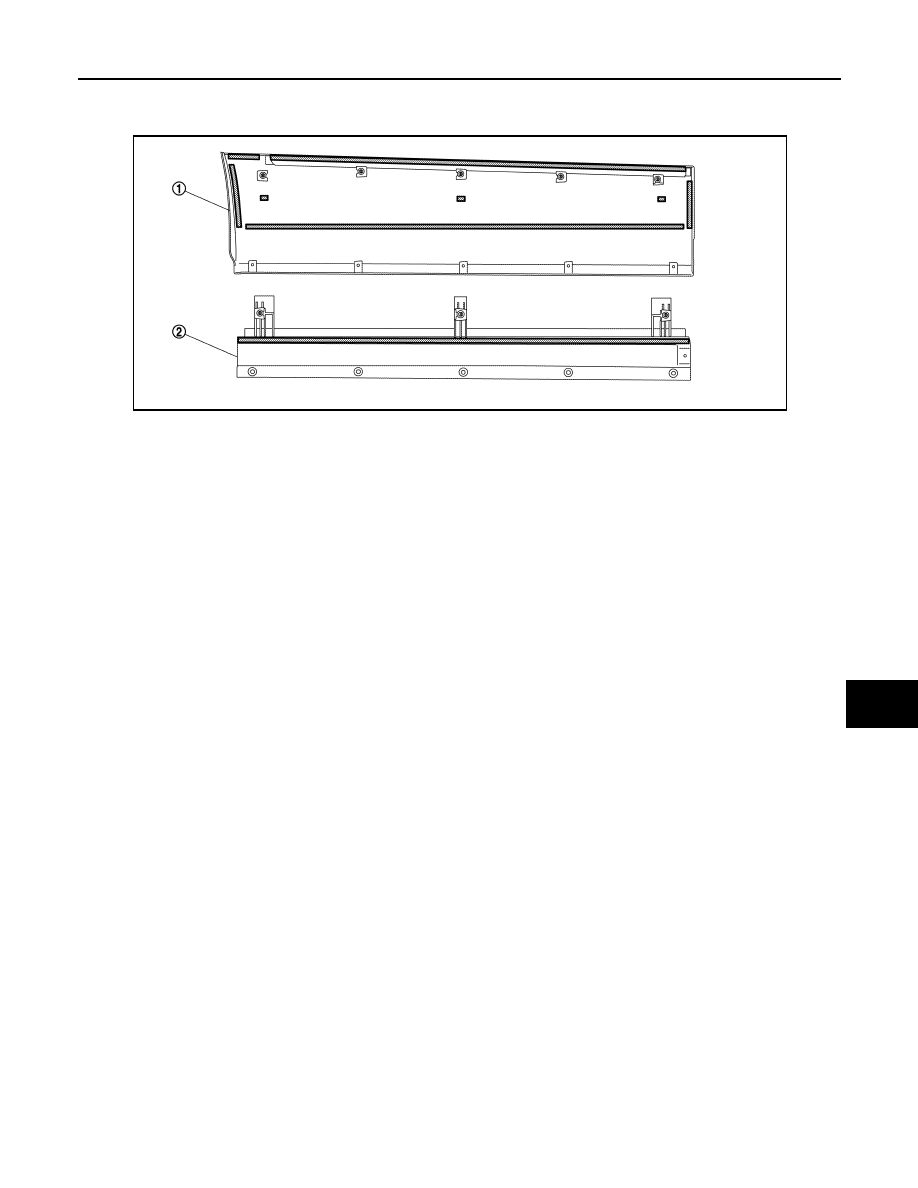
• Degrease mounting surface of slide door protect molding.
• When reusing removed protect molding, apply new double-sided tape as shown in the figure, assem-

ble molding (1) and bracket (2), and then install.

• Never wash the vehicle within 24 hours so as to keep adhesive.

1.

Slide door protect molding

2.

Slide door protect molding bracket

Double-sided tape [t: 1.2 mm (0.047 in)]

JMKIA6252ZZ

EXT-28

< REMOVAL AND INSTALLATION >

FLOOR SIDE FAIRING

FLOOR SIDE FAIRING

Exploded View

INFOID:0000000009650503

Removal and Installation

INFOID:0000000009650504

REMOVAL

Remove engine under cover fixing clips, and then remove engine under cover. 

INSTALLATION

Install in the reverse order of removal.

1.

Front bumper fascia assembly

2.

Engine under cover

: Indicates that the part is connected at points with same symbol in actual vehicle.

JMKIA8217ZZ

ROOF SIDE MOLDING

EXT-29

< REMOVAL AND INSTALLATION >

C

D

E

F

G

H

I

J

L

M

A

B

EXT

N

O

P

ROOF SIDE MOLDING

Exploded View

INFOID:0000000009650505

Removal and Installation

INFOID:0000000009650506

REMOVAL

Roof side molding

1.

Remove front fender cover (LH and RH). Refer to 

EXT-21, "Exploded View"

.

2.

Disengage roof side molding fixing pawls from front end.

1.

Roof side molding

2.

Roof side molding clip

: Pawl

JMKIA6165ZZ

: Pawl

JMKIA6166ZZ

EXT-30

< REMOVAL AND INSTALLATION >

ROOF SIDE MOLDING

3.

Twist and pull up to upper side, and then remove roof side mold-
ing.

CAUTION:

Never pull the roof side molding strongly.

INSTALLATION

Roof side molding

Note the following item, and then install in the reverse order of removal.

CAUTION:

When installing, check that roof side molding and installation
guide pawl are aligned normally, and then press in from rear
end toward front end.

REMOVAL AND INSTALLATION OF ROOF SIDE MOLDING CLIP 

REMOVAL

1.

Remove roof side molding.

2.

Heat adhesive tape interface using a dryer, and then peel roof side molding clips (body side) using long-
nose pliers.

CAUTION:

Be careful not to damage the body.

INSTALLATION

1.

Clean tape removed surface with a shop cloth soaked in white gasoline or IPA.

2.

Use two-part epoxy adhesive.

3.

Apply adhesive evenly to clip tape surface.

4.

Position applied parts to the proper location, and then sufficiently press-fit until the adhesive protrudes to
tape side.

5.

Tape roof side molding clips after press fit, and temporarily hold it for specified time based on the follow-
ing.

CAUTION:

: Pawl

JMKIA6167ZZ

: Vehicle front

JMKIA6168ZZ

Adhesive

: 3M-weld DP–105 or equivalent

Thickness

: Approximately 0.5 mm (0.020 in)

Press-fit limit

: 19.6 N

×

 2 seconds

5 to 10

°

C (41 to 50

°

F)

: 1 hour or more

11 to 23

°

C (52 to 73

°

F)

: 30 minutes or more

24

°

C or more (75

°

F or more)

: 15 minutes or more


Content   ..  661  662  663  664   ..