Nissan Quest E52. Manual - part 446


  Index      Nissan     Nissan Quest E52 (2011-2014 year) - Service and Repair Manual


Search            


Content   ..  444  445  446  447   ..


Nissan Quest E52. Manual - part 446


DLK-498

< REMOVAL AND INSTALLATION >

AUTOMATIC BACK DOOR CLOSE SWITCH

AUTOMATIC BACK DOOR CLOSE SWITCH

Removal and Installation

INFOID:0000000009649513

REMOVAL

1.

Remove the automatic back door close switch finisher. Refer to 

INT-48, "BACK DOOR LOWER FIN-

ISHER : Removal and Installation"

.

2.

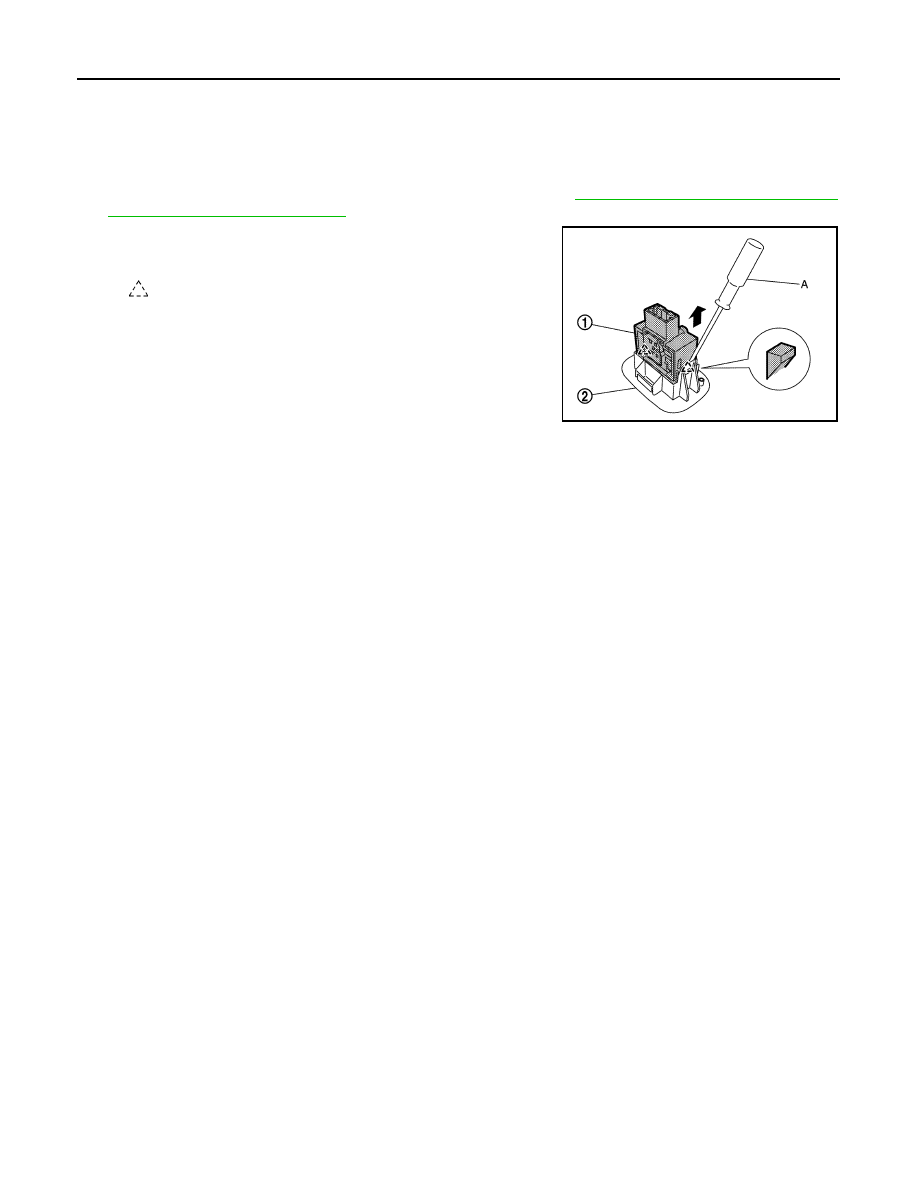
Remove automatic back door close switch (1) from automatic
back door close switch finisher (2) using remover tool (A).

INSTALLATION

Install in the reverse order of removal.

:

Pawl

JMKIA6045ZZ

AUTOMATIC BACK DOOR SWITCH

DLK-499

< REMOVAL AND INSTALLATION >

C

D

E

F

G

H

I

J

L

M

A

B

DLK

N

O

P

AUTOMATIC BACK DOOR SWITCH

Exploded View

INFOID:0000000009649514

Removal and Installation

INFOID:0000000009649515

REMOVAL

1.

Remove the instrument driver lower panel. Refer to 

IP-14, "Removal and Installation"

.

2.

Remove automatic back door switch (1) from switch bracket (2)
using remover tool (A).

INSTALLATION

Install in the reverse order of removal.

JMKIA8179ZZ

1.

Instrument lower panel LH

2.

Switch bracket upper

3.

Automatic door switch

: Pawl

JMKIA8180ZZ

DLK-500

< REMOVAL AND INSTALLATION >

SLIDING DOOR CONTROL UNIT

SLIDING DOOR CONTROL UNIT

RH

RH : Removal and Installation

INFOID:0000000009649516

REMOVAL

1.

Remove the luggage side lower finisher RH. Refer to 

INT-43, "LUGGAGE SIDE LOWER FINISHER :

Removal and Installation"

.

2.

Remove the rear foot duct. Refer to 

VTL-13, "REAR FOOT DUCT : Removal and Installation"

.

3.

Remove the sliding door control unit RH mounting bolt and nats
(A), and then remove the sliding door control unit RH (1).

INSTALLATION

Install in the reverse order of removal
NOTE:
After installing sliding door control unit, perform additional service when replace control unit. Refer to 

DLK-

170, "Work Procedure"

.

LH

LH : Removal and Installation

INFOID:0000000009649517

REMOVAL

1.

Remove the luggage side lower finisher LH. Refer to 

INT-43, "LUGGAGE SIDE LOWER FINISHER :

Removal and Installation"

.

2.

Remove the sliding door control unit LH mounting bolt and nats
(A), and then remove the sliding door control unit LH (1).

INSTALLATION

Install in the reverse order of removal
NOTE:
After installing sliding door control unit, perform additional service when replace control unit. Refer to 

DLK-

170, "Work Procedure"

.

JMKIA6055ZZ

JMKIA6052ZZ

SLIDING DOOR OPEN/CLOSE SWITCH

DLK-501

< REMOVAL AND INSTALLATION >

C

D

E

F

G

H

I

J

L

M

A

B

DLK

N

O

P

SLIDING DOOR OPEN/CLOSE SWITCH

FRONT

FRONT : Removal and Installation

INFOID:0000000009649518

REMOVAL

1.

Remove the instrument finisher B. Refer to 

IP-14, "Removal and Installation"

.

2.

Remove the switch bracket lower mounting screw (A), and then
remove the switch bracket lower from instrument finisher B.

3.

Remove the sliding door open/close switch (front side) (2) from
switch bracket lower (1) using flat-head screw driver (A).

INSTALLATION

Install in the reverse order of removal.

REAR

REAR : Removal and Installation

INFOID:0000000009649519

REMOVAL

1.

Remove the center pillar lower. Refer to 

INT-25, "CENTER PILLAR LOWER GARNISH : Removal and

Installation"

.

2.

Remove the sliding door open/close switch (rear side) mounting
screw (A), and then remove the sliding door open/close switch
(rear side).

INSTALLATION

Install in the reverse order of removal.

JMKIA8194ZZ

: Pawl

JMKIA8195ZZ

JMKIA8196ZZ


Content   ..  444  445  446  447   ..