Content .. 1114 1115 1116 1117 ..
Nissan Quest E52. Manual - part 1116
SATELLITE SENSOR
SR-25
< REMOVAL AND INSTALLATION >
C
D
E
F
G
I
J
K
L
M
A
B
SR
N
O
P
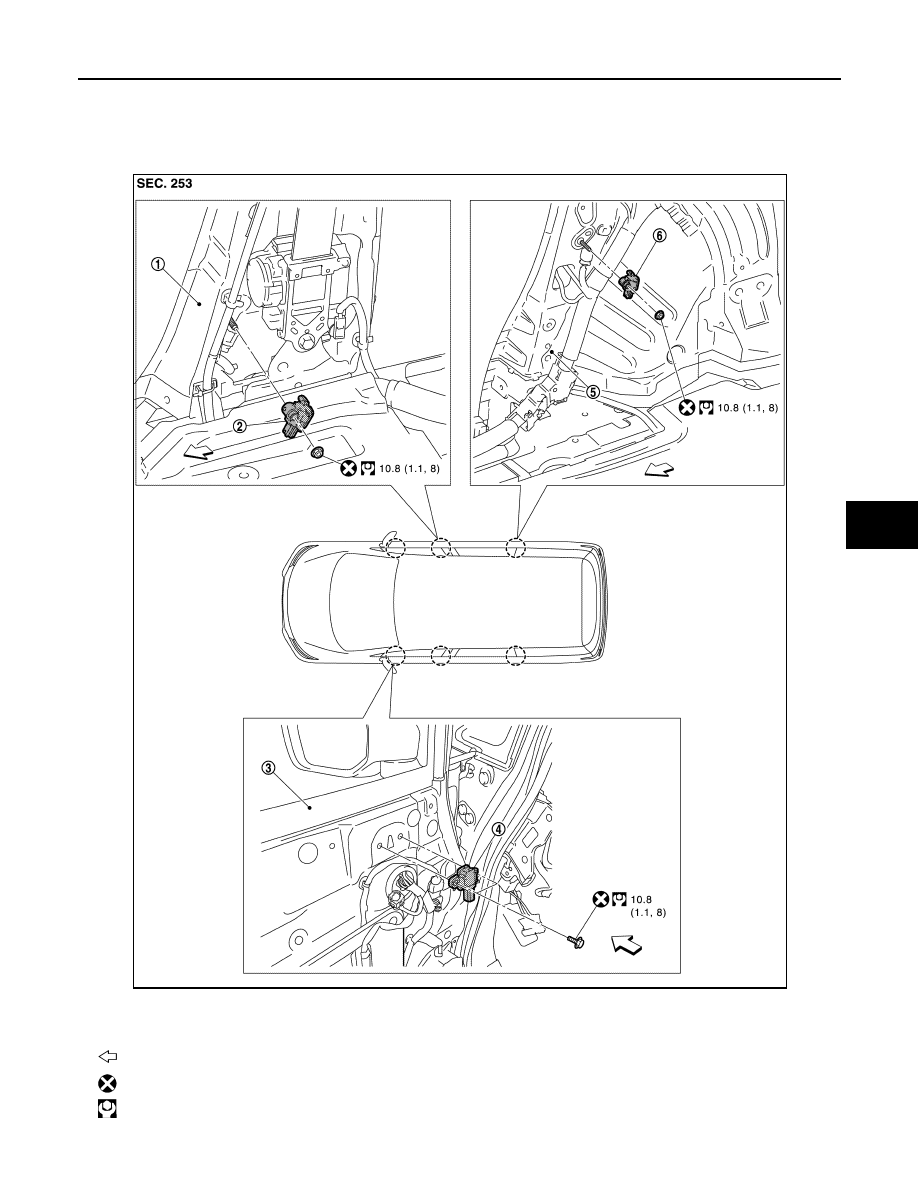
SATELLITE SENSOR
Exploded View
INFOID:0000000009650329
1.
Center pillar outer panel
2.
Front satellite sensor
3.
Front door inner panel
4.
Front door satellite sensor
5.
Rear wheel house inner panel
6.
Rear satellite sensor
: Vehicle front
: Always replace after every disassembly.
: N·m (kg-m, ft-lb)
JMHIA2045GB