Nissan Rogue. Manual - part 1049


  Index      Nissan     Nissan Rogue (2015 year) - Service and Repair Manual


Search            


Content   ..  1047  1048  1049  1050   ..


Nissan Rogue. Manual - part 1049


SE-62

< UNIT DISASSEMBLY AND ASSEMBLY >

FRONT SEAT

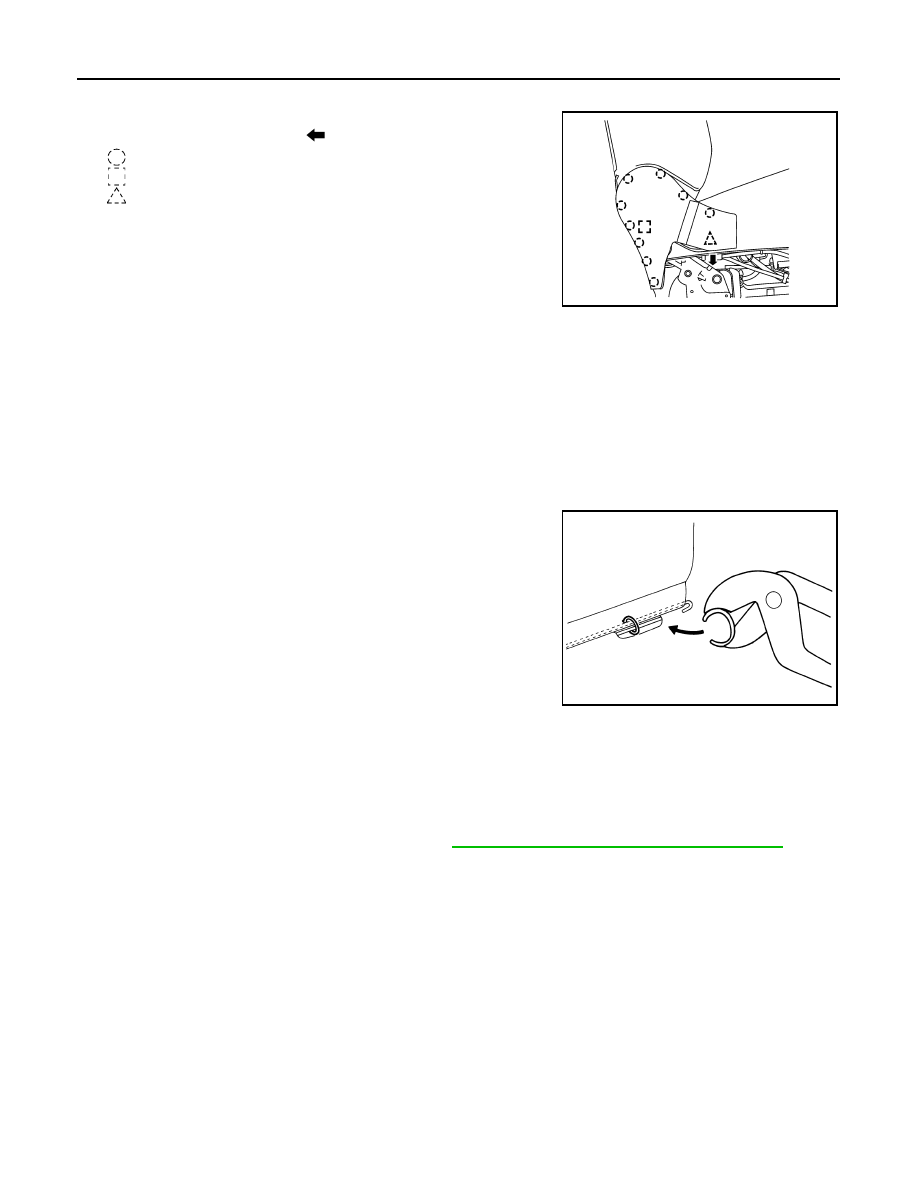
iv. Disconnect harness connectors from the power seat switch and lumbar support switch.
3. Release pawls and clips, and remove seat cushion outer finisher

(RH) in the direction shown (

).

: Pawl
: Metal clip
:Clip

4. Release two seatback J-clip retainers from the seat frame.
5. Partially release seatback fasteners (LH/RH).
6. Release ten seat cushion J-clips holding the seat cushion trim to the seat frame.
7. Remove seat cushion trim and seat cushion pad as an assembly from the seat frame.
8. Remove hog rings and separate seat cushion trim and seat cushion pad.

NOTE:

Remove all pieces of hog rings and discard them.

ASSEMBLY

Assembly is in the reverse order of disassembly. 

• Install new hog rings on the seat cushion trim in original positions. 

• Use only one hog ring in each designated location.

• Make sure hog rings are correctly fastened around both the seat

cushion trim and seat cushion pad wires.

• Use NISSAN standard hog rings and tools to assemble.

• Make sure hook fastener is pressed into place after seat cushion

trim is assembled.

• Smooth out all wrinkles during assembly.

CAUTION:

• Always route side air bag module harness in original location. Replace any deformed or damaged

clips with same type and color. Always install clips in the original location in the harness. 

• After work is completed, check that no system malfunction is detected causing the air bag warning

lamp to illuminate.

• If a malfunction is detected by the air bag warning lamp after repair or replacement of the malfunc-

tion parts, perform the SRS final check. Refer to 

SRC-16, "Trouble Diagnosis with CONSULT"

Lumbar Support

INFOID:0000000011280469

DISASSEMBLY

WARNING:

Do not leave any objects (screwdrivers, tools, etc.) on the seat during seatback repair. It can lead to

personal injury if the side air bag module should accidentally deploy.

CAUTION:

• Before servicing, turn the ignition switch OFF, disconnect both battery terminals, then wait at least

three minutes.

• Handle the side air bag module carefully. During disassembly, always hold the side air bag module,

do not let it hang by the wire harness.

• Always work from the side or back of the seatback, do not work in front of seat.

• Do not use air tools or electric tools for servicing the seat.

• Replace the side air bag module if it has been dropped or sustained an impact.

• Do not insert any objects into the side air bag module.

ALJIA1442ZZ

PIIB3356J

FRONT SEAT

SE-63

< UNIT DISASSEMBLY AND ASSEMBLY >

C

D

E

F

G

H

I

K

L

M

A

B

SE

N

O

P

• Do not attempt to disassemble the side air bag module.

• Do not expose the side air bag module to temperatures exceeding 93

°C (199°F).

• Do not expose the side air bag module to any oil, grease, detergent or water.

• During disassembly, do not damage the seatback board, chutes, connectors, retainers, clips, module

harness or the side air bag module.

NOTE:

If the vehicle has been involved in a collision and the side air bag module has deployed, the seatback pad and

seatback trim must be replaced. 
1. Remove the seatback. Refer to 

SE-56, "Seatback"

.

2. Release hooks (A) from seatback frame and remove lumbar

support.

ASSEMBLY

Assembly is in the reverse order of disassembly.

CAUTION:

• Do not reuse the side air bag module nuts.

• Inspect seatback pad, seatback trim and seatback trim chutes. Replace if damaged.

• Smooth out all wrinkles during assembly.

• Always route side air bag module harness in original location. Replace any deformed or damaged

clips with same type and color. Always install clips in the original location in the harness. 

• After work is completed, check that no system malfunction is detected causing the air bag warning

lamp to illuminate.

• If a malfunction is detected by the air bag warning lamp after repair or replacement of the malfunc-

tion parts, perform the SRS final check. Refer to 

SRC-16, "Trouble Diagnosis with CONSULT"

• When installing the side air bag module, make sure there are no wrinkles and the chute is not folded,

twisted or pinched.

Front Seat Heater

INFOID:0000000011375920

SEATBACK HEATER

Removal

1. Remove seatback pad. Refer to 

SE-56, "Seatback"

2. Carefully remove front seatback heater from seatback pad.

CAUTION:

• Carefully remove seatback heater from seatback pad. 

• Do not damage seatback pad when removing seatback heater, if damaged replace seatback pad.

Installation

1. Peel protective backing from front seatback heater and attach to seatback pad.
2. Secure the front seatback heater harness to the seatback frame.
3. Install the remaining seatback components. Refer to 

SE-56, "Seatback"

.

SEAT CUSHION HEATER

Removal

1. Remove seat cushion pad. Refer to 

SE-60, "Seat Cushion"

2. Carefully remove front seat cushion heater from seat cushion pad.

CAUTION:

• Carefully remove seat cushion heater from seat cushion pad. 

ALJIA1478ZZ

SE-64

< UNIT DISASSEMBLY AND ASSEMBLY >

FRONT SEAT

• Do not damage seat cushion pad when removing seat cushion heater, if damaged replace seat

cushion pad.

Installation

1. Peel protective backing from front seat cushion heater and attach to seat cushion pad.
2. Secure the front seat cushion heater harness to the seat cushion frame.
3. Install the remaining seat cushion components. Refer to 

SE-60, "Seat Cushion"

.

SECOND ROW SEAT

SE-65

< UNIT DISASSEMBLY AND ASSEMBLY >

C

D

E

F

G

H

I

K

L

M

A

B

SE

N

O

P

SECOND ROW SEAT

Exploded View

INFOID:0000000011280470

RH SEAT

AWJIA1618ZZ

1.

Headrest

2.

Seatback upper luggage board 

3.

Seatback luggage board

4.

Seatback trim

5.

Seatback pad

6.

Seatback pad wire

7.

Recline release cable

8.

Seat cushion trim

9.

Fold flat strap

10. Seat cushion pad

11. Seat cushion silencer

12. Seat cushion pad wire

13. Bolt cover

14. Seat cushion outer finisher (RH) 15. Seat cushion inner finisher (RH)

16. Seat cushion frame

17. Seat cushion frame

18. Seat cushion slide (RH)

19. Seat cushion slide cable

20. Rear bolt cover (RH) (with third 

row seat)

21. Front bolt cover (RH)

22. Front bolt cover (LH)

23. Rear bolt cover (LH) (with third 

row seat) 

24. Seat cushion slide (LH)

25. Seat cushion inner finisher (LH) 26. Seat cushion outer finisher (LH) 27. Seat cushion rear finisher (LH)
28. Seat belt buckle

29. Recline lever finisher

30. Seatback frame

31. Recline device

32. Recline device cover

33. Headrest holder (locked)

34. Headrest holder (free)

Clip

Pawl


Content   ..  1047  1048  1049  1050   ..