Content .. 1046 1047 1048 1049 ..
Nissan Rogue. Manual - part 1048
SE-58
< UNIT DISASSEMBLY AND ASSEMBLY >
FRONT SEAT
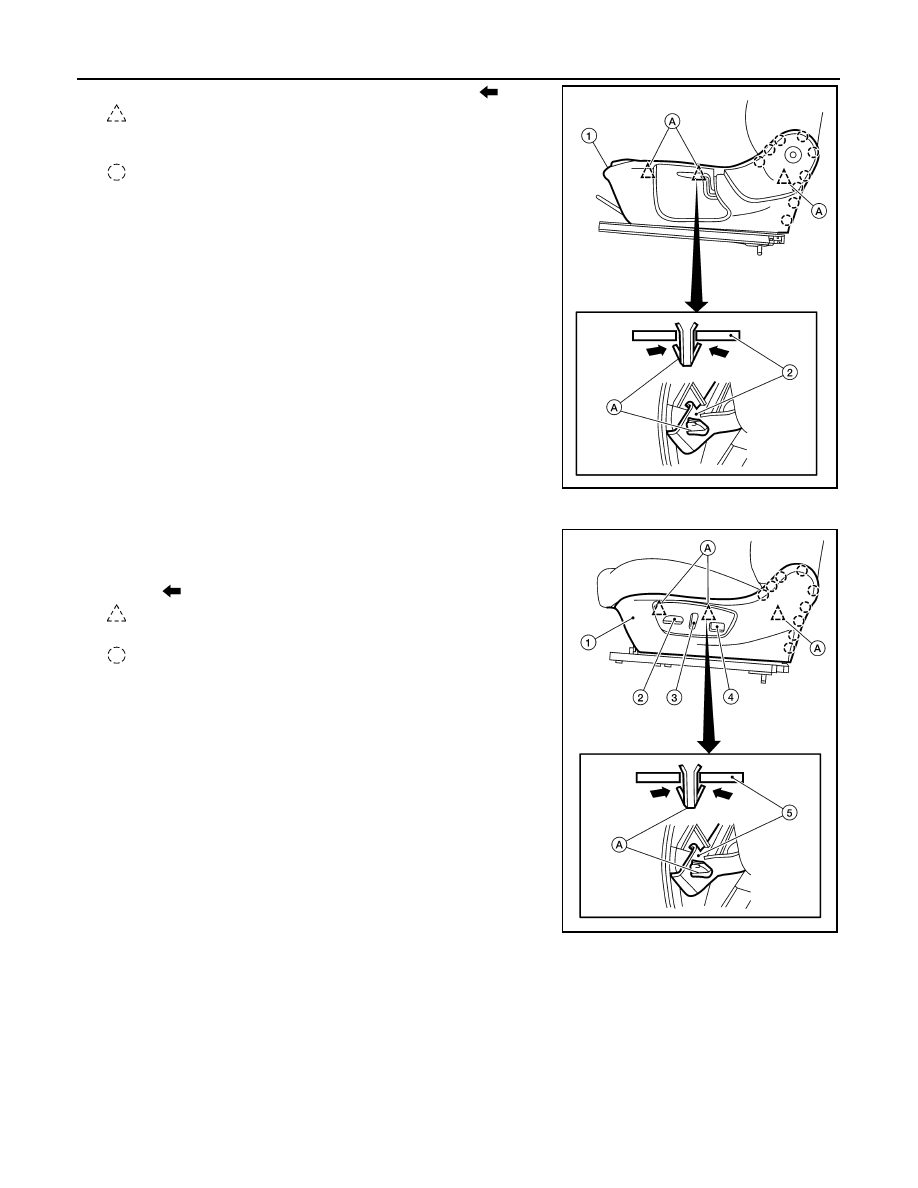
iii. Release clips (A) from seat cushion frame as shown (
).
:Clip
iv. Release remaining pawls then remove seat cushion outer fin-
isher (LH) (1).
: Pawl
b. For power seat:
i.
Remove the seat cushion outer finisher (LH) (1).
ii.
Remove seat slide knob (2), seat recline knob (3) and seat lum-
bar knob (4), then release clips (A) from seat frame (5), as
shown (
).
:Clip
iii. Release pawls and remove.
: Pawl
iv. Disconnect harness connectors from the power seat switch and lumbar support switch.
AWJIA1542ZZ
AWJIA1566ZZ