Nissan Sentra. Manual - part 613
HEADLINING
INT-41
< REMOVAL AND INSTALLATION >
C
D
E
F
G
H
I
K
L
M
A
B
INT
N
O
P
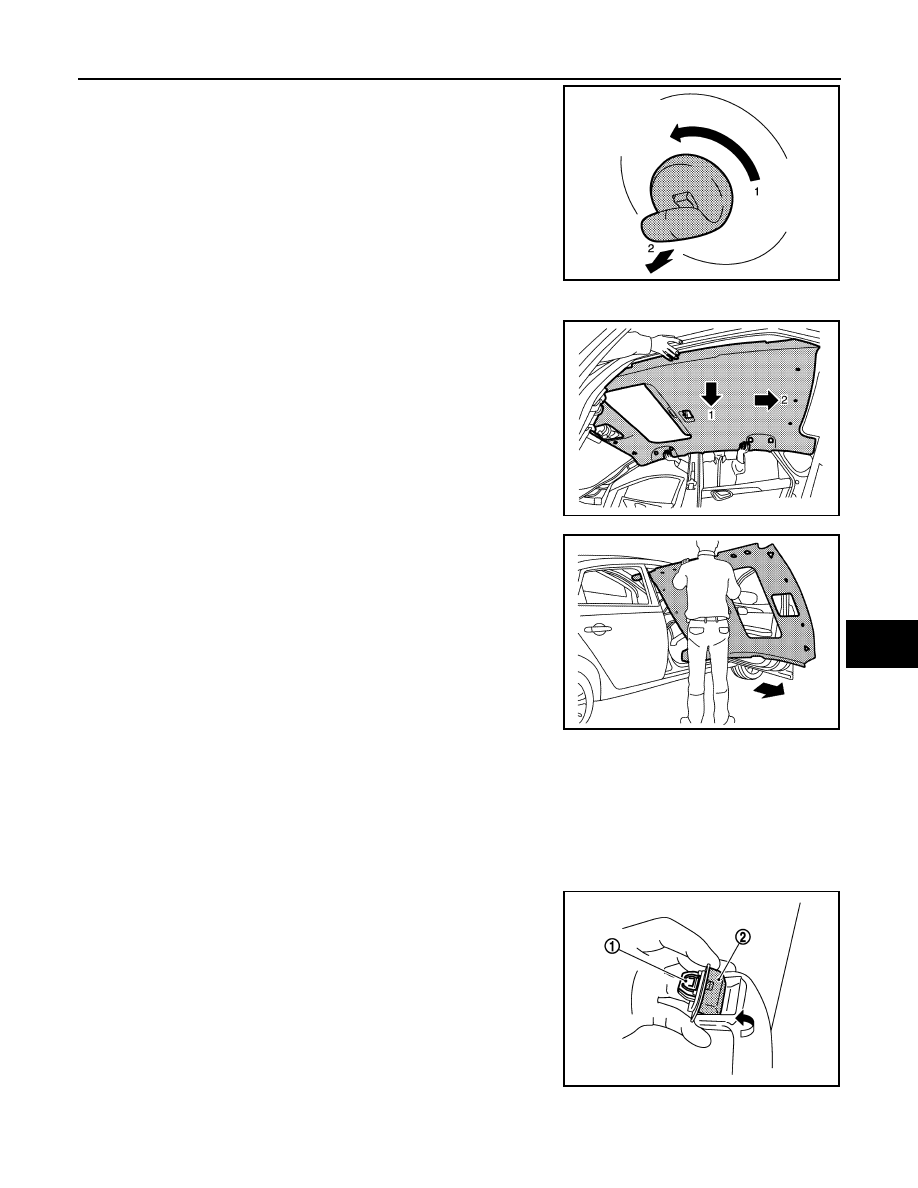
Rotate 90
° and remove as shown.
14. Remove headlining clips.
15. Remove headlining from roof panel as shown. Adjust the posi-
tion of headlining so that it can be removed through passenger
side door.
16. Remove headlining as shown.
CAUTION:
• Two people are required for removal in order to prevent
damage.
• Do not bend headlining when removing.
• Be careful not to scratch or damage any part of the body
while removing the headliner.
INSTALLATION
Installation is in the reverse order of removal.
CAUTION:
• When installing headlining, start by installing both sun visor holders and the headlining clips in
order to keep the headlining in position.
• Do not bend headlining when installing.
• Be careful that the surface is not wrinkled when installing.
• When installing assist grip, install metal clip (1) to assist grip
clip (2), then install to the body panel.
JMJIA4401ZZ
JMJIA7803ZZ
JMJIA7804ZZ
JMJIA3623ZZ