Nissan Sentra. Manual - part 494
EXT-44
< REMOVAL AND INSTALLATION >
LICENSE LAMP FINISHER
LICENSE LAMP FINISHER
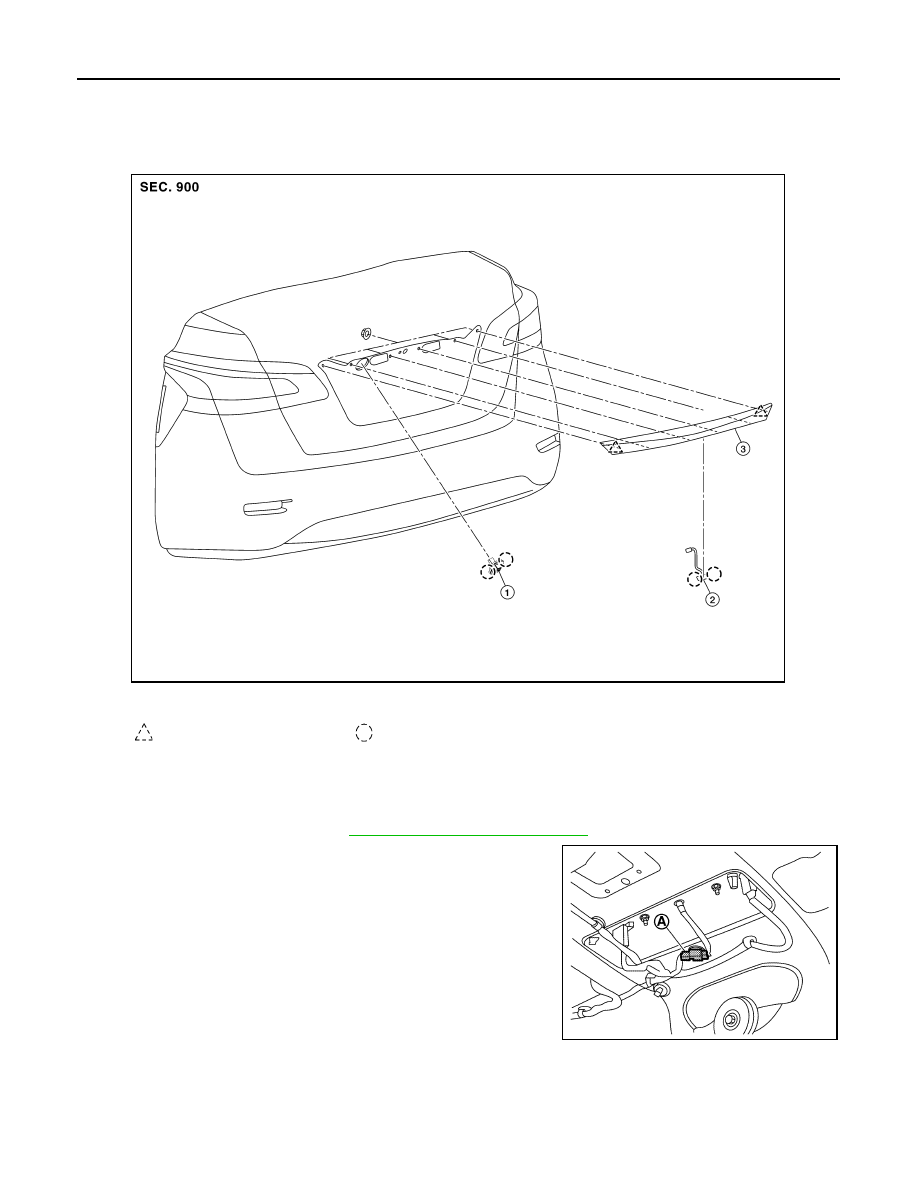
Exploded View
INFOID:0000000009758061
Removal and Installation
INFOID:0000000009758062
REMOVAL
1. Remove trunk lid finisher. Refer to
INT-45, "Removal and Installation"
2. Disconnect the harness connector (A) from trunk lid opener
request switch.
1.
Rear view camera
2.
Trunk lid opener request switch
3.
License lamp finisher
Clip
Pawl
AWKIA2124ZZ
JMKIB0246ZZ