Nissan Leaf. Manual - part 875


  Index      Nissan     Nissan Leaf (2011-2014 year) - Service and Repair Manual


Search            


Content   ..  873  874  875  876   ..


Nissan Leaf. Manual - part 875


LUGGAGE FLOOR TRIM

INT-45

< REMOVAL AND INSTALLATION >

C

D

E

F

G

H

I

K

L

M

A

B

INT

N

O

P

1. Apply protective tape (A) on the parts to protect it from damage.

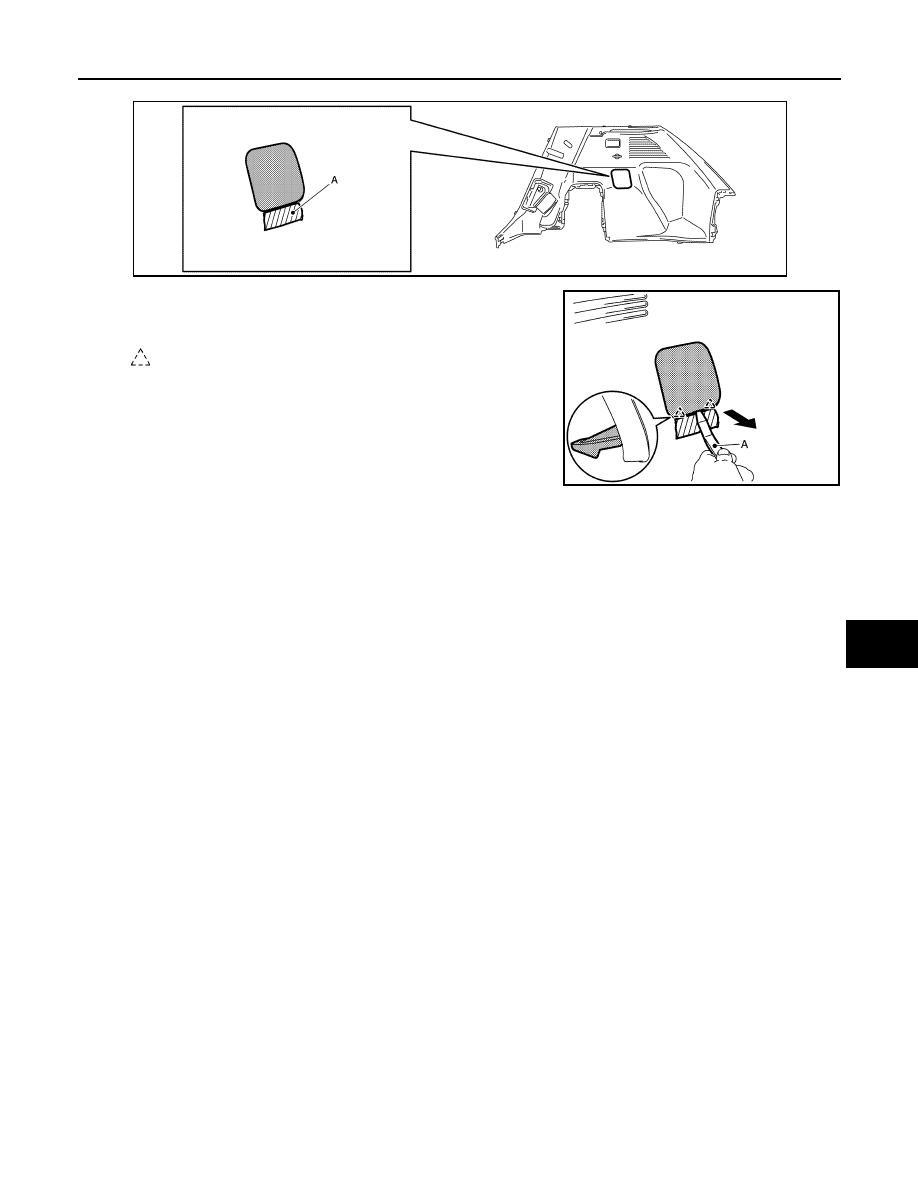
2. Disengage shock absorber mask fixing pawls with a suitable tool

(A), and then remove shock absorber mask.

INSTALLATION

Install in the reverse order of removal.

JMJIA6961ZZ

: Pawl

JMJIA6983ZZ

INT-46

< REMOVAL AND INSTALLATION >

BACK DOOR TRIM

BACK DOOR TRIM

Exploded View

INFOID:0000000010119689

BACK DOOR UPPER FINISHER
BACK DOOR UPPER FINISHER : Removal and Installation

INFOID:0000000010119690

CAUTION:

• When removing, always use a suitable tool that is made of plastic to prevent damage to the parts.

• Never damage the back door panel.

REMOVAL

1. Fully open back door.
2. Remove back door upper finisher.

1.

Back door side finisher RH

2.

Back door upper finisher

3.

Back door side finisher LH

4.

Back door lower finisher

5.

Back door pull handle

6.

Emergency lid

: Clip

: Pawl

: Metal clip

JMJIA5053ZZ

BACK DOOR TRIM

INT-47

< REMOVAL AND INSTALLATION >

C

D

E

F

G

H

I

K

L

M

A

B

INT

N

O

P

a. Apply protective tape (A) on the parts to protect it from damage.

b. Disengage back door upper finisher fixing clips and pawls with a

suitable tool (A), and then remove back door upper finisher.

INATALLATION

Note the following item, and install in the reverse order of removal.

CAUTION:

When installing, check in advance that clips and pawls are accurately aligned with the holes on back

door side, and then install by pressing in.

BACK DOOR SIDE FINISHER
BACK DOOR SIDE FINISHER : Removal and Installation

INFOID:0000000010119691

CAUTION:

• When removing, always use a suitable tool that is made of plastic to prevent damage to the parts.

• Never damage the back door panel.

REMOVAL

1. Remove strap from back door side finisher hook.
2. Remove back door upper finisher. Refer to 

INT-46, "BACK DOOR UPPER FINISHER : Removal and

Installation"

.

3. Remove back door side finisher.
a. Pull back door side finisher from vehicle inside to outside, and

then remove back door side finisher fixing clip.

JMJIA6962ZZ

: Clip

: Pawl

JMJIA6984ZZ

: Clip

JMJIA7220ZZ

INT-48

< REMOVAL AND INSTALLATION >

BACK DOOR TRIM

b. Pull back door side finisher, and then remove back door side fin-

isher fixing pawl and clip.

INSTALATION

Note the following item, and install in the reverse order of removal.

CAUTION:

When installing, check in advance that clip are accurately aligned with the holes on back door side,

and then install by pressing in.

BACK DOOR PULL HANDLE
BACK DOOR PULL HANDLE : Removal and Installation

INFOID:0000000010119692

CAUTION:

• When removing, always use a suitable tool that is made of plastic to prevent damage to the parts.

• Never damage the back door panel.

REMOVAL

1. Fully open back door.
2. Remove back door pull handle.
a. Apply protective tape (A) on the parts to protect it from damage.

b. Disengage back door pull handle fixing pawls with a suitable tool

(A), and then remove back door pull handle.

INSTALATION

Install in the reverse order of removal.

BACK DOOR LOWER FINISHER
BACK DOOR LOWER FINISHER : Removal and Installation

INFOID:0000000010119693

CAUTION:

• When removing, always use a suitable tool that is made of plastic to prevent damage to the parts.

: Clip

: Pawl

JMJIA7221ZZ

JMJIA6964ZZ

: Pawl

JMJIA6986ZZ


Content   ..  873  874  875  876   ..