Nissan Primera P11. Manual - part 71
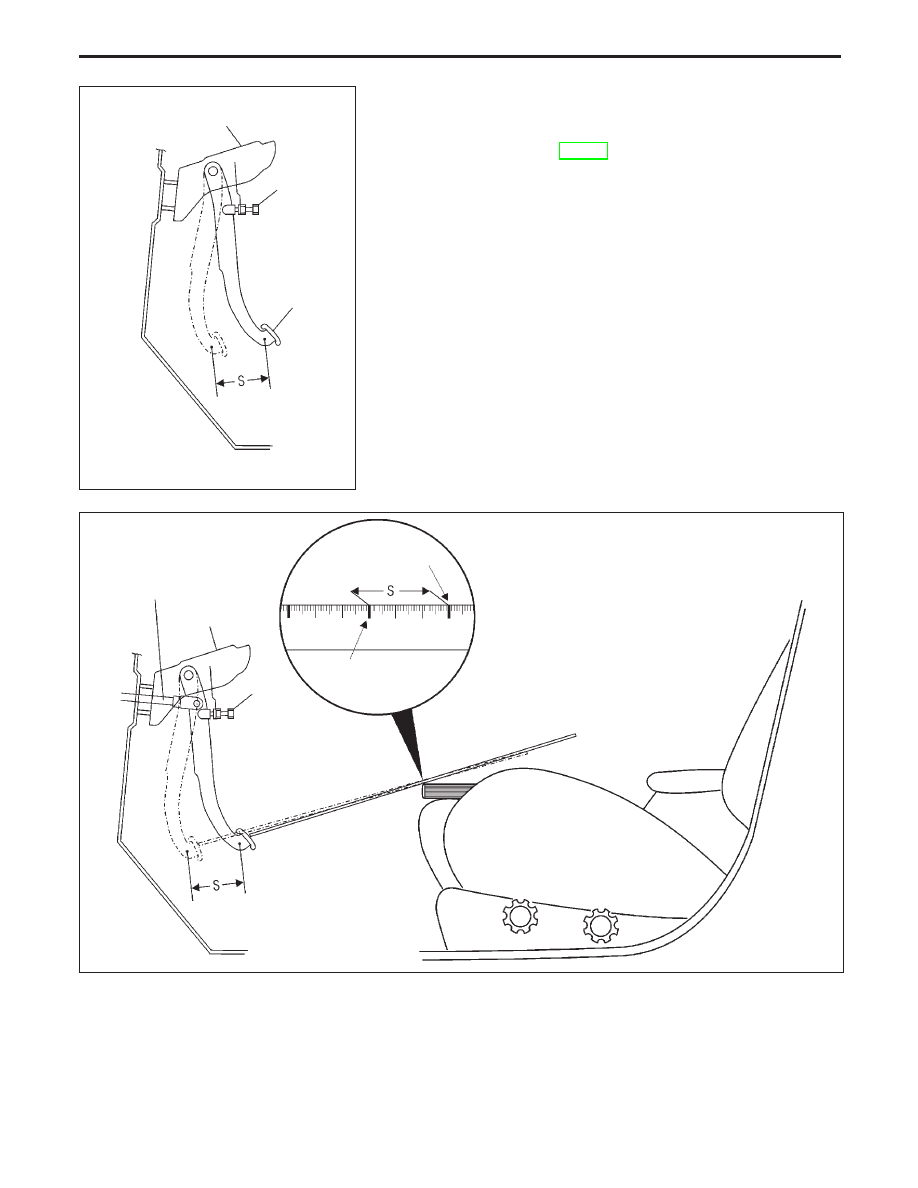
Inspecting and Adjusting Clutch Pedal
Inspect and adjust clutch pedal stroke.
Pedal stroke “S”:
Refer to SDS, CL-16.
NCL057
Pedal bracket
Pedal stopper
bolt
Pedal pad
NCL058
Master cylinder
push rod
Pedal bracket
Pedal stopper
bolt
B Pedal fully
depressed position
A Pedal fully up
position
INSPECTION AND ADJUSTMENT
CL-5