Index Nissan Nissan Primera P11 (2001 year) - Service and Repair Manual
Search
Content .. 45 46 47 48 ..
Nissan Primera P11. Manual - part 47
YBR231
TROUBLE DIAGNOSES
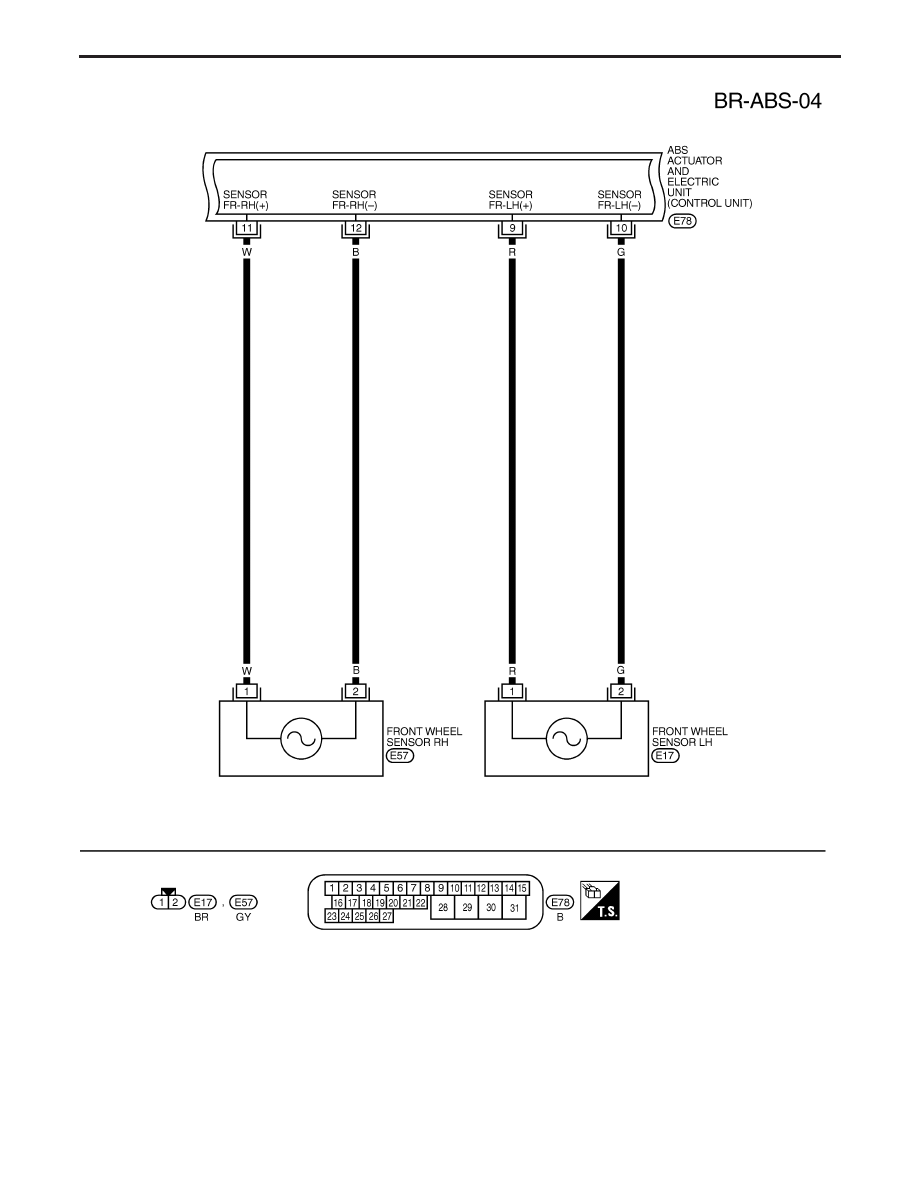
Wiring Diagram — ABS — (Cont’d)
BR-65