Nissan Teana J32. Manual - part 757


  Index      Nissan     Nissan Teana J32 (2008 year) - Service and Repair Manual


Search            


Content   ..  755  756  757  758   ..


Nissan Teana J32. Manual - part 757


INT-48

< ON-VEHICLE REPAIR >

FLOOR TRIM

6.

Remove instrument lower cover, instrument driver panel, instrument assist lower panel and instrument
side panel (LH/RH). Refer to 

IP-12, "Removal and Installation"

.

7.

Remove G-sensor. Refer to 

VTL-82, "WITH INTELLIGENT AIR CONDITIONER SYSTEM : Removal and

Installation"

.

8.

Remove diagnosis sensor unit. Refer to 

SR-22, "Removal and Installation"

.

9.

Remove dash side finisher (LH/RH), front kicking plate inner (LH/RH), center pillar lower garnish (LH/RH)
and body side welt (LH/RH). Refer to 

INT-39, "Removal and Installation"

.

10. Remove side brake wire. Refer to 

BR-17, "Removal and Installation"

.

11. Remove automatic transmission drive. Refer to 

FAX-16, "Exploded View"

.

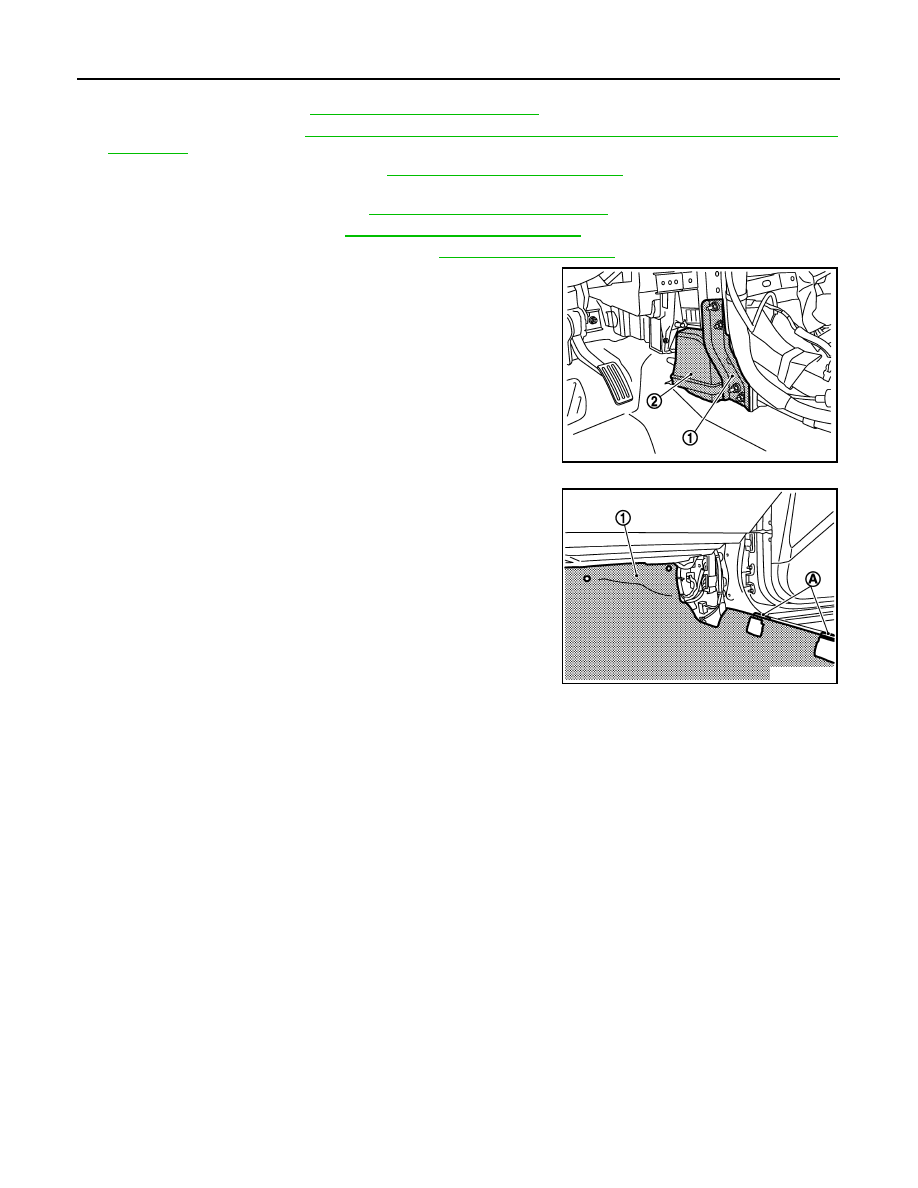
12. Remove the front floor bracket (1) and front floor duct (2). (Both

sides)

13. Remove floor trim from floor trim fixing clips (A) and remove floor

carpet (1).

INSTALLATION

Install in the reverse order of removal.

JMJIA1957ZZ

JMJIA0094GB

HEADLINING

INT-49

< ON-VEHICLE REPAIR >

C

D

E

F

G

H

I

K

L

M

A

B

INT

N

O

P

HEADLINING

NORMAL ROOF

NORMAL ROOF : Exploded View

INFOID:0000000003819228

1.

Antenna feeder (rear)

2.

Assist grip

3.

Antenna feeder (front)

4.

Sun visor assembly RH

5.

Sun visor cover

6.

Sun visor holder

7.

Sun visor assembly LH

8.

Roof harness

9.

Headlining assembly

10. Rear hidden clip

11. Roof insulator

12. Dual lock fastener

13. Map lamp assembly

14. Roof bracket

15. Roof plate assembly

JMJIA1804ZZ

INT-50

< ON-VEHICLE REPAIR >

HEADLINING

NORMAL ROOF : Removal and Installation

INFOID:0000000003819229

REMOVAL

1.

Remove front body side welt (LH/RH) and front pillar garnish (LH/RH). Refer to 

INT-39, "Removal and

Installation"

.

2.

Disconnect the roof harness (1) connector (B), antenna feeder (2) harness connector (C) and then
remove the clips (A) as shown in the figure below.

3.

Remove sun visor assembly (LH/RH).
• Remove sun visor cover.
• Remove sun visor assembly (1) mounting screws (B) with a

screwdriver (A).

• Disconnect vanity mirror lamp harness connector. 

4.

Rotate 90 degrees and remove sun visor holder (1) (LH/RH).

16. Map lamp lens RH

17. Map lamp lens LH

18. Assist grip clip

19. Personal lamp bracket

20. Personal lamp bulb

21. Personal lamp cover

22. Personal lamp lens

: Pawl

: Metal clip

: Clip

JMJIA1785ZZ

JMJIA1786ZZ

JMJIA1787ZZ

HEADLINING

INT-51

< ON-VEHICLE REPAIR >

C

D

E

F

G

H

I

K

L

M

A

B

INT

N

O

P

5.

Remove mounting plastic clips (A) using a flat-bladed screw-
driver (B) of front and rear assistance grips (1), and then remove
assist grips.

6.

Remove the front seat assembly. Refer to 

SE-92, "Removal and Installation"

.

7.

Remove rear seat assembly. Refer to 

SE-99, "Removal and Installation"

.

8.

Remove front kicking plate inner (LH/RH), center pillar upper garnish (LH/RH), and rear pillar finisher (LH/
RH).
Refer to 

INT-39, "Removal and Installation"

.

9.

On the rear right side of the vehicle, disconnect the harness
connector (A) and (C), remove the bolt (B) and then disengage
the pawls as shown in the figure.

10. With a removal tool, remove body side mounting plastic clip from rear end of headlining.

11. Pull map lamp assembly toward vehicle lower, and disengage

dual-lock fastener (A) and metal clips (B).

CAUTION:

Map lamp assembly is crimped from back of headlining.
Remove it by disengaging the crimped area of back of map
lamp assembly after removing headlining from the vehicle.

12. Remove headlining assembly (1) as shown in the figure below.

JMJIA0096GB

: Pawl

JMJIA1788ZZ

JMJIA1008ZZ

JMJIA1789ZZ


Content   ..  755  756  757  758   ..