Nissan Teana J32. Manual - part 754
INT-36
< ON-VEHICLE REPAIR >
REAR DOOR FINISHER
REAR DOOR FINISHER
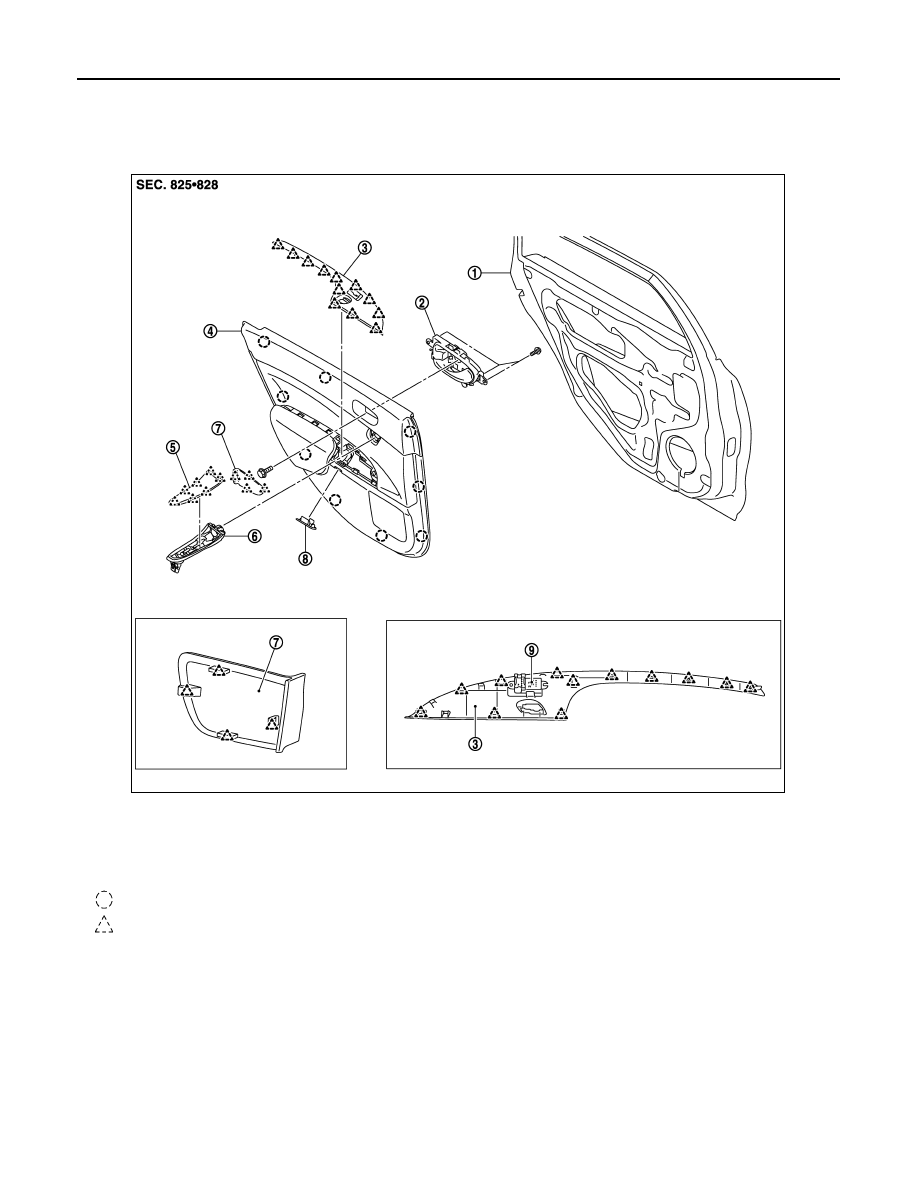
Exploded View
INFOID:0000000003819220
Removal and Installation
INFOID:0000000003819221
CAUTION:
Wrap the tip of flat-bladed screwdriver with a cloth before remove.
REMOVAL
1.
Fully open door window.
1.
Rear door panel
2.
Rear door inside handle
3.
Rear door power window switch fin-
isher
4.
Rear door finisher
5.
Rear door grip cover
6.
Rear door grip
7.
Inside handle escutcheon
8.
Cap
9.
Rear door power window switch
: Clip
: Pawl
JMJIA1800ZZ