Nissan Murano. Manual - part 1516


  Главная      Nissan     Nissan Murano (2014 year) - Service Manual


поиск по сайту            


содержание   ..  1514  1515  1516  1517   ..


Nissan Murano. Manual - part 1516


WW-132

< REMOVAL AND INSTALLATION >

FRONT WASHER NOZZLE AND TUBE

3.

While pressing pawl (A) on the cowl top cover front side of front
washer nozzle (1), remove front washer nozzle from cowl top
cover.

INSTALLATION

Install in the reverse order of removal.

CAUTION:

The spray positions differ, check that left and right nozzles are installed correctly.

Inspection and Adjustment

INFOID:0000000009719774

INSPECTION

Check valve Inspection

Check that air can pass through the hose by blowing forward (toward
the nozzle), and check that air cannot pass through by sucking.

ADJUSTMENT

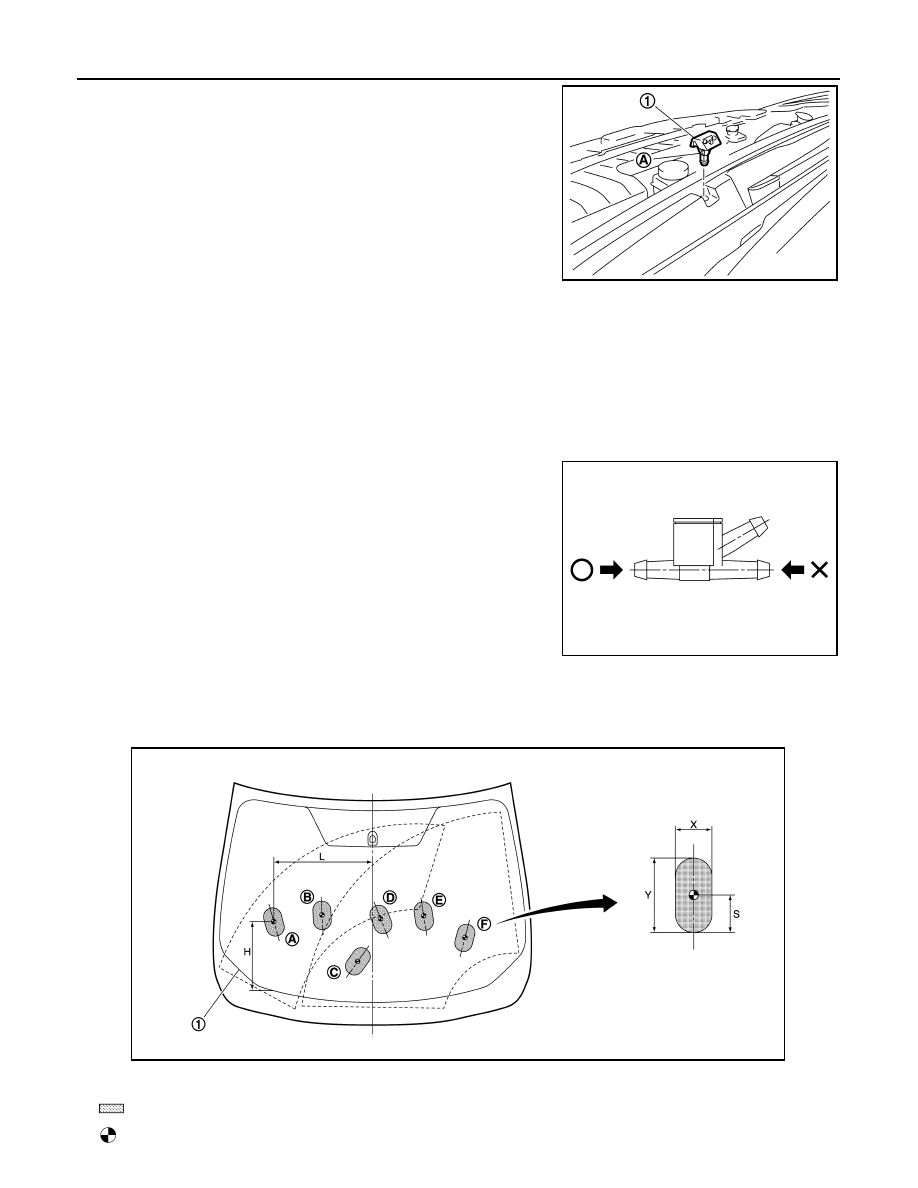
Washer Nozzle Spray Position Adjustment

Adjust spray positions to match the positions shown in the figure.

JPLIA0871ZZ

JPLIA0685ZZ

1.

Black printed frame line

: Spray area

: Target spray position

JPLIA0872ZZ

FRONT WASHER NOZZLE AND TUBE

WW-133

< REMOVAL AND INSTALLATION >

C

D

E

F

G

H

I

J

K

M

A

B

WW

N

O

P

Unit: mm (in)

Insert a needle or similar object (A) into the spray opening (1) and
move up/down and left/right to adjust the spray position.
NOTE:
If wax or dust gets into the nozzle, remove wax or dust with a needle
or small pin.

Spray position

H

X

Y

S

A

285 (11.22)

429 (16.89)

80 (3.15)

130 (5.12)

65 (2.56)

B

398 (15.67)

232 (9.13)

80 (3.15)

130 (5.12)

65 (2.56)

C

185 (7.28)

69 (2.72)

80 (3.15)

130 (5.12)

65 (2.56)

D

381 (15.00)

37 (1.46)

80 (3.15)

130 (5.12)

65 (2.56)

E

398 (15.67)

232 (9.13)

80 (3.15)

130 (5.12)

65 (2.56)

F

296 (11.65)

421 (16.57)

80 (3.15)

130 (5.12)

65 (2.56)

JPLIA0873ZZ

WW-134

< REMOVAL AND INSTALLATION >

FRONT WIPER ARM

FRONT WIPER ARM

Exploded View

INFOID:0000000009719775

Removal and Installation

INFOID:0000000009719776

REMOVAL

1.

Operate the front wiper to move it to the auto stop position.

2.

Open the hood.

3.

Remove front wiper arm caps.

4.

Remove the front wiper arm mounting nuts.

5.

Raise front wiper arm, and remove front wiper arm from the vehicle.

INSTALLATION

1.

Clean wiper arm mount as shown in the figure to prevent nuts
from being loosened.

2.

Operate the front wiper motor to move the front wiper to the auto
stop position.

3.

Adjust the front wiper blade position. Refer to 

WW-134, "Adjust-

ment"

.

4.

Install the front wiper arms by tightening the mounting nuts.

5.

Inject the washer fluid.

6.

Operate the front wiper to move it to the auto stop position.

7.

Check that the front wiper blades stop at the specified position.

8.

Install front wiper arm caps.

Adjustment

INFOID:0000000009719777

WIPER BLADE POSITION ADJUSTMENT

Clearance between the end of cowl top cover and the top of front wiper blade center

1.

Front wiper blade (RH)

2.

Front wiper arm (RH)

3.

Front wiper arm cap

4.

Front wiper arm (LH)

5.

Front wiper blade (LH)

Refer to 

GI-4, "Components"

 for symbols in the figure.

JPLIA0874GB

ELH0717D

FRONT WIPER ARM

WW-135

< REMOVAL AND INSTALLATION >

C

D

E

F

G

H

I

J

K

M

A

B

WW

N

O

P

Standard clearance

R

: 51.0

±

7.5 mm (2.008 

±

 0.295 in)

L

: 48.0

±

7.5 mm (1.890 

±

 0.295 in)

JPLIA0082ZZ


содержание   ..  1514  1515  1516  1517   ..