содержание .. 569 570 571 572 ..
Nissan X-Trail 32. Manual - part 571
FUEL FILLER LID OPENER
DLK-625
< REMOVAL AND INSTALLATION >
[TYPE 2]
C
D
E
F
G
H
I
J
L
M
A
B
DLK
N
O
P
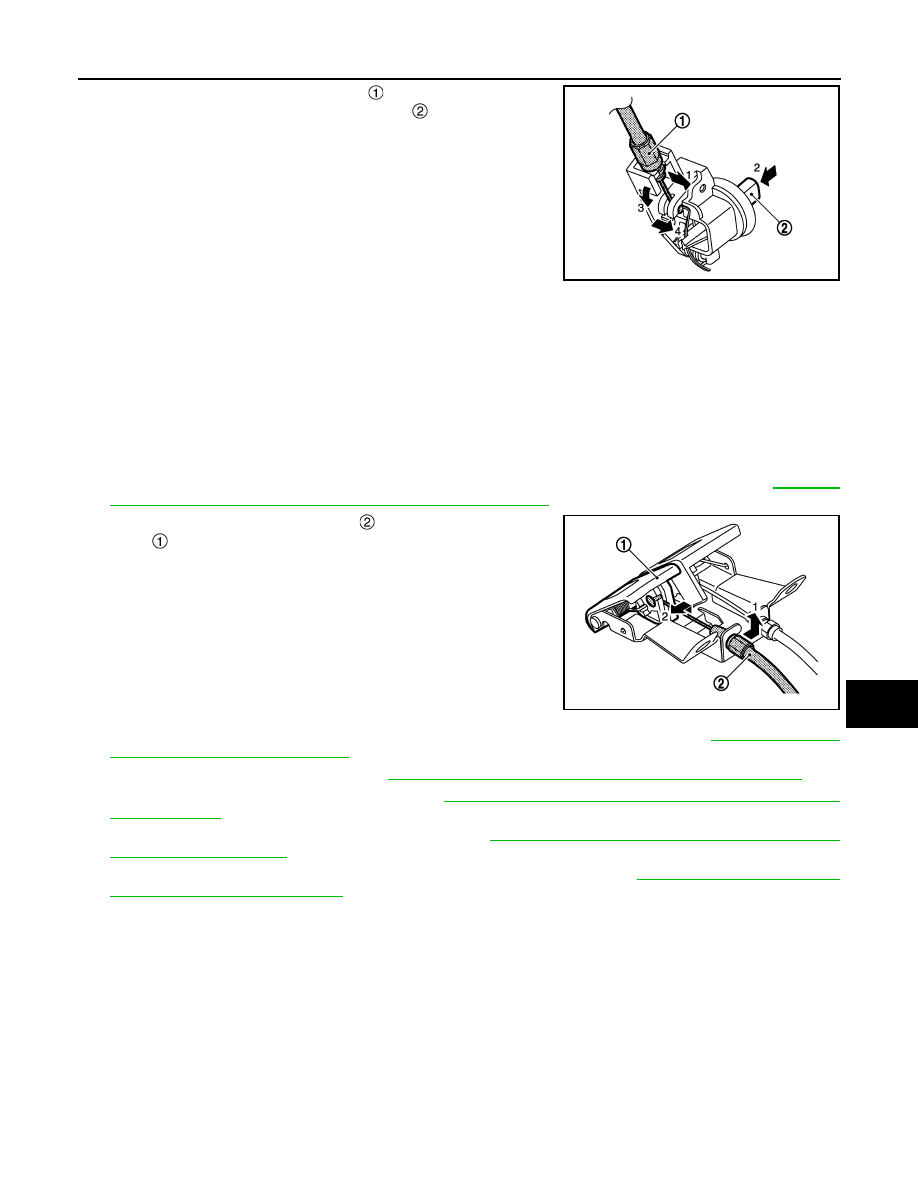
4.
Disengage fuel filler lid opener cable
and remove fuel filler lid
opener cable while pressing stopper pin
according to the
numerical order 1
→
4 indicated by arrows as shown in the figure.
INSTALLATION
Note the following item, and then install in the reverse order of removal.
CAUTION:
After installation, check fuel filler lid assembly open/close, lock/unlock operation.
FUEL FILLER OPENER CABLE
FUEL FILLER OPENER CABLE : Removal and Installation
INFOID:0000000010728172
REMOVAL
1.
Remove hood lock control handle mounting bolts, and then hood lock control handle. Refer to
"HOOD LOCK CONTROL HANDLE : Removal and Installation"
.
2.
Remove fuel filler lid opener cable
from fuel filler lid opener
lever
according to the numerical order 1
→
2 indicated by
arrows as shown in the figure.
3.
Remove kicking plate inner LH and rear kicking plate inner (LH and RH). Refer to
PLATE : Removal and Installation"
4.
Remove dash side finisher LH. Refer to
INT-26, "DASH SIDE FINISHER : Removal and Installation"
.
5.
Remove center pillar lower garnish LH. Refer to
INT-27, "CENTER PILLAR LOWER GARNISH : Removal
6.
Remove luggage side lower finisher RH. Refer to
INT-43, "LUGGAGE SIDE LOWER FINISHER :
.
7.
Remove fuel filler lid opener cable from fuel filler lid lock assembly. Refer to
LOCK : Removal and Installation"
.
8.
Remove fuel filler lid opener cable from harness protectors.
9.
Remove fuel filler lid opener cable fixing clips, and then remove fuel filler lid opener cable.
INSTALLATION
Note the following item, and then install in the reverse order of removal.
CAUTION:
After installation, check fuel filler lid assembly open/close, lock/unlock operation.
JMKIA5719ZZ
JMKIA5901ZZ