содержание .. 1327 1328 1329 1330 ..
Nissan X-Trail 32. Manual - part 1329
GW-34
< REMOVAL AND INSTALLATION >
BACK DOOR WINDOW GLASS
6.
Apply matching marks to back door window glass and back door
panel.
CAUTION:
To prevent the gap when install back door window glass put
on matching marks by all means.
7.
Remove adhesive using a piano wire.
a.
Pass the piano wire passenger room to bonded area of back door window glass using a wire pierce.
CAUTION:
• Never use plane surface of wire pierce tip vertically.
• Never damage resinous back door panel and surrounding parts.
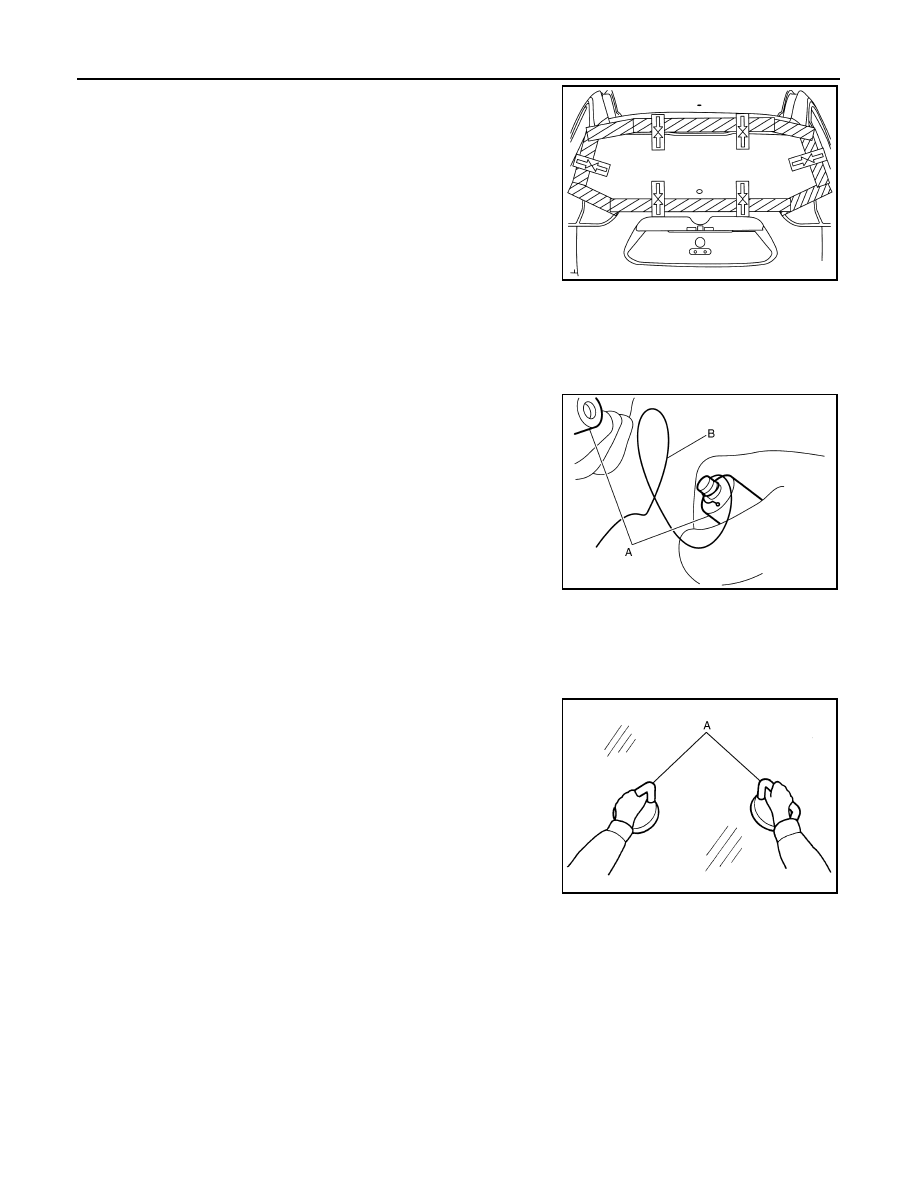
b.
Tie both ends of the piano wire (B) to wire grip (A), etc..
8.
Remove adhesive, back door window glass clips and back door window glass holders by using piano wire
alongside of back door window glass.
CAUTION:
• Remove adhesive, 2 workers are required by all means.
• Never damage resinous back door panel and surrounding parts.
9.
Use suction lifter (A) or rubber suction cups, etc. to remove back
door window glass from the vehicle.
CAUTION:
Due to weight of back door window glass, 2 workers are
required by all means.
10. Remove back door window glass clips and back door window glass holders from back door panel.
INSTALLATION
Replacement Back Door Window Glass
CAUTION:
Never damage back door window glass and resinous back door panel.
JMKIB3202ZZ
JMKIA9832ZZ
JMKIA1138ZZ