содержание .. 1245 1246 1247 1248 ..
Nissan X-Trail 32. Manual - part 1247
ROOF SIDE MOLDING
EXT-47
< REMOVAL AND INSTALLATION >
C
D
E
F
G
H
I
J
L
M
A
B
EXT
N
O
P
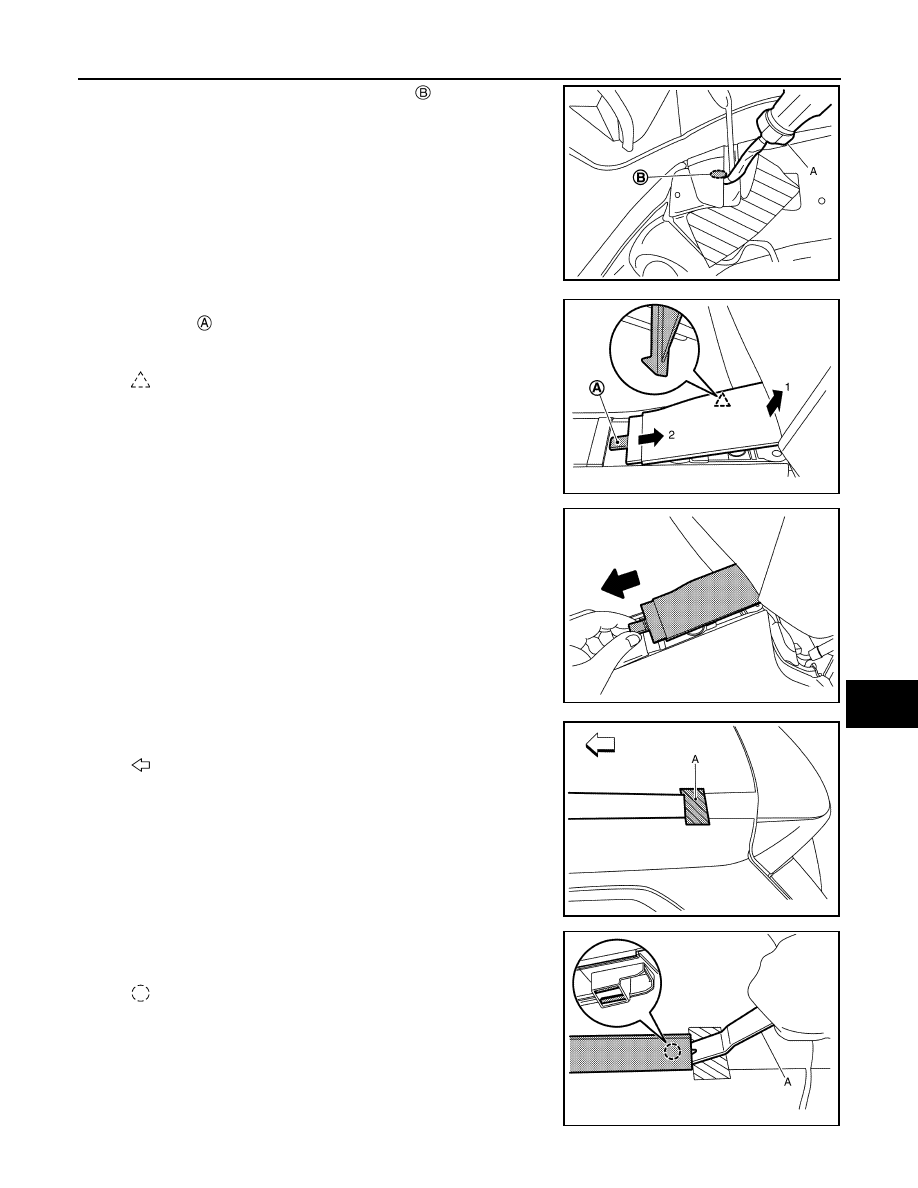
3.
Remove back door hinge cover fixing clip
using a remover
tool (A).
4.
Disengage back door hinge cover fixing pawl, and then while
escape part
of back door hinge cover according to numerical
order 1
→
2 as shown in the figure, pull up back door hinge cover.
5.
Remove back door hinge cover as shown by the arrow in the fig-
ure.
6.
Apply protective tape (A) on the part to protect it from damage.
7.
Disengage roof side molding fixing clip using a remover tool (A),
and then remove roof side molding.
JMKIB2968ZZ
: Pawl
JMKIB2969ZZ
JMKIB2970ZZ
: Vehicle front
JMKIB2971ZZ
: Clip
JMKIB2972ZZ