содержание .. 111 112 113 114 ..
Nissan X-Trail 32. Manual - part 113
BR-46
< REMOVAL AND INSTALLATION >
[LHD]
FRONT DISC BRAKE
8.
Install the lower sliding pin bolt and tighten it to the specified
torque.
9.
Depress the brake pedal several times to check that no drag feel is present for the front disc brake. Refer
to
BR-46, "BRAKE PAD (1 PISTON TYPE) : Inspection"
10. Install tires. Refer to
WT-61, "Removal and Installation"
BRAKE PAD (1 PISTON TYPE) : Inspection
INFOID:0000000010838533
INSPECTION AFTER REMOVAL
• Replace the shims and shim covers if rust is excessively attached.
• Eliminate rust on the pad return spring, pad retainers and the torque member. Replace them if rust is exces-
sively attached.
INSPECTION AFTER INSTALLATION
• Check a drag of front disc brake. If any drag is found, follow the procedure described below.
1.
Remove brake pads. Refer to
BR-43, "BRAKE PAD (1 PISTON TYPE) : Removal and Installation"
2.
Press the pistons. Refer to
BR-43, "BRAKE PAD (1 PISTON TYPE) : Removal and Installation"
3.
Install brake pads. Refer to
BR-43, "BRAKE PAD (1 PISTON TYPE) : Removal and Installation"
4.
Depress the brake pedal several times.
5.
Check a drag of front disc brake again. If any drag is found, disassemble the cylinder body and replace if
necessary. Refer to
BR-52, "BRAKE CALIPER ASSEMBLY (1 PISTON TYPE) : Disassembly and Assem-
• Burnish contact surfaces brake pads and disc rotor after refinishing or replacing brake pads, or if a soft pedal
occurs at very low mileage. Refer to
BR-17, "BRAKE PAD : Inspection and Adjustment"
.
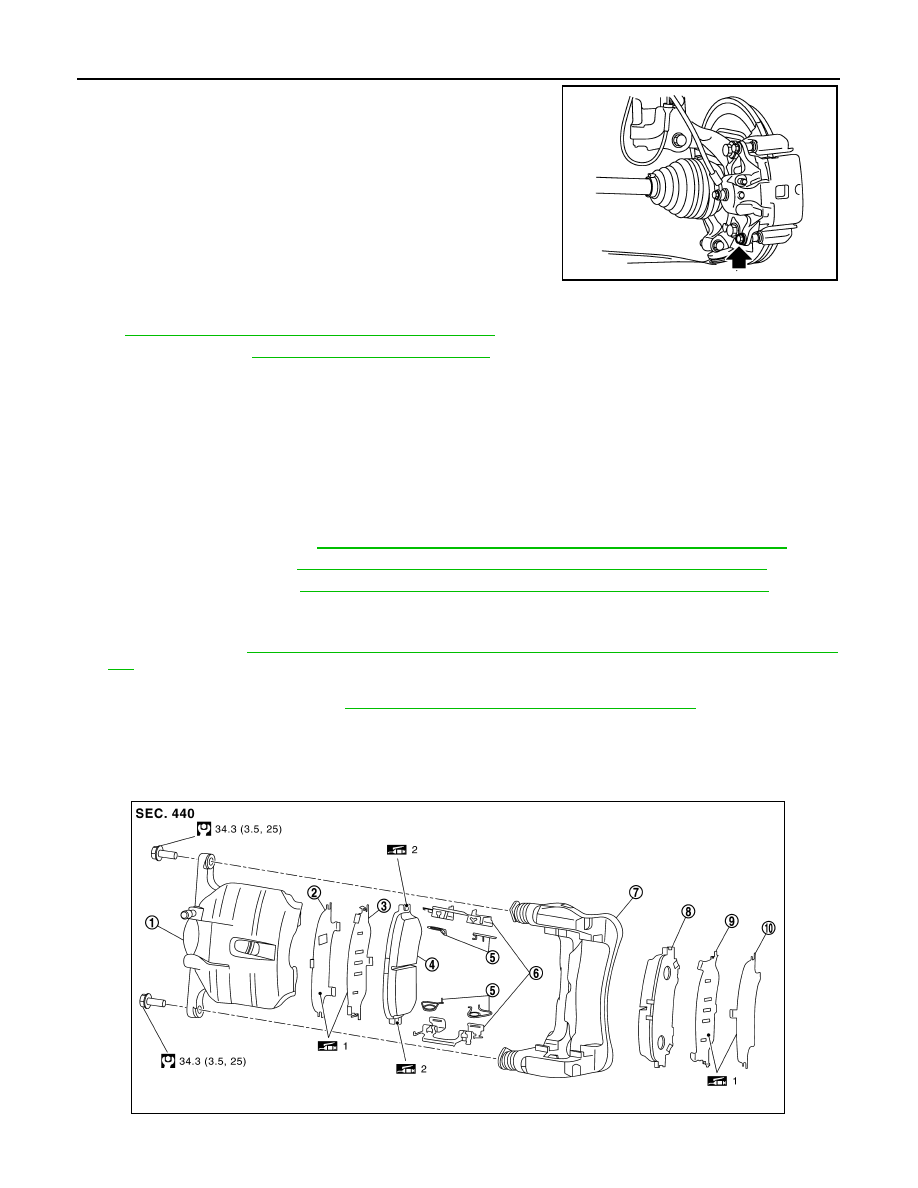
BRAKE PAD (2 PISTON TYPE)
BRAKE PAD (2 PISTON TYPE) : Exploded View
INFOID:0000000010838597
JPFIA0832ZZ
JSFIA2246GB