содержание .. 1072 1073 1074 1075 ..
Nissan X-Trail 32. Manual - part 1074
OIL PAN (LOWER)
EM-193
< REMOVAL AND INSTALLATION >
[QR25DE]
C
D
E
F
G
H
I
J
K
L
M
A
EM
N
P
O
OIL PAN (LOWER)
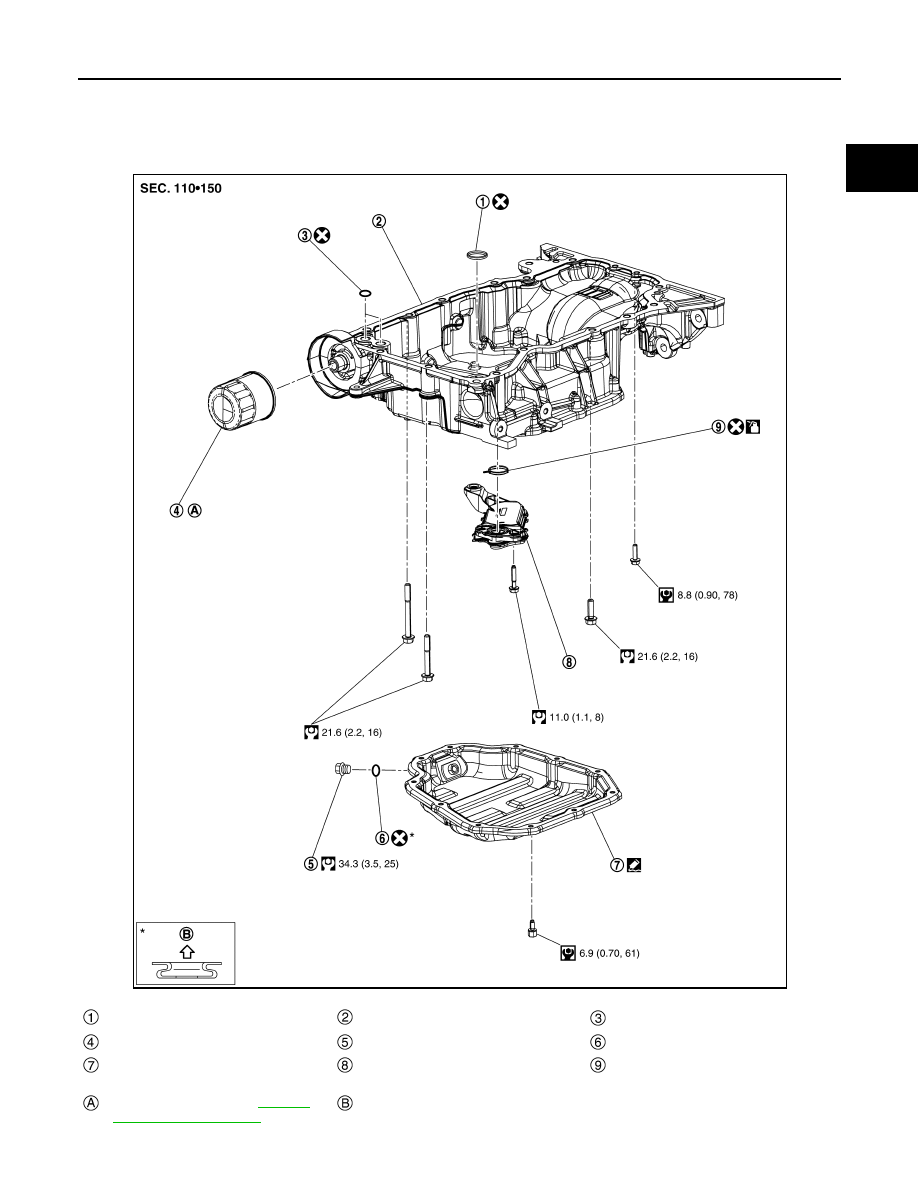
Exploded View
INFOID:0000000010783796
JSBIA3334GB
O-ring
Oil pan (upper)
O-ring
Oil filter
Drain plug
Drain plug washer
Oil pan (lower)
Oil strainer
O-ring
Comply with the installation procedure
when tightening. Refer to
Oil pan side