содержание .. 1071 1072 1073 1074 ..
Nissan X-Trail 32. Manual - part 1073
IGNITION COIL, SPARK PLUG AND ROCKER COVER
EM-189
< REMOVAL AND INSTALLATION >
[QR25DE]
C
D
E
F
G
H
I
J
K
L
M
A
EM
N
P
O
IGNITION COIL, SPARK PLUG AND ROCKER COVER
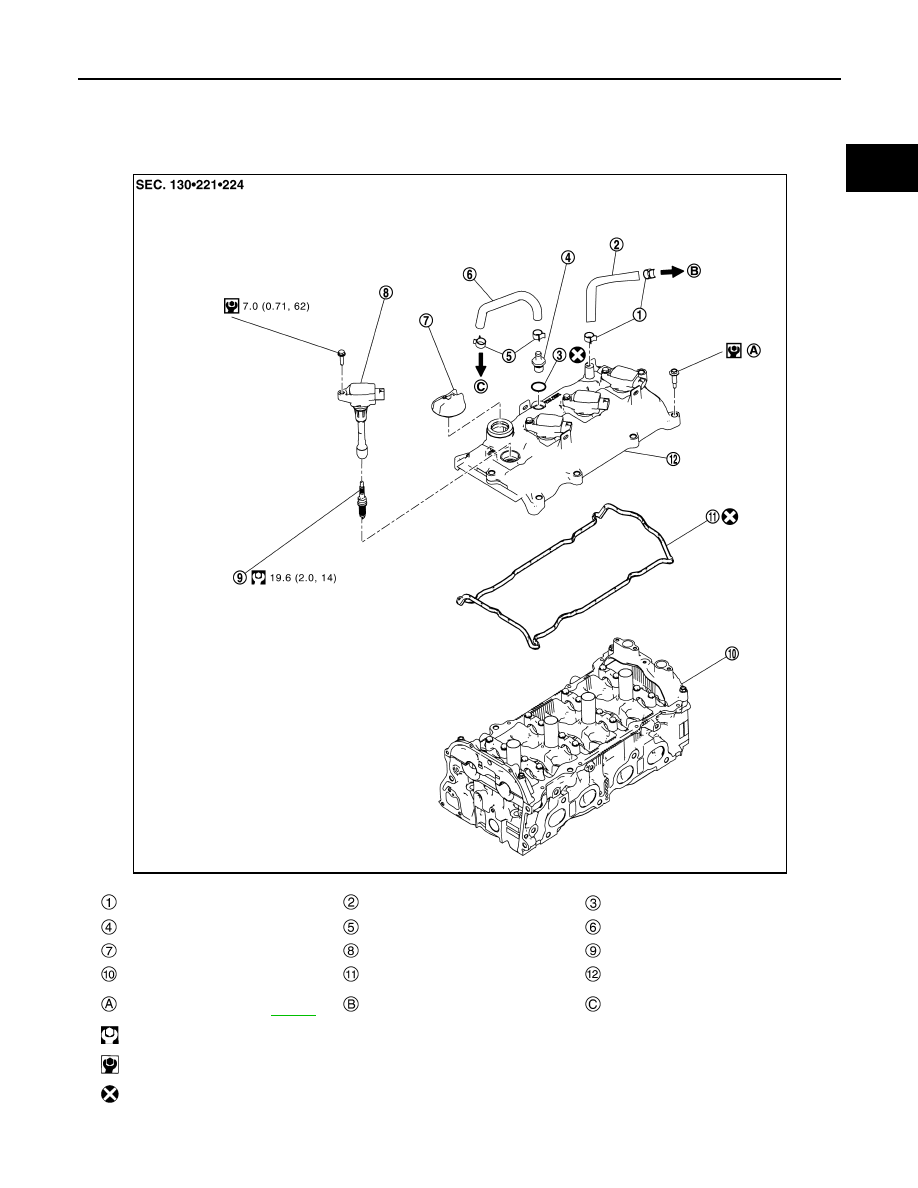
Exploded View
INFOID:0000000010783794
Clamp
Blow-by hose
O-ring
PCV valve
Clamp
PCV valve hose
Oil filler cap
Ignition coil
Spark plug
Camshaft position sensor bracket
Rocker cover gasket
Rocker cover
Comply with the assembly procedure
when tightening. Refer to
To air duct assembly
To intake manifold
: N·m (kg-m, ft-lb)
: N·m (kg-m, in-lb)
: Always replace after every disassembly.
JSBIA3327GB