содержание .. 98 99 100 101 ..
Nissan Primera P12. Manual - part 100
REAR DOOR LOCK
BL-109
C
D
E
F
G
H
J
K
L
M
A
B
BL
REAR DOOR LOCK
PFP:82502
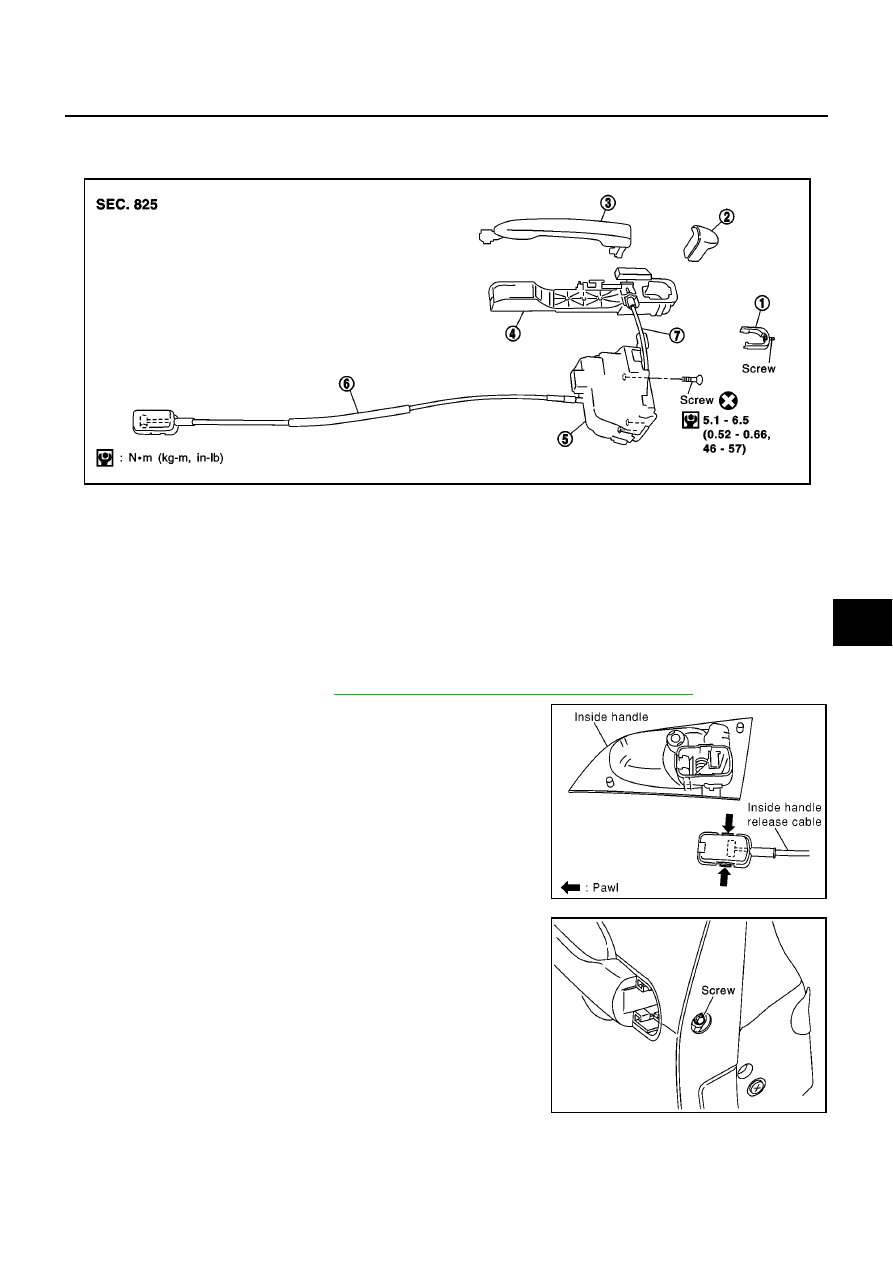
Component Parts
EIS005I7
Removal and Installation
EIS005I8
REMOVAL
1.
Remove door finisher. Refer to EI section in P12 ESM (SM2E00-1P12E0E).
2.
Remove remove sealing screen.
NOTE:
If sealing screen is reused, cut butyl tape in a way that leaves it on the sealing screen.
3.
Remove rear door glass. Refer to
GW-68, "REAR DOOR GLASS AND REGULATOR"
.
4.
Disconnect inside release cable at the joint.
5.
Remove mount screw and remove door out side handle
escutcheon.
1
: Fixing bracket
2
: Door outside handle escutcheon
3
: Door outside handle grip
4
: Door outside handle bracket
5
: Door lock actuator assembly
6
: Inside handle release cable
7
: Outside handle release cable
PIIA0827E
PIIA0825E
SIIA1642E