содержание .. 35 36 37 38 ..
Nissan Primera P12. Manual - part 37
REFRIGERANT LINES
ATC-141
C
D
E
F
G
H
I
K
L
M
A
B
ATC
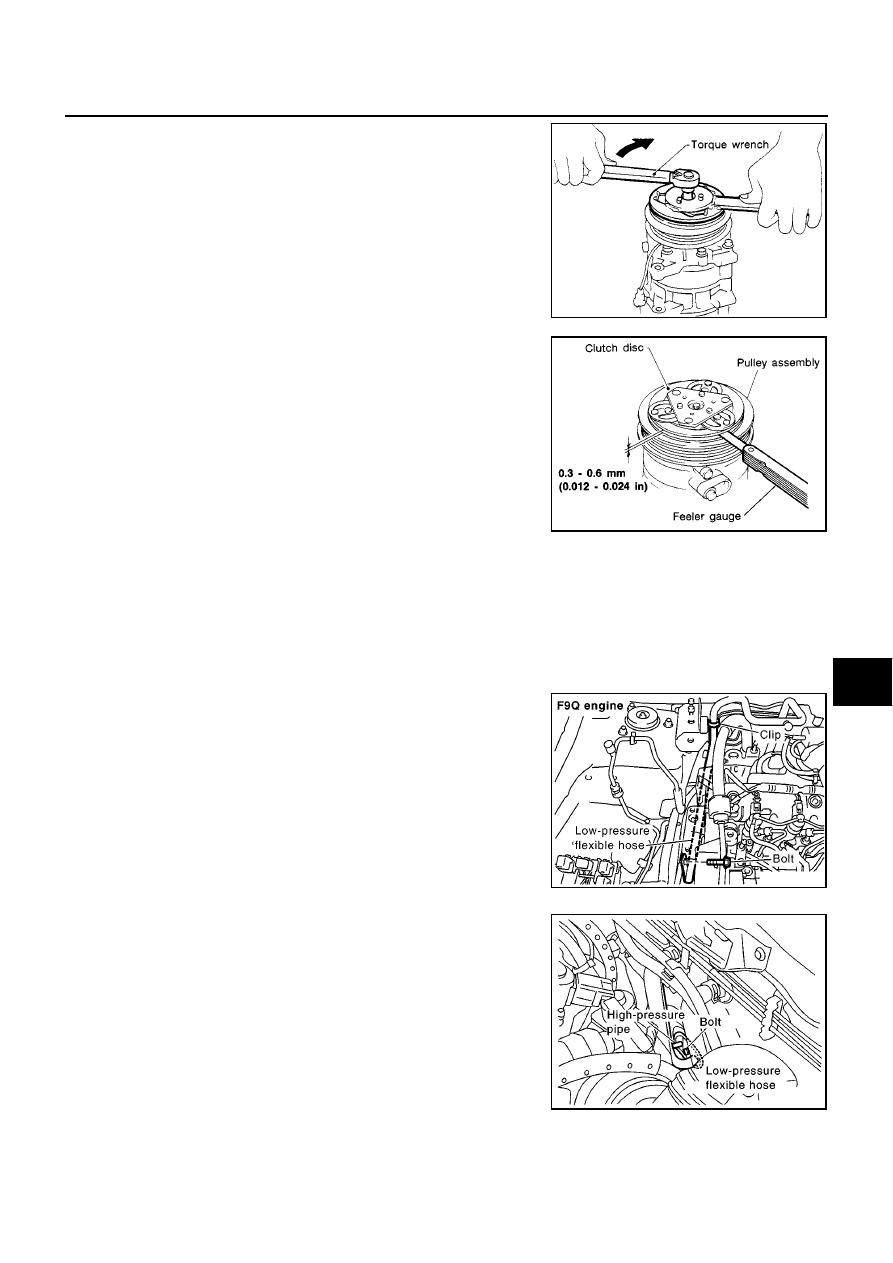
5.
Using the holder to prevent clutch disc rotation.
After tightening the bolt, check that the pulley rotates smoothly.
6.
Check clearance around the entire periphery of clutch disc.
If the specified clearance is not obtained, replace adjusting
spacer and readjust.
Break-In Operation
When replacing compressor clutch assembly, always carry out the break-in operation. This is done by engag-
ing and disengaging the clutch about thirty times. Break-in operation raises the level of transmitted torque.
Low-pressure Flexible Hose
EJS003AC
REMOVAL
1.
Use refrigerant collecting equipment (for HFC-134a) to discharge refrigerant.
2.
Remove the cowl top panel.
3.
Remove the clip from the low-pressure flexible hose.
4.
Remove the mounting bolts from the low-pressure flexible hose.
5.
Remove the low-pressure flexible hose.
CAUTION:
Cap or wrap the joint of the pipe with suitable material such
as vinyl tape to avoid the entry of air.
Tightening torque
: 14 N·m (1.4 kg-m, 10 ft-lb)
RHA086E
Disc to pulley clear-
ance
: 0.3 - 0.6 mm (0.012 - 0.024 in)
RHA087E
RJIA2376E
RJIA0185E