Qashqai J11. Road wheels & tires - part 3
 

  Index      Nissan     Qashqai J11. Road wheels & tires. Service and Repair Manual


Search            copyright infringement  


Content      ..     1      2      3      4      ..


Qashqai J11. Road wheels & tires - part 3


C1729 VEHICLE SPEED SIGNAL

WT-37

< DTC/CIRCUIT DIAGNOSIS >

[WITH TPMS]

C

D

F

G

H

I

J

K

L

M

A

B

WT

N

O

P

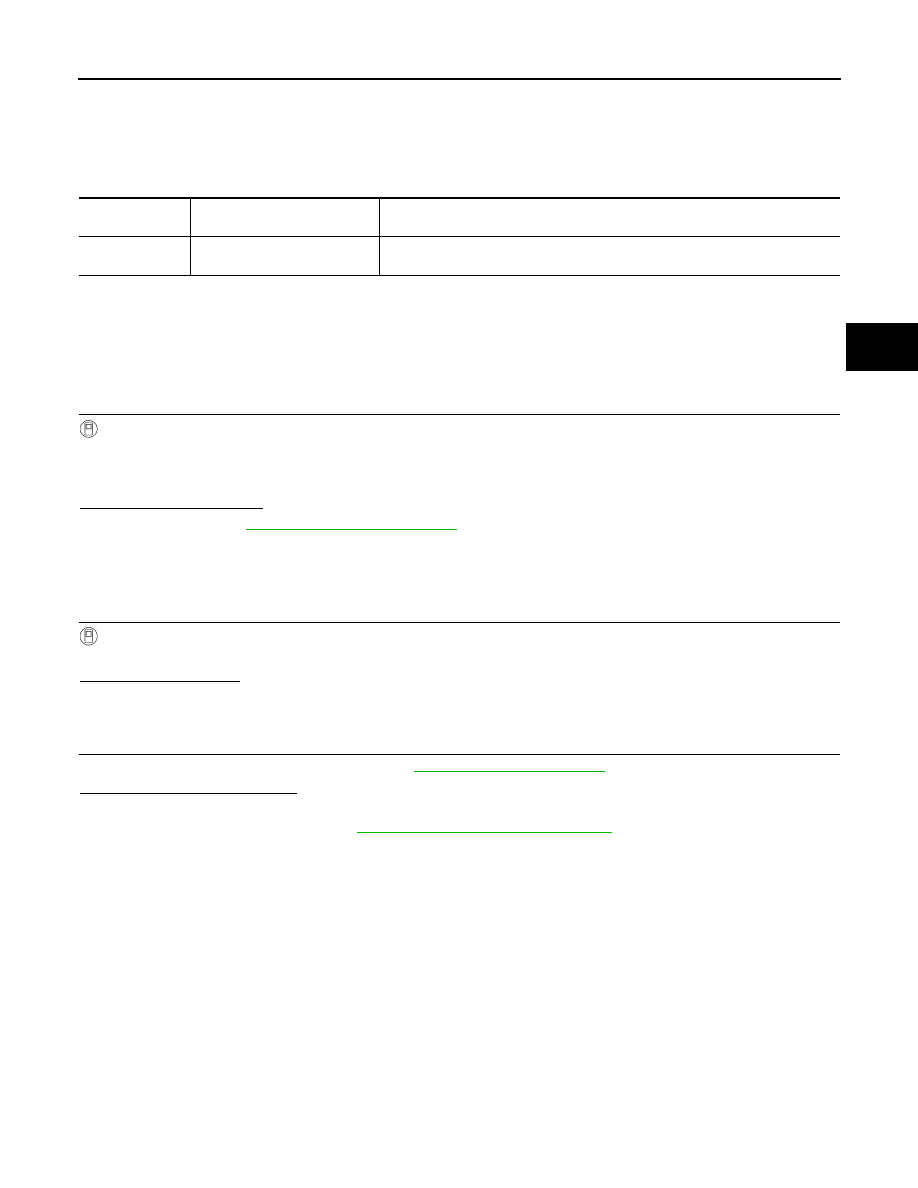
C1729 VEHICLE SPEED SIGNAL

DTC Description

INFOID:0000000010339531

DTC DETECTION LOGIC

POSSIBLE CAUSES

• CAN communication
• BCM
• ABS actuator and electric unit (control unit) malfunction

DTC CONFIRMATION PROCEDURE

1.

DTC CONFIRMATION PROCEDURE

With CONSULT

1.

Drive the vehicle.

2.

Stop the vehicle.

3.

Perform self-diagnosis in “AIR PRESSURE MONITOR”.

Is DTC “C1729” detected?

YES

>> Proceed to 

WT-37, "Diagnosis Procedure"

.

NO

>> INSPECTION END

Diagnosis Procedure

INFOID:0000000010339532

1.

PERFORM ABS ACTUATOR AND ELECTRIC UNIT (CONTROL UNIT) SELF-DIAGNOSIS

With CONSULT

Perform self-diagnosis for “ABS”.

Is any DTCs detected?

YES

>> Check the DTCs.

NO

>> GO TO 2.

2.

CHECK BCM INPUT/OUTPUT SIGNAL

Check BCM input/output signal values. Refer to 

BCS-64, "Reference Value"

Is the inspection result normal?

YES

>> Check pin terminal and connection of each harness connector for malfunctioning conditions. 

NO

>> Replace the BCM. Refer to 

BCS-132, "Removal and Installation"

.

DTC No.

CONSULT screen item

(Trouble diagnosis content)

DTC Detection Condition

C1729

VHCL SPEED SIG ERR
(Vehicle speed signal error)

Vehicle speed signal not detected.

WT-38

< DTC/CIRCUIT DIAGNOSIS >

[WITH TPMS]

C1734 CONTROL UNIT

C1734 CONTROL UNIT

DTC Description

INFOID:0000000010339533

DTC DETECTION LOGIC

POSSIBLE CAUSE

• BCM

DTC CONFIRMATION PROCEDURE

1.

PERFORM SELF DIAGNOSTIC RESULT 

With CONSULT

Perform self-diagnosis in “AIR PRESSURE MONITOR”.

Is DTC C1734 detected?

YES

>> Proceed to 

WT-38, "Diagnosis Procedure"

.

NO-1

>> To check malfunction symptom before repair: Refer to 

GI-41, "Intermittent Incident"

.

NO-2

>> Confirmation after repair: INSPECTION END

Diagnosis Procedure

INFOID:0000000010339534

1.

CHECK BCM HARNESS CONNECTORS

Check BCM harness connectors for damage or loose connections.

Is the inspection result normal?

YES

>> GO TO 2.

NO

>> Repair or replace connectors.

2.

CHECK BCM POWER SUPPLY CIRCUIT

Check BCM power supply circuit. Refer to 

BCS-125, "Diagnosis Procedure"

.

Is the inspection result normal?

YES

>> GO TO 3.

NO

>> Repair or replace harness or connectors.

3.

CHECK BCM INPUT/OUTPUT SIGNALS

Check BCM input/output signals. Refer to 

BCS-64, "Reference Value"

.

Is the inspection result normal?

YES

>> Check pin terminal and connection of each harness connector for malfunctioning conditions. 

NO

>> Replace BCM. Refer to 

BCS-132, "Removal and Installation"

.

DTC No.

CONSULT screen item

(Trouble diagnosis content)

DTC Detection Condition

C1734

CONTROL UNIT
(Control unit)

TPMS malfunction in BCM.

C1735 IGNITION SIGNAL

WT-39

< DTC/CIRCUIT DIAGNOSIS >

[WITH TPMS]

C

D

F

G

H

I

J

K

L

M

A

B

WT

N

O

P

C1735 IGNITION SIGNAL

DTC Description

INFOID:0000000010435809

DTC DETECTION LOGIC

POSSIBLE CAUSE

• BCM

Diagnosis Procedure

INFOID:0000000010435810

1.

PERFORM BCM SELF-DIAGNOSIS

When DTC "C1735" is detected, perform BCM diagnosis.

>> Perform BCM diagnosis. Refer to 

BCS-90, "DTC Index"

.

DTC No.

CONSULT screen item

(Trouble diagnosis content)

DTC Detection Condition

C1735

IGN CIRCUIT OPEN
(Ignition circuit open)

BCM has detected a mismatch between IGN ON signals.

WT-40

< DTC/CIRCUIT DIAGNOSIS >

[WITH TPMS]

C1761, C1762, C1763, C1764 TIRE PRESSURE SENSOR

C1761, C1762, C1763, C1764 TIRE PRESSURE SENSOR

DTC Description

INFOID:0000000010339535

DTC DETECTION LOGIC

NOTE:
The actual malfunction part may differ from the malfunction part which DTC shows if ID registration is not per-
formed after performing tire rotation or tire/road wheel replacement. 

POSSIBLE CAUSE

• Tire pressure sensor
• BCM

Diagnosis Procedure

INFOID:0000000010339536

1.

REPLACE TIRE PRESSURE SENSOR

When DTC "C1761, C1762, C1763, C1764" is detected, replace tire pressure sensor.

>> Replace tire pressure sensor. Refer to 

WT-62, "Removal and Installation"

.

DTC No.

CONSULT screen item

(Trouble diagnosis content)

DTC Detection Condition

C1761

TEMPERATURE DATA FL
(Temperature data front left)

Malfunction in the tire temperature data from the front left wheel tire pressure sen-
sor.

C1762

TEMPERATURE DATA FR
(Temperature data front right)

Malfunction in the tire temperature data from the front right wheel tire pressure sen-
sor.

C1763

TEMPERATURE DATA RR
(Temperature data rear right)

Malfunction in the tire temperature data from the rear right wheel tire pressure sen-
sor.

C1764

TEMPERATURE DATA RL
(Temperature data rear left)

Malfunction in the tire temperature data from the rear left wheel tire pressure sensor.

C1765, C1766, C1767, C1768 WHEEL SENSOR

WT-41

< DTC/CIRCUIT DIAGNOSIS >

[WITH TPMS]

C

D

F

G

H

I

J

K

L

M

A

B

WT

N

O

P

C1765, C1766, C1767, C1768 WHEEL SENSOR

DTC Description

INFOID:0000000010339537

DTC DETECTION LOGIC

POSSIBLE CAUSE

• Wheel sensor

Diagnosis Procedure

INFOID:0000000010339538

1.

PERFORM ABS ACTUATOR AND ELECTRIC UNIT (CONTROL UNIT) SELF-DIAGNOSIS

When DTC "C1765, C1766, C1767, C1768" is detected, perform ABS system diagnosis.

>> Perform ABS system diagnosis. Refer to 

BRC-53, "DTC Index"

.

DTC No.

CONSULT screen item

(Trouble diagnosis content)

DTC Detection Condition

C1765

WHELL TOP DATA FL
(Wheel top data front left)

Malfunction in the wheel top data from the front left wheel sensor.

C1766

WHELL TOP DATA FR
(Wheel top data front right)

Malfunction in the wheel top data from the front right wheel sensor.

C1767

WHELL TOP DATA RL
(Wheel top data rear left)

Malfunction in the wheel top data from the rear left wheel sensor.

C1768

WHELL TOP DATA RR
(Wheel top data rear right)

Malfunction in the wheel top data from the rear right wheel sensor.

WT-42

< DTC/CIRCUIT DIAGNOSIS >

[WITH TPMS]

C1769 CONFIGURATION SETTING

C1769 CONFIGURATION SETTING

DTC Description

INFOID:0000000010339539

This procedure must be performed:
• After replacement of BCM.

DTC DETECTION LOGIC

Diagnosis Procedure

INFOID:0000000010339540

1.

TIRE PRESSURE MONITORING SYSTEM CONFIGURATION

Perform configuration.

>> Refer to 

WT-30, "Work Procedure"

and GO TO 2.

2.

TIRE PRESSURE SENSOR ID REGISTRATION 

Perform tire pressure sensor ID registration. Refer to 

WT-29, "Work Procedure"

.

Does low tire pressure warning lamp turn OFF?

YES

>> INSPECTION END

NO

>> Configuration setting tire pressure monitoring system again. Refer to 

WT-30, "Work Procedure"

.

DTC No.

Display Item

Malfunction detected condition

C1769

CONFIG SETTING
(Configuration setting)

Tire pressure monitoring system configuration do not be performed.

Receiver ID registration cannot be performed.

C1770, C1771, C1772, C1773 G SENSOR

WT-43

< DTC/CIRCUIT DIAGNOSIS >

[WITH TPMS]

C

D

F

G

H

I

J

K

L

M

A

B

WT

N

O

P

C1770, C1771, C1772, C1773 G SENSOR

DTC Description

INFOID:0000000010339541

DTC DETECTION LOGIC

NOTE:
The actual malfunction part may differ from the malfunction part which DTC shows if ID registration is not per-
formed after performing tire rotation or tire/road wheel replacement. 

POSSIBLE CAUSE

• Wheel sensor

Diagnosis Procedure

INFOID:0000000010339542

1.

REPLACE WHEEL SENSOR

When DTC "C1770, C1771, C1772, C1773" is detected, replace wheel sensor.

>> Replace wheel sensor. Refer to 

BRC-138, "FRONT WHEEL SENSOR : Removal and Installation"

(front wheel sensor), 

BRC-139, "REAR WHEEL SENSOR : Removal and Installation"

 (rear wheel

sensor).

DTC No.

CONSULT screen item

(Trouble diagnosis content)

DTC Detection Condition

C1770

G SENSOR FL
(G sensor front left)

Malfunction in the G sensor data from front left wheel sensor.

C1771

G SENSOR FR
(G sensor front right)

Malfunction in the G sensor data from front right wheel sensor.

C1772

G SENSOR RL
(G sensor rear left)

Malfunction in the G sensor data from rear left wheel sensor.

C1773

G SENSOR RR
(G sensor rear right)

Malfunction in the G sensor data from rear right wheel sensor.

WT-44

< DTC/CIRCUIT DIAGNOSIS >

[WITH TPMS]

U1000 CAN COMM CIRCUIT

U1000 CAN COMM CIRCUIT

Description

INFOID:0000000010339543

CAN (Controller Area Network) is a serial communication line for real time application. It is an on-vehicle mul-
tiplex communication line with high data communication speed and excellent error detection ability. Many elec-
tronic control units are equipped onto a vehicle, and each control unit shares information and links with other
control units during operation (not independent). In CAN communication, control units are connected with 2
communication lines (CAN-H line, CAN-L line) allowing a high rate of information transmission with less wiring.
Each control unit communicates data but selectively reads required data only.

DTC Description

INFOID:0000000010339544

DTC DETECTION LOGIC

DTC CONFIRMATION PROCEDURE

1.

PERFORM DTC CONFIRMATION

With CONSULT

1.

Drive for several minutes at a speed of 40 km/h (25 MPH) or more.

2.

Stop the vehicle.

3.

Perform self-diagnosis for “AIR PRESSURE MONITOR”.

Is DTC “U1000” detected?

YES

>> Proceed to 

WT-44, "Diagnosis Procedure"

.

NO

>> INSPECTION END

Diagnosis Procedure

INFOID:0000000010339545

Proceed to 

LAN-39, "CAN COMMUNICATION SYSTEM : CAN System Specification Chart"

.

DTC No.

Display item

Malfunction detected condition

Possible cause

U1000

CAN COMM CIRCUIT

Low tire pressure warning control unit is 
not communicating CAN communication 
signal for 2 seconds or more.

• CAN communication malfunction
• Malfunction of BCM

U1010 CONTROL UNIT (CAN)

WT-45

< DTC/CIRCUIT DIAGNOSIS >

[WITH TPMS]

C

D

F

G

H

I

J

K

L

M

A

B

WT

N

O

P

U1010 CONTROL UNIT (CAN)

Description

INFOID:0000000010339546

CAN (Controller Area Network) is a serial communication line for real time application. It is an on-vehicle mul-
tiplex communication line with high data communication speed and excellent error detection ability. Many elec-
tronic control units are equipped onto a vehicle, and each control unit shares information and links with other
control units during operation (not independent). In CAN communication, control units are connected with 2
communication lines (CAN-H line, CAN-L line) allowing a high rate of information transmission with less wiring.
Each control unit communicates data but selectively reads required data only.

DTC Description

INFOID:0000000010339547

DTC DETECTION LOGIC

DTC CONFIRMATION PROCEDURE

1.

PERFORM DTC CONFIRMATION

With CONSULT

1.

Drive for several minutes at a speed of 40 km/h (25 MPH) or more.

2.

Stop the vehicle.

3.

Perform self-diagnosis for “AIR PRESSURE MONITOR”.

Is DTC “U1010” detected?

YES >> Proceed 

to 

WT-45, "Diagnosis Procedure"

.

NO

>> INSPECTION END

Diagnosis Procedure

INFOID:0000000010339548

1.

CHECK BCM

Check BCM harness connector for disconnection or deformation.

Is the inspection result normal? 

YES

>> Replace BCM. Refer to 

BCS-132, "Removal and Installation"

.

NO

>> Repair or replace error-detected parts.

DTC

Display item

Malfunction detected condition

Possible cause

U1010

CONTROL UNIT (CAN)

Detecting error during the initial diagno-
sis of CAN controller of BCM.

Malfunction of BCM

WT-46

< DTC/CIRCUIT DIAGNOSIS >

[WITH TPMS]

LOW TIRE PRESSURE WARNING LAMP

LOW TIRE PRESSURE WARNING LAMP

Component Function Check

INFOID:0000000010339549

1.

CHECK THE ILLUMINATION OF THE LOW TIRE PRESSURE WARNING LAMP

Check that the low tire pressure warning lamp is turned OFF after illuminating for approximately 1 second,
when the ignition switch is turned ON.

Is the inspection result normal?

YES

>> INSPECTION END

NO

>> Perform trouble diagnosis. Refer to 

WT-46, "Diagnosis Procedure"

Diagnosis Procedure

INFOID:0000000010339550

1.

POWER SUPPLY AND GROUND CIRCUIT

Check power supply and ground circuit. Refer to 

BCS-125, "Diagnosis Procedure"

.

Is the inspection result normal?

YES

>> GO TO 2.

NO

>> Repair or replace damaged parts.

2.

PERFORM SELF-DIAGNOSIS

With CONSULT

Perform self-diagnosis for “AIR PRESSURE MONITOR”.
Is any DTC detected?

YES

>> Check the DTC. Refer to 

WT-20, "DTC Index"

NO

>> GO TO 3.

3.

CHECK LOW TIRE PRESSURE WARNING LAMP SIGNAL

With CONSULT

1.

Turn the ignition switch ON.

CAUTION:

Never start the engine.

2.

Select “ACTIVE TEST” in “AIR PRESSURE MONITOR”.

3.

Touch “WARNING LAMP” to turn ON the low tire pressure warning lamp.

When “ACTIVE TEST” is performed, does the low tire pressure warning lamp in the combination meter turn
ON?

YES

>> Perform combination meter diagnosis. Refer to 

MWI-54, "Work flow"

.

NO

>> Replace the BCM. Refer to 

BCS-132, "Removal and Installation"

.

TPMS

WT-47

< SYMPTOM DIAGNOSIS >

[WITH TPMS]

C

D

F

G

H

I

J

K

L

M

A

B

WT

N

O

P

SYMPTOM DIAGNOSIS

TPMS

Symptom Table 

INFOID:0000000010339552

LOW TIRE PRESSURE WARNING LAMP SYMPTOM CHART

WT-48

< SYMPTOM DIAGNOSIS >

[WITH TPMS]

TPMS

Diagnosis items

Symptom

(Ignition switch 

ON)

Low tire pressure warning lamp

Cause

Action

Low tire pres-
sure warning 
lamp

The low tire pres-
sure warning lamp 
illuminates for 1 
second, then turns 
OFF.

Wake-up operation for all 
tire pressure sensors at 
wheels is completed.

No system malfunctions

The low tire pres-
sure warning lamp 
turns ON and stays 
illuminated.

Low tire pressure

Check the tire pressure for 
all wheels and adjust to the 
specified value. Refer to 

WT-66, "Tire Air Pressure"

Tire pressure monitoring 
system configuration do 
not be performed. 

Perform configuration. Re-
fer to 

WT-30, "Work Proce-

dure"

.

Tire pressure sensor ID 
registration do not be 
performed. 

Perform ID registration. Re-
fer to 

WT-29, "Work Proce-

dure"

.

The low tire pres-
sure warning lamp 
repeats blinking at 
0.5-second inter-
vals for 1 minute, 
and then stays illu-
minated.

The BCM cannot detect 
tire pressure data signal.

• Check visually that the 

tire pressure sensors are 
installed. If necessary, re-
place/install the tire pres-
sure sensor(s) and 
perform tire pressure 
sensor ID registration. 
Refer to 

WT-29, "Work 

Procedure"

.

• Remove the interference 

radio wave (e.g. battery 
charger of smart phone).

The combination meter 
fuse is open or removed 
(or pulled out).

Check and install the com-
bination meter fuse. If nec-
essary, replace the fuse.

The BCM harness con-
nector is removed.

Check the connection con-
ditions of the BCM harness 
connector, and repair if nec-
essary.

Tire Pressure Monitoring 
System (TPMS) mal-
function.
(except tire pressure 
monitoring system con-
figuration and/or tire 
pressure sensor ID reg-
istration non-performed)

Perform CONSULT self-di-
agnosis. Refer to 

WT-16, 

"CONSULT Function (TIRE 
PRESSURE MONITORING 
SYSTEM)"

.

Hazard warning 
lamp

The hazard warn-
ing lamp does not 
blink twice when 
performing ID reg-
istration operation.

ID registration is not 
completed.

Perform “TIRE PRESSURE 
SENSOR ID REGISTRA-
TION CANNOT BE COM-
PLETED” diagnosis 
procedure. Refer to 

WT-54, 

"Diagnosis Procedure"

.

SEIA0592E

SEIA0598E

SEIA0788E

LOW TIRE PRESSURE WARNING LAMP DOES NOT TURN ON

WT-49

< SYMPTOM DIAGNOSIS >

[WITH TPMS]

C

D

F

G

H

I

J

K

L

M

A

B

WT

N

O

P

LOW TIRE PRESSURE WARNING LAMP DOES NOT TURN ON

Description

INFOID:0000000010339553

The low tire pressure warning lamp does not turn ON when the ignition switch is turned ON.
NOTE:
The low tire pressure warning lamp turn ON for approximately 1 second and then turns OFF when the ignition
switch is turned ON. This is to check that no abnormal condition is present in the tire pressure monitoring sys-
tem.
The combination meter may be malfunctioning or the tire pressure monitoring system may be malfunctioning if
the low tire pressure warning lamp does not turn ON when the ignition switch is turned ON.

Diagnosis Procedure

INFOID:0000000010339554

1.

CHECK LOW TIRE PRESSURE WARNING LAMP SIGNAL

With CONSULT

1.

Turn the ignition switch ON.

CAUTION:

Never start the engine.

2.

Select “ACTIVE TEST” in “AIR PRESSURE MONITOR”.

3.

Touch “WARNING LAMP” to turn ON the low tire pressure warning lamp.

When “ACTIVE TEST” is performed, does the low tire pressure warning lamp in the combination meter turn
ON?

YES

>> GO TO 2.

NO

>> GO TO 3.

2.

CHECK LOW TIRE PRESSURE WARNING LAMP OPERATION

Check that the low tire pressure warning lamp is turned OFF after turns ON for approximately 1 second, when
the ignition switch is turned ON.

Is the inspection result normal?

YES

>> Check intermittent incident. Refer to 

GI-41, "Intermittent Incident"

.

NO

>> Replace the BCM. Refer to 

BCS-132, "Removal and Installation"

.

3.

CHECK COMBINATION METER POWER SUPPLY CIRCUIT

Perform the trouble diagnosis for combination meter power supply circuit. Refer to 

MWI-61, "COMBINATION

METER : Diagnosis Procedure"

.

Is the inspection result normal?

YES

>> Perform combination diagnosis. Refer to 

MWI-54, "Work flow"

.

NO

>> Repair or replace error-detected parts.

WT-50

< SYMPTOM DIAGNOSIS >

[WITH TPMS]

LOW TIRE PRESSURE WARNING LAMP DOES NOT TURN OFF

LOW TIRE PRESSURE WARNING LAMP DOES NOT TURN OFF

Description

INFOID:0000000010339555

The low tire pressure warning lamp does not turn OFF after several seconds is passed after engine starts.

Diagnosis Procedure

INFOID:0000000010339556

1.

CHECK TIRE PRESSURE

1.

Turn the ignition switch ON.

CAUTION:

Never start the engine.

2.

Check the tire pressure for all wheels and adjust to the specified value. Refer to 

WT-66, "Tire Air Pres-

sure"

3.

Perform TPMS temperature calibration. Refer to 

WT-14, "TPMS temperature calibration"

.

4.

Recheck the tire pressure for all wheels. Refer to 

WT-66, "Tire Air Pressure"

Is the inspection result normal?

YES

>> GO TO 2.

NO

>> Inspect or repair the tires or wheels.

2.

CHECK LOW TIRE PRESSURE WARNING LAMP OPERATION

Check that the low tire pressure warning lamp is turned OFF after turns ON for approximately 1 second, when
the ignition switch is turned ON.

Is the inspection result normal?

YES

>> INSPECTION END

NO

>> GO TO 3.

3.

PERFORM SELF-DIAGNOSIS

With CONSULT

Perform self-diagnosis for “AIR PRESSURE MONITOR”.

Is DTC detected?

YES

>> Perform DTC diagnosis procedure. Refer to 

BCS-90, "DTC Index"

.

NO

>> GO TO 4.

4.

CHECK BCM POWER SUPPLY AND GROUND CIRCUIT

Perform the trouble diagnosis for power supply and ground circuit. Refer to 

BCS-125, "Diagnosis Procedure"

.

Is the inspection result normal?

YES

>> Replace BCM. Refer to 

BCS-132, "Removal and Installation"

NO

>> Repair or replace error-detected parts.

LOW TIRE PRESSURE WARNING LAMP BLINKS

WT-51

< SYMPTOM DIAGNOSIS >

[WITH TPMS]

C

D

F

G

H

I

J

K

L

M

A

B

WT

N

O

P

LOW TIRE PRESSURE WARNING LAMP BLINKS

Description

INFOID:0000000010339557

When the ignition switch is turned ON, the low tire pressure warning lamp blinks. And then 1 minute later, low
tire pressure warning lamp turns ON.

Diagnosis Procedure

INFOID:0000000010339558

1.

CHECK TIRE PRESSURE SENSOR INSTALLATION 

Check visually that tire pressure sensors are installed to each wheels correctly.
NOTE:
In the following case, tire pressure monitoring system (TPMS) does not function.
• Tire pressure sensor(s) are not installed. 
• Tire pressure sensor(s) of other cars are installed. 

Are the genuine NISSAN tire pressure sensors are installed correctly? 

YES

>> GO TO 2.

NO

>> Replace and/or Install tire pressure sensor(s). Refer to 

WT-62, "Removal and Installation"

. GO TO

3.

2.

PERFORM SELF-DIAGNOSIS

With CONSULT

Perform self-diagnosis for “AIR PRESSURE MONITOR”.

Is DTC detected?

YES

>> Perform DTC diagnosis procedure. Refer to 

BCS-90, "DTC Index"

.

NO

>> GO TO 4.

3.

TIRE PRESSURE SENSOR ID REGISTRATION

Perform tire pressure sensor ID registration. Refer to 

WT-29, "Work Procedure"

.

Is tire pressure sensor ID registration completed?

YES

>> Adjust the tire pressure for all wheels specified to the value. Refer to 

WT-66, "Tire Air Pressure"

.

And perform TPMS temperature calibration. Refer to 

WT-14, "TPMS temperature calibration"

.

INSPECTION END

NO

>> Perform diagnosis procedure of “TIRE PRESSURE SENSOR ID REGISTRATION CANNOT BE

COMPLETED”. Refer to 

WT-54, "Diagnosis Procedure"

.

4.

CHECK BCM POWER SUPPLY AND GROUND CIRCUIT

Perform the trouble diagnosis for power supply and ground circuit. Refer to 

BCS-125, "Diagnosis Procedure"

.

Is the inspection result normal?

YES

>> Replace BCM. Refer to 

BCS-132, "Removal and Installation"

NO

>> Repair or replace error-detected parts.

WT-52

< SYMPTOM DIAGNOSIS >

[WITH TPMS]

LOW TIRE PRESSURE LOCATION INDICATOR DOES NOT DISPLAY

LOW TIRE PRESSURE LOCATION INDICATOR DOES NOT DISPLAY

Description

INFOID:0000000010339559

When low tire pressure, low tire location indicator does not display though low tire pressure warning lamp
turns ON.

Diagnosis Procedure

INFOID:0000000010339560

1.

CHECK COMBINATION METER

Check combination meter. Refer to 

MWI-54, "Work flow"

.

Is the inspection result normal?

YES

>> GO TO 2.

NO

>> Repair or replace error-detected parts.

2.

CHECK LOW TIRE PRESSURE WHELL LOCATION INDICATOR OPERATION

Check that the low tire pressure location indicator is turned OFF after turns ON for approximately 1 second,
when the ignition switch is turned ON.
Is the inspection result normal?

YES

>> Check intermittent incident. Refer to 

GI-41, "Intermittent Incident"

.

NO

>> Replace the BCM. Refer to 

BCS-132, "Removal and Installation"

.


Content      ..     1      2      3      4      ..