Qashqai J11. Road wheels & tires - part 2
TIRE PRESSURE MONITORING SYSTEM
WT-21
< WIRING DIAGRAM >
[WITH TPMS]
C
D
F
G
H
I
J
K
L
M
A
B
WT
N
O
P
WIRING DIAGRAM
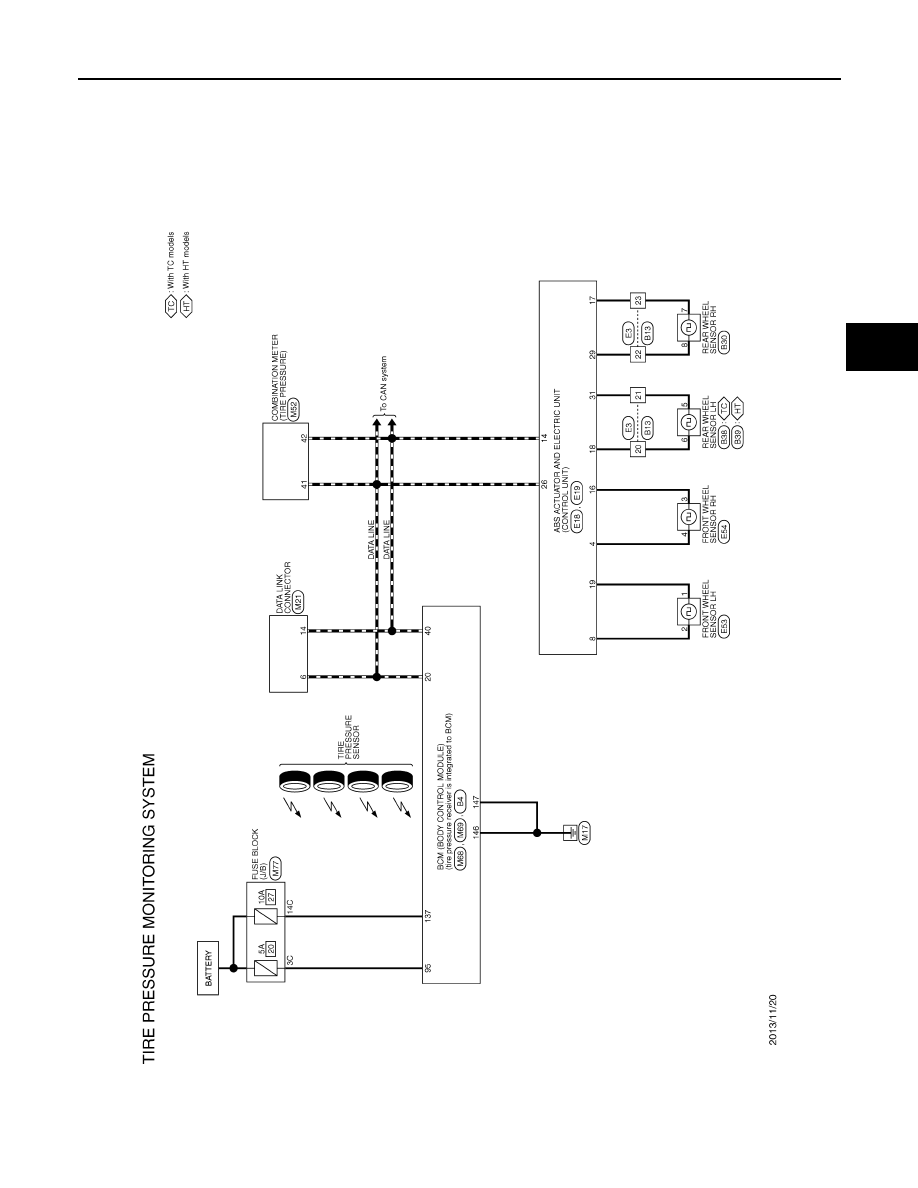
TIRE PRESSURE MONITORING SYSTEM
Wiring Diagram
INFOID:0000000010339518
JREWC0693GB
|
|
|
TIRE PRESSURE MONITORING SYSTEM WT-21 < WIRING DIAGRAM > [WITH TPMS] C D F G H I J K L M A B WT N O P WIRING DIAGRAM TIRE PRESSURE MONITORING SYSTEM Wiring Diagram INFOID:0000000010339518 JREWC0693GB |