Nissan Qashqai J11. Manual - part 1228


  Index      Nissan     Nissan Qashqai J11 - Service and Repair Manual


Search            


Content   ..  1226  1227  1228  1229   ..


Nissan Qashqai J11. Manual - part 1228


HOOD LOCK

DLK-181

< REMOVAL AND INSTALLATION >

[TYPE 1]

C

D

E

F

G

H

I

J

L

M

A

B

DLK

N

O

P

• After installation, perform hood fitting adjustment. Refer to 

DLK-152, "HOOD ASSEMBLY : Adjust-

ment"

.

• After installation, perform hood lock control inspection. Refer to 

DLK-181, "Inspection"

.

HOOD SAFETY HOOK

HOOD SAFETY HOOK : Removal and Installation

INFOID:0000000010478165

REMOVAL

Remove mounting nuts, and then remove hood lock secondary assembly.

INSTALLATION

Note the following item, and install in the reverse order of removal.

CAUTION:

After installation, perform hood lock control inspection. Refer to 

DLK-181, "Inspection"

.

Inspection

INFOID:0000000010434723

NOTE:
If the hood lock cable is bent or deformed, replace it.

1.

Check that hood opener operating is condition 49 N (5.0 kg, 11.0 lb) or below.

2.

Check that secondary latch is securely engaged with secondary striker from the dead load of the hood
assembly.

3.

Check that primary latch is securely engaged with primary striker when hood assembly is closed [free-fall
from approximately 200 mm (7.874 in) height].

CAUTION:

Never free-fall hood assembly from a height of 300 (11.811 in) mm or more.

4.

While operating hood opener, carefully check that the front end of hood is raised by approximately 20.0
mm (0.787 in). Also check that hood opener returns to the original position.

5.

Check that secondary latch is properly engaged with secondary striker [4.0 mm (0.157 in)].

6.

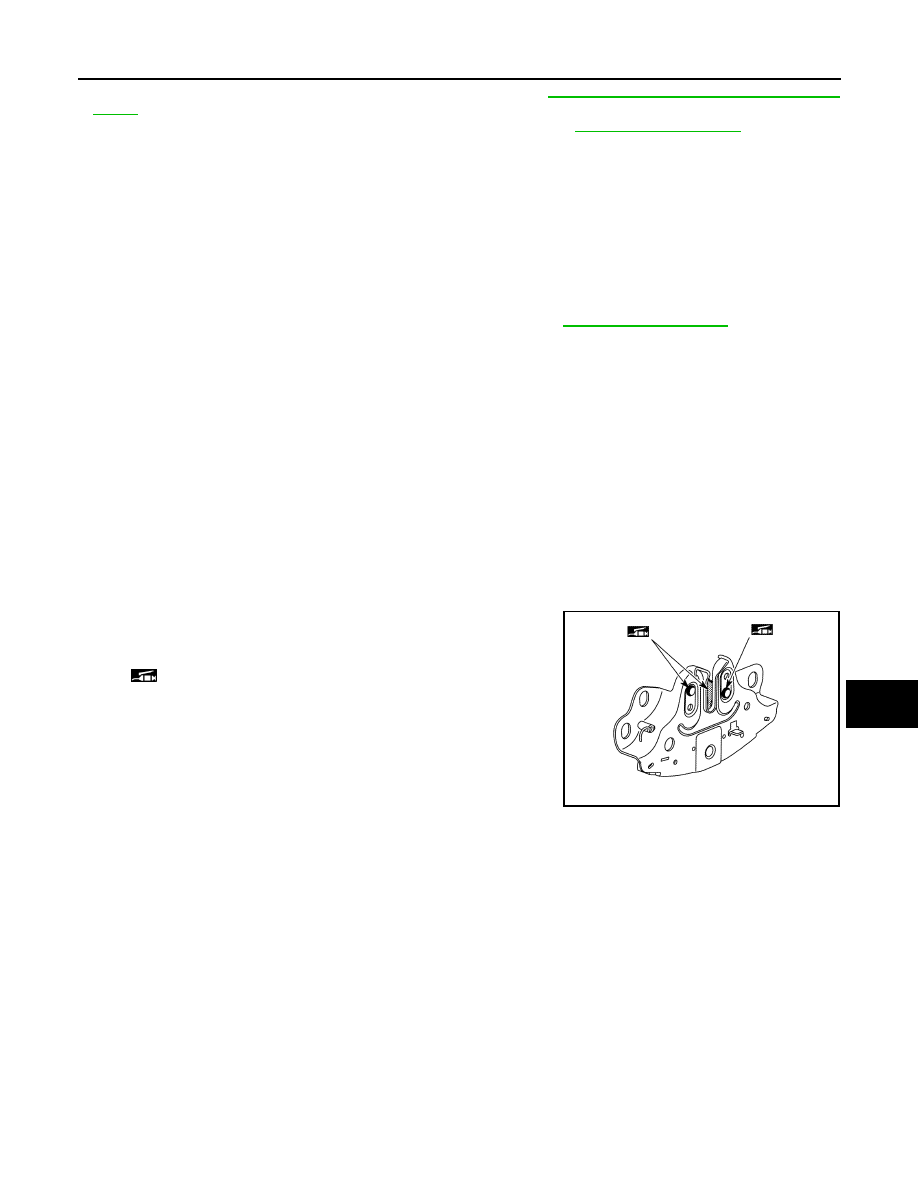
Check the hood lock lubrication condition. If necessary, apply
body grease to hood lock assembly.

: Body grease

JMKIB1164ZZ

DLK-182

< REMOVAL AND INSTALLATION >

[TYPE 1]

FRONT DOOR LOCK

FRONT DOOR LOCK

Exploded View

INFOID:0000000010434724

*

1

: Driver side only

1.

Outside handle escutcheon

2.

Outside handle grip

3.

Front gasket

4.

Inside handle

5.

cable clip

6.

Door lock assembly

7.

Key rod protector*

1

8.

Key rod*

1

9.

TORX bolt

10. Outside handle bracket

11. Rear gasket

: Pawl

: Vehicle front

: Always replace after every disassembly.

: N·m (kg-m, in-lb)

: Body grease

JMKIB3252GB

FRONT DOOR LOCK

DLK-183

< REMOVAL AND INSTALLATION >

[TYPE 1]

C

D

E

F

G

H

I

J

L

M

A

B

DLK

N

O

P

DOOR LOCK

DOOR LOCK : Removal and Installation

INFOID:0000000010434725

REMOVAL

1.

Disconnect inside handle cable from inside handle. Refer to 

DLK-183, "INSIDE HANDLE : Removal and

Installation"

.

2.

Disconnect outside handle cable from outside handle bracket. Refer to 

DLK-183, "OUTSIDE HANDLE :

Removal and Installation"

.

3.

Disconnect door lock assembly harness connector.

4.

Remove door lock assembly screws, and then remove door lock assembly.

INSTALLATION

Note the following items, and install in the reverse order of removal.

CAUTION:

• Never reuse door lock assembly screw. Always replace it with a new one when it is removed.
• Check door lock cable is properly engaged with outside handle bracket.
• When installing key rod, rotate key rod holder until a click is felt.
• Check door lock assembly for poor lubrication. Refer to 

DLK-183, "DOOR LOCK : Inspection"

• Check door open/close, lock/unlock operation after installation. 

DOOR LOCK : Inspection

INFOID:0000000010434726

Check door lock assembly for poor lubrication. Apply body grease if
necessary.

INSIDE HANDLE

INSIDE HANDLE : Removal and Installation

INFOID:0000000010434727

REMOVAL

1.

Remove front door finisher. Refer to 

INT-12, "FRONT DOOR FINISHER : Removal and Installation"

.

2.

Remove inside handle mounting bolt.

3.

Disengage inside handle from door panel while sliding inside handle toward vehicle rear, and then sepa-
rate inside handle.

4.

Disconnect inside handle cable, and then remove inside handle.

INSTALLATION

Note the following item, and install in the reverse order of removal.

CAUTION:

Check door open/close, lock/unlock operation after installation.

OUTSIDE HANDLE

OUTSIDE HANDLE : Removal and Installation

INFOID:0000000010434728

REMOVAL

1.

Fully close the front door glass.

2.

Remove front door finisher. Refer to 

INT-12, "FRONT DOOR FINISHER : Removal and Installation"

.

3.

Remove sealing screen.

: Body grease

JMKIA8534ZZ

DLK-184

< REMOVAL AND INSTALLATION >

[TYPE 1]

FRONT DOOR LOCK

NOTE:
Cut the butyl-tape so that some parts of the butyl-tape do not remain on the sealing screen, if the sealing
screen is reused.

4.

Remove front door glass rear run. Refer to 

GW-23, "Removal and Installation"

.

5.

Remove key rod protector mounting bolts, and then remove key rod protector.

6.

Disengage outside handle cable from cable clip.

7.

Disengage rod holder, and then disconnect key rod from door lock assembly. (Driver side only)

8.

Disconnect outside handle harness connector.

9.

Remove grommet (1) of door side. Loosen, through grommet hole, TORX bolt (2) that fixes outside handle
escutcheon.

10. While pulling outside handle (1)according to the numerical order

1

2 indicated by arrows as shown in the figure, remove outside

handle escutcheon (2).

11. While pulling outside handle (1) according to the numerical order

1

2 indicated by arrows as shown in the figure, slide toward

rear of vehicle to remove outside handle.

12. Remove front gasket (1) and rear gasket (2).

JMKIB0585ZZ

JMKIA0441ZZ

JMKIA2948ZZ

JMKIB2240ZZ


Content   ..  1226  1227  1228  1229   ..