Nissan Juke F15. Manual - part 906
INT-28
< REMOVAL AND INSTALLATION >
HEADLINING
CAUTION:
• When removing, always use a remover tool that is made of plastic.
• Never damage the body.
1. Remove front pillar garnish (LH and RH). Refer to
INT-18, "FRONT PILLAR GARNISH : Removal and
.
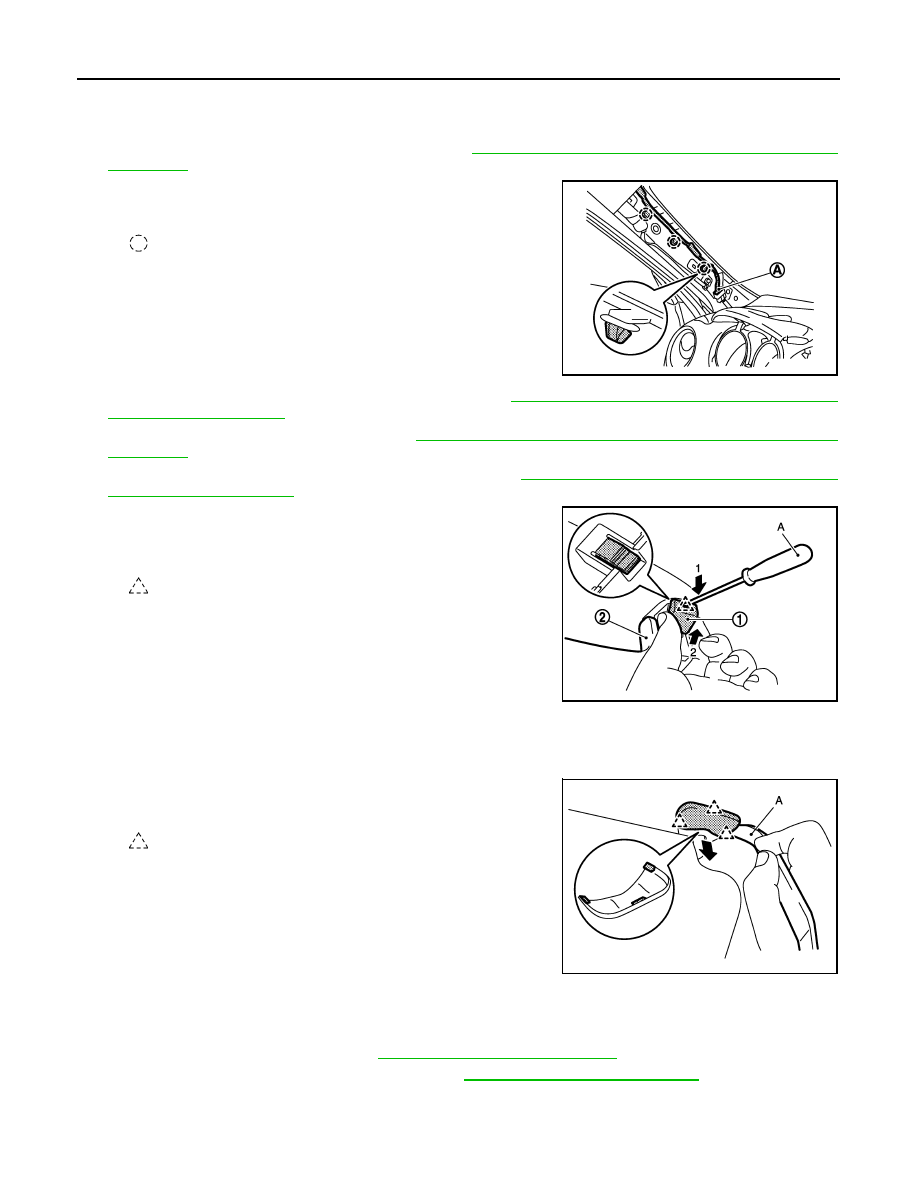
2. Disconnect harness connector (A) from headlining and harness
clips
3. Remove center pillar upper garnish (LH and RH). Refer to
INT-22, "CENTER PILLAR UPPER GARNISH :
.
4. Remove back door weather-strip. Refer to
DLK-152, "BACK DOOR WEATHER-STRIP : Removal and
(with Intelligent Key System).
5. Remove luggage side upper finisher (LH and RH). Refer to
INT-36, "LUGGAGE SIDE UPPER FINISHER
.
6. Remove all assist grips.
1. Disengage pawl of assist grip clip (1) using a remover tool
(A). Slide assist grip clip forward and remove it.
2. Slide assist grip (2) forward and remove it.
3. Remove metal clips.
7. Remove sun visor assembly (LH and RH).
1. Disengage sun visor cover fixing pawls with a remover tool
(A), and then remove sun visor cover.
2. Remove sun visor assembly fixing screws, and then slide toward vehicle rear to remove sun visor
assembly.
8. Remove map lamp assembly. Refer to
INL-46, "Removal and Installation"
9. Remove front seat assembly (passenger). Refer to
SE-21, "Removal and Installation"
.
10. Remove sun visor holder (LH and RH).
: Clip
JMJIA4534ZZ
: Pawl
JMJIA4398ZZ
: Pawl
JMJIA4399ZZ