Nissan Tiida C11. Manual - part 929


  Главная      Nissan     Nissan Tiida C11 - Service Manual


поиск по сайту            


содержание   ..  927  928  929  930   ..


Nissan Tiida C11. Manual - part 929


INT-34

< ON-VEHICLE REPAIR >

HEADLINING

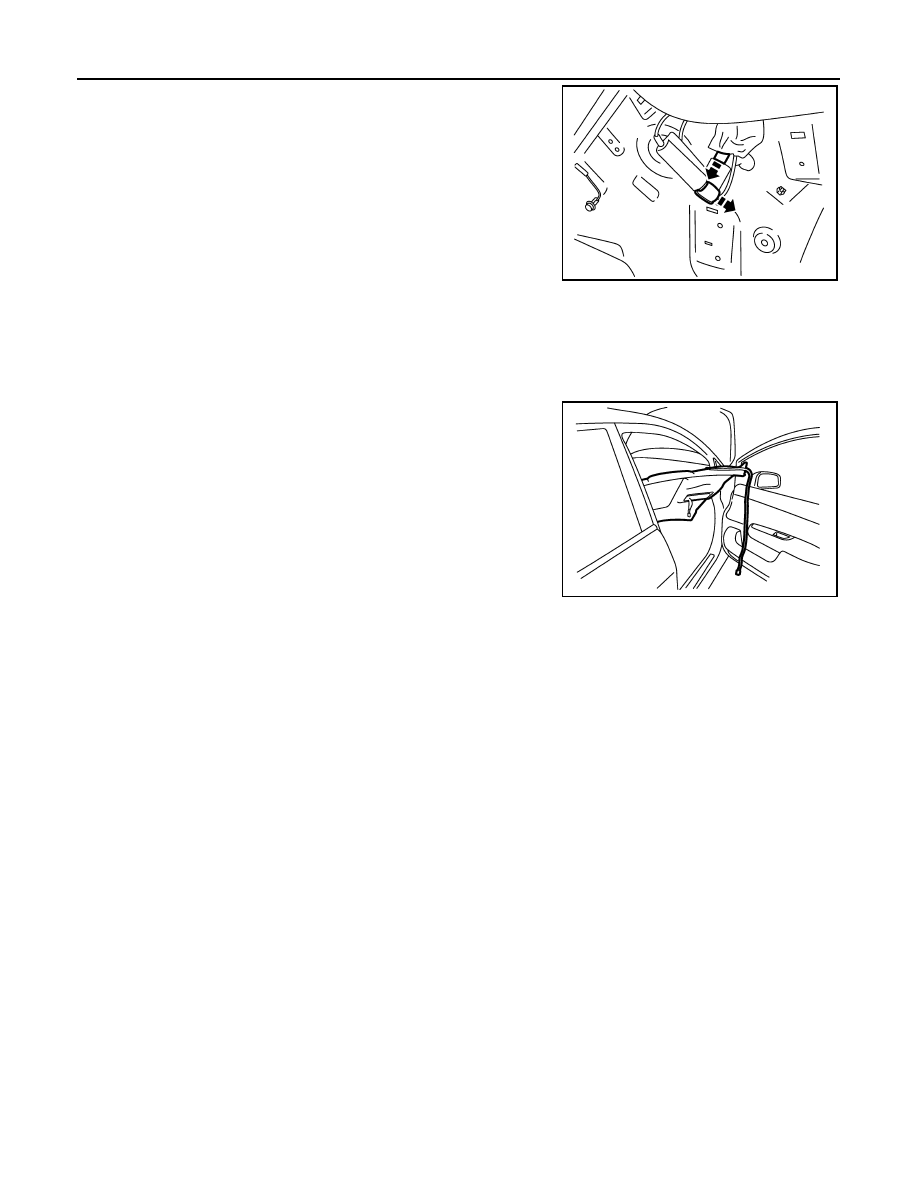
14. Disconnect antenna feeder cable near rear pillar finisher LH.

15. Disengage the dual lock fastener on the backside of headlining.

• Insert a suitable tool into the edge of dual lock fastener, then move the tool side to side horizontally to

release it.

CAUTION:

Excessive up and down force may cause roof panel damage.

16. Position the headlining so the front edge goes through the open-

ing of the right side front door.

17. Position the headlining so the rear edge goes through the open-

ing of the left rear door, then remove headlining.

CAUTION:

• 2 technicians should be used to avoid damage when remov-

ing or replacing headlining.

• During headlining removal and installation, cover the center

console finisher upper surface to prevent damage.

• Set A/T shift lever to the D position, and make a space to

remove front end of headlining right side.

• Do not bend headlining when removing.

INSTALLATION

Installation is in the reverse order of removal.

CAUTION:

Avoid headlining damage when installing by inserting rear clips first during assembly.

PIIB2586J

PIIB6049E

TRUNK ROOM TRIM & TRUNK LID FINISHER

INT-35

< ON-VEHICLE REPAIR >

C

D

E

F

G

H

I

K

L

M

A

B

INT

N

O

P

TRUNK ROOM TRIM & TRUNK LID FINISHER

Removal and Installation

INFOID:0000000001329058

REMOVAL

CAUTION:

• Insert a trim stick or suitable tool between panel on vehicle

and clips (as indicated with arrow) to release clips. 

• Be careful not to damage the body while prying to release

clips.

• Make sure clips are properly aligned in panel holes on body

when installing, then press them in completely. 

1.

Open trunk lid.

2.

Position the rear seat cushion to the forward most position, then
remove the rear seatback and seatback side RH/LH. Refer to

SE-18, "Removal and Installation"

.

3.

Release the clips, then remove the seatback finisher RH/LH.

4.

Lift and remove the trunk floor carpet.

1.

Trunk side finisher RH

2.

Seat back finisher RH (if equipped)

3.

Trunk floor carpet

4.

Seat back finisher LH (if equipped)

5.

Trunk side finisher LH

6.

Trunk rear plate

7.

Trunk lid finisher inner

A.

Clip C205

Vehicle front

AWJIA0063ZZ

SIIA0810E

INT-36

< ON-VEHICLE REPAIR >

TRUNK ROOM TRIM & TRUNK LID FINISHER

5.

Release the clips, then remove the trunk rear plate.

6.

Release the clips, then remove the trunk side finisher RH/LH.

7.

Release the clips and remove the trunk lid finisher inner from the trunk lid.

INSTALLATION

Installation is in the reverse order of removal.


содержание   ..  927  928  929  930   ..