содержание .. 1466 1467 1468 1469 ..
Nissan Tiida C11. Manual - part 1468
FRONT WASHER NOZZLE AND TUBE
WW-67
< ON-VEHICLE REPAIR >
C
D
E
F
G
H
I
J
K
M
A
B
WW
N
O
P
FRONT WASHER NOZZLE AND TUBE
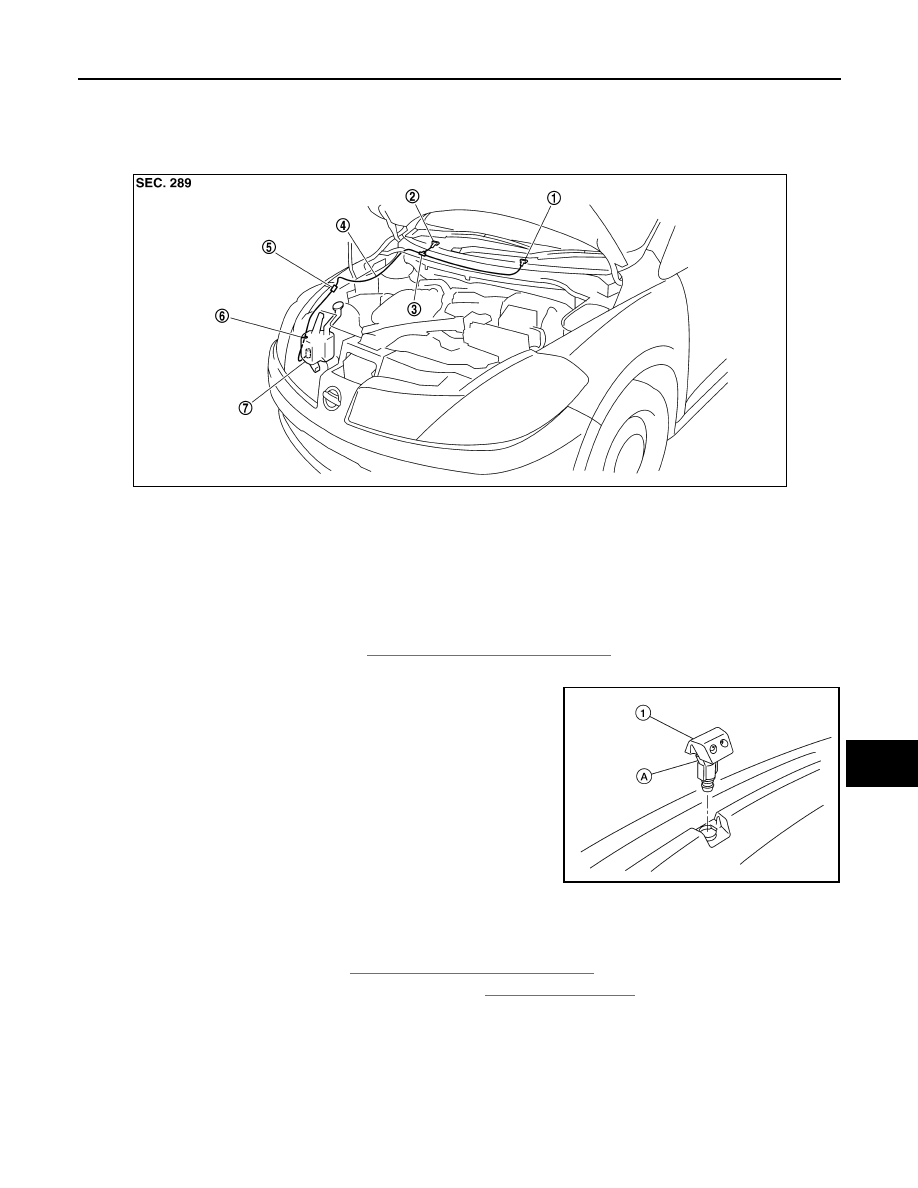
Washer Tube Layout
INFOID:0000000001396458
Removal and Installation
INFOID:0000000001404271
REMOVAL
1.
Remove the cowl top cover. Refer to
EXT-20, "Removal and Installation"
.
2.
Disconnect the washer tube from the front washer nozzle.
3.
While pressing pawl (A) on the reverse side of front washer noz-
zle (1), remove front washer nozzle (1) from cowl top cover.
INSTALLATION
1.
Attach the washer tube to the front washer nozzle.
2.
Install the front washer nozzle in the cowl top cover.
3.
Install the cowl top cover. Refer to
EXT-20, "Removal and Installation"
4.
Adjust the front washer nozzle spray pattern. Refer to
.
CAUTION:
The spray points are different from side to side, so install the left and right front washer nozzles in
the correct positions.
Inspection
INFOID:0000000001404272
CHECK VALVE INSPECTION
1.
Front washer nozzle (LH)
2.
Front washer nozzle (RH)
3.
Joint washer tube
4.
Washer tube
5.
Clip
6.
Clamp
7.
Washer tank
SKIB5664E
LKIA0939E