Mitsubishi L200 (2020 year). Manual in english - page 8
Auto Stop & Go (AS&G) system*
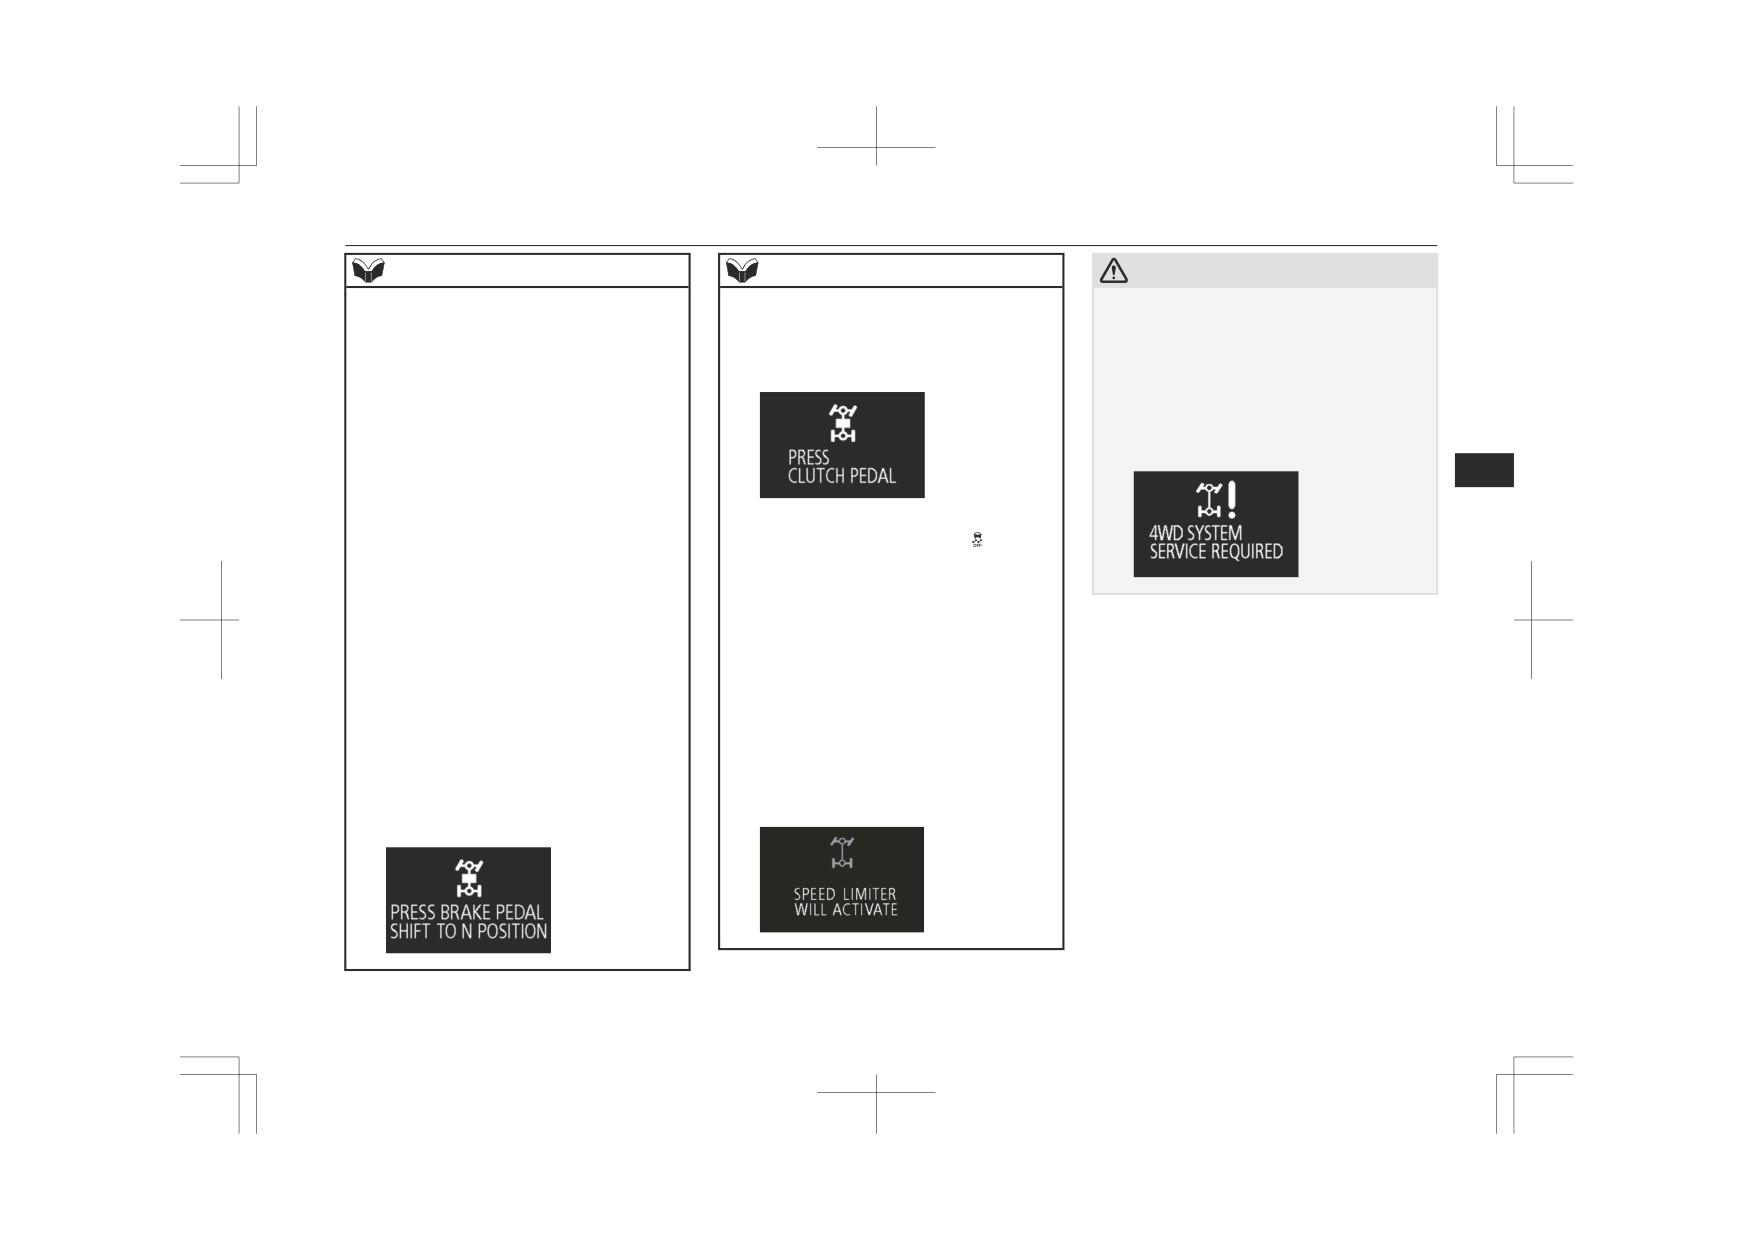
2. Depressing the brake pedal. The engine
CAUTION
NOTE
will stop automatically.
an unexpected accident might occur when
• After the engine restarts automatically, the
the engine restarts automatically.
vehicle speed has not exceeded approxi-
• Do not depress the accelerator pedal to
mately 5 km/h (3 mph).
race the engine while the vehicle is stop-
• After the engine start, approximately 30
ped (regardless of whether the engine is
seconds or more have not elapsed.
running or stopped).
• After the engine restarts automatically
• On vehicles with M/T, do not move the
and the vehicle stops again within 10 sec-
gearshift lever to a position other than the
onds.
“N” (Neutral) position.
• Engine coolant temperature is low.
6
If the gearshift lever is moved to a posi-
• Ambient temperature is low.
tion other than the “N” (Neutral) position,
• When the heater is operated, vehicle indi-
the
indicator display blinks and the
cator temperature is not still hot enough.
buzzer sounds.
• Air conditioning is operating and passen-
If the gearshift lever is returned to the “N”
ger compartment has not sufficiently
NOTE
(Neutral) position, the
indicator
cooled.
display stops blinking and the buzzer
• Demister switch is pressed.
z
When the engine is automatically stopped,
stops sounding. The engine will not re-
Refer to
“Demisting of the windscreen
changes will occur in the driving operations.
start if the gearshift lever is in a position
and door windows: For quick demisting”
Pay close attention to the following.
other than the “N” (Neutral) position.
on page 7-16.
• The brake booster becomes inoperative
and the pedal effort will increase.
• When the air conditioner is operated in
the AUTO mode where the temperature
If the vehicle is moving, press down the
NOTE
control is set to max. hot or max. cool (for
brake pedal harder than usual.
vehicles with automatic climate air condi-
z
In the following cases, the
indicator
tioning).
display will blink to inform the driver and
CAUTION
• When the diesel particulate filter (DPF)
the engine will not stop automatically.
automatically burns away trapped particu-
When the engine is automatically stopped,
• Driver’s seat belt is not fastened.
z
late matter (PM).
do not attempt to exit the vehicle. Because
• Driver’s door is opened.
• Electric power consumption is high, such
the engine restarts automatically when the
• Bonnet is opened.
as when the rear window demister or oth-
driver’s seat belt is unfastened or the driver’s
z
In the following cases, the
indicator
er electrical components are operating or
door is opened, an unexpected accident
display will turn off and the engine will not
the blower speed is set to a high setting.
might occur when the vehicle starts moving.
stop automatically.
• Battery voltage or battery performance is
z
Observe the following precautions when the
low.
engine is stopped automatically. Otherwise,
6-26
Starting and driving
Auto Stop & Go (AS&G) system*
NOTE
NOTE
NOTE
• "Check engine warning lamp" is illumina-
z If the AS&G system operates while the air
z
On vehicles with M/T, do not move the gear-
ted or the
indicator display is blink-
conditioner is operating, both the engine and
shift lever to a position other than the “N”
ing.
the air conditioning compressor will stop.
(Neutral) position or do not release the
• The selector lever is other than in the “D”
Therefore, only the blower will operate, the
clutch pedal while the engine is restarting
(DRIVE) position (A/T)
windows may start to fog up. If this occurs,
automatically. The starter motor will stop
• ASTC operation indicator and ASTC OFF
press the demister switch to restart the en-
and the engine will not restart automatically.
indicator is turn on (A/T)
gine.
z
If the engine does not restart automatically
• ABS warning lamp is turned on
Refer to “Demister switch” on page 7-16.
or if the engine stalls, the charge warning
• A/T warning lamp will turn on/warning
z If the windows become fogged up each time
lamp and check engine warning lamp will il-
6
display will display (A/T)
the engine is stopped, we recommend you to
luminate.
deactivate the AS&G system by pressing the
If this occurs,
• On 4WD vehicles, the drive mode-selec-
tor in “4H” or “4L” (Easy Select 4WD),
“AS&G OFF” switch. Refer to “To deacti-
[On vehicles with M/T]
vate” on page 6-28.
The engine will not restart even if the clutch
“4HLc” or “4LLc” (Super Select 4WD II)
• The Hill Descent Control is operating (if
z If the air conditioner is operating, set the
pedal is depressed again. While depressing
temperature control higher to lengthen the
the brake pedal, fully depress the clutch ped-
so equipped)
In the following cases, the engine will not
time that the engine is stopped automatical-
al and turn the ignition switch to the
z
ly.
“START” position or press the engine switch
stop automatically even if the
indica-
to start the engine.
tor display turn on.
[On vehicles with A/T]
• Push the accelerator pedal
Automatically restarting the
The engine will not restart even if release the
• The brake booster vacuum pressure is
engine
brake pedal again. Also, the
indicator
low.
display blinks, and the buzzer sounds.
• Brake pedal is not sufficiently depressed
On vehicles with M/T, depress the clutch
While depressing the brake pedal, move the
(A/T)
pedal while the gearshift lever is in the “N”
selector lever to the “P” (Park) or “N” (Neu-
• The steering wheel is operated.
(Neutral) position. The
indicator dis-
tral) position and turn the ignition switch to
• Parking brake operates (A/T)
play turns off and the engine restarts auto-
the “START” position or press the engine
• Parking on steep hill
matically.
switch to start the engine. After the engine is
z
Do not rest your foot on the clutch pedal
started, the buzzer stops.
On vehicles with A/T, Release the brake ped-
while driving because this will cause detec-
But the
indicator display is blinking
al. The
indicator display turns off and
tion of clutch pedal switch malfunction and
until turning the ignition switch to the
the engine restarts automatically.
blinking of
indicator display, and
“LOCK” position or putting the operation
AS&G system will not operate.
mode in OFF.
For details, refer to “Starting and stopping
the engine” on page 6-17.
Starting and driving
6-27
Auto Stop & Go (AS&G) system*
NOTE
CAUTION
NOTE
z
The vehicles with A/T have the function of
• When the air conditioner is operated in
• On vehicles with M/T, while the engine is
preventing the unexpected start of the vehi-
AUTO mode where the temperature con-
stopped automatically,
“AS&G OFF”
cle due to creeping, etc., by temporarily
trol is set to the max. hot or the max. cool
switch is pressed to
deactivate the
maintain the braking force applied when the
(for vehicles with automatic climate air
“AS&G” system.
engine restarts automatically.
conditioning)
• Bonnet is opened.
This function is deactivated if the selector
• When the air conditioner is ON, the pas-
When the engine restarts automatically, the
z
lever is set into
“N” (Neutral) position.
senger compartment temperature rises and
audio volume may temporarily decrease.
While the function is activated, you might
the air conditioning compressor operates
This does not indicate a malfunction.
hear operation noise from under the vehicle
to lower the temperature.
z
While the engine is stopped automatically,
6
or feel a shock from the brake pedal.
• Demister switch is pressed.
the air volume change of the air conditioner
This indicates that the system is operating
Refer to “For quick demisting” on page
may temporarily be experienced. This does
normally. It does not indicate a malfunction.
7-16.
not indicate a malfunction.
• Electric power consumption is high, such
z
On vehicles with A/T, while the engine is
as when the rear window demister or oth-
stopped automatically, if the selector lever is
CAUTION
er electrical components are operating or
moved to the “P” (PARK) position quickly
the blower speed is set to a high setting.
with the brake pedal firmly depressed, the
z
In the following cases, the engine will restart
• Battery voltage or battery performance is
engine does not restart automatically even if
automatically even if the engine was stopped
low.
you release the brake pedal. If this occurs,
by the AS&G system. Pay attention, other-
• Move the selector lever to the “R” (RE-
the
indicator display will blink to in-
wise an unexpected accident might occur
VERSE) position (A/T)
form the driver.
when the engine restarts.
• Move the selector lever from the
“N”
If you want to restart the engine, depress the
• Vehicle speed is 3 km/h (2 mph) or higher
(NEUTRAL) to “D” (DRIVE) position
brake pedal again.
when coasting down a slope.
(A/T)
If you want to put the operation mode in
• Brake booster vacuum pressure is low be-
• Operate the steering wheel.
OFF, press the engine switch without de-
cause the brake pedal is depressed repeat-
• Driver’s seat belt is unfastened.
pressing the brake pedal. (Vehicles equipped
edly or depressed harder than usual.
• Driver’s door is opened.
with the keyless operation system)
• Engine coolant temperature is low.
• When the air conditioner is operated by
• Press the Hill Descent Control switch. (if
pressing the air conditioning switch.
so equipped)
To deactivate
• When the preset temperature of the air
conditioner is changed significantly.
The AS&G system is automatically activated
NOTE
when the ignition switch is turned to the
z
In the following cases, the engine will not
“ON” position or the operation mode put in
restart automatically.
ON. You can deactivate the system by press-
ing the “AS&G OFF” switch.
6-28
Starting and driving

Manual transmission*
When the AS&G system is deactivated, the
CAUTION
indicator display will be turned on.
z
Do not put the gearshift lever into the re-
To reactivate the AS&G system, press the
verse position while the vehicle is moving
“AS&G OFF” switch; the
indicator dis-
forward. Doing so could damage the trans-
play will turn off.
mission.
NOTE
Do not rest your foot on the clutch pedal
z
Type 1
while driving as this will cause premature
z This indicator display will also turn on for a
clutch wear or damage.
few seconds when the ignition switch is
turned to the “ON” position or the operation
z
Do not coast in the “N” (Neutral) position.
mode put in ON.
z
Do not use the gearshift lever as a hand rest,
6
because this can result in premature wear of
the transmission shift forks.
If the
indication lamp
Quick or slight clutch engagement made
z
blinks while driving
while the engine is running at high speed
will cause damage to the clutch and trans-
If the
indicator display blinks, the
mission because the traction force is very
AS&G system is malfunctioning and will not
great.
operate.
We recommend you to consult a
Type 2
NOTE
MITSUBISHI MOTORS Authorized Service
Point.
z
During cold weather, shifting may be diffi-
cult until the transmission lubricant has
warmed up. This is normal and not harmful
Manual transmission*
to the transmission.
z
If it is hard to shift into
1st, depress the
The shift pattern is shown on the gearshift
clutch pedal again; the shift will then be eas-
lever knob. Press the clutch pedal all the way
ier to make.
down while shifting gears. To start off, press
z
In case of hot weather condition or long time
the clutch pedal all the way down and shift
cruising with high speed, a speed limitation
into the 1st or “R” (Reverse) position, operat-
function may work to restrict the oil temper-
ature rising of the manual transmission. Af-
ing the gearshift lever slowly. Then gradually
AS&G OFF indicator display
ter the oil temperature drops to the appropri-
release the clutch pedal while depressing the
ate level, the speed limitation function is
accelerator pedal.
cancelled.
Starting and driving
6-29

Manual transmission*
Moving the gearshift lever to
Vehicles with 2WD
NOTE
the “R” (Reverse) position
z
The gearshift indicator shows recommended
Shift point
Speed limit
gearshift points for fuel-efficient driving. It
Depress and hold the gearshift lever to the
1st gear
30 km/h
shows a
/
when an upshift is rec-
“R” (Reverse) position.
ommended.
2nd gear
60 km/h
Indication lamp
3rd gear
95 km/h
4th gear
140 km/h
5th gear
170 km/h
6
Use 6th gear whenever vehicle speed allows,
Indicator display
for maximum fuel economy.
Vehicles with Easy Select 4WD
4N14
Speed limit
Shift
CAUTION
point
2H
4H
4L
z
Do not depress the gearshift lever when
1st gear
30 km/h
30 km/h
10 km/h
moving it to any position other than the “R”
(Reverse) position. If you always depress the
2nd gear
60 km/h
60 km/h
20 km/h
gearshift lever when moving it, you could
unintentionally move the gearshift lever to
3rd gear
95 km/h
95 km/h
35 km/h
the “R” (Reverse) position and cause an ac-
4th gear
140 km/h
cident and/or a transmission fault.
110 km/h
50 km/h
5th gear
170 km/h
Possible driving speed
Use 6th gear whenever vehicle speed allows,
for maximum fuel economy.
Avoid shifting down at high speed, as this
4N15
may cause excessive engine speed (the tach-
ometer needle into the red zone) and damage
the engine.
6-30
Starting and driving
Automatic transmission Sports Mode 6A/T*
Speed limit
Speed limit
The individual gears are selected automati-
Shift point
cally, depending on the speed of the vehicle
2H, 4H
4L
Shift point
2H, 4H,
4LLc
and the position of the accelerator pedal.
4HLc
1st gear
30 km/h
10 km/h
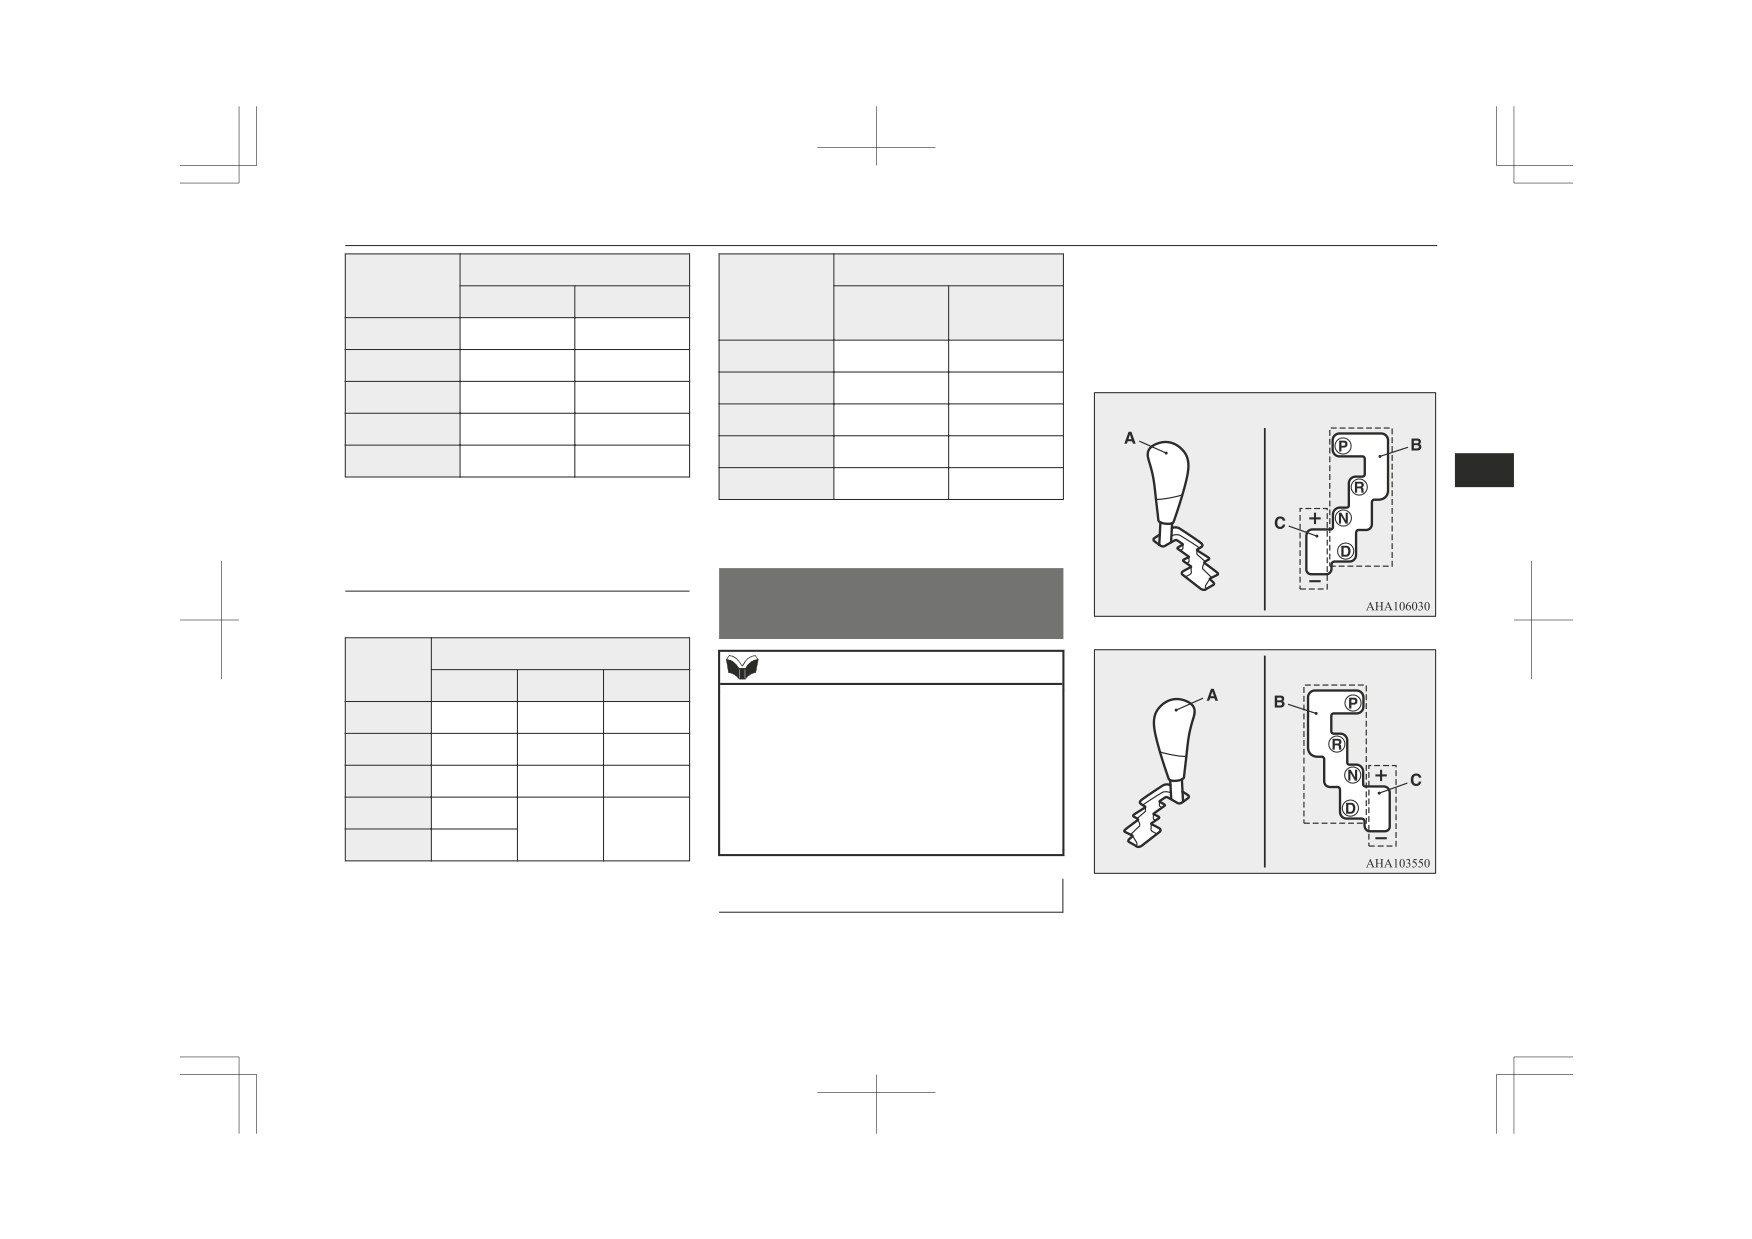
The selector lever (A) has 2 gates; the main
1st gear
35 km/h
10 km/h
gate (B) and the manual gate (C).
2nd gear
60 km/h
20 km/h
2nd gear
65 km/h
25 km/h
3rd gear
100 km/h
35 km/h
LHD
3rd gear
105 km/h
40 km/h
4th gear
140 km/h
55 km/h
4th gear
150 km/h
55 km/h
5th gear
165 km/h
70 km/h
6
5th gear
170 km/h
75 km/h
Use 6th gear whenever vehicle speed allows,
for maximum fuel economy.
Use 6th gear whenever vehicle speed allows,
for maximum fuel economy.
Vehicles with Super Select 4WD
II
Automatic transmission
4N14
Sports Mode 6A/T*
Speed limit
Shift
NOTE
RHD
point
2H, 4H
4HLc
4LLc
z
During running-in period or immediately af-
1st gear
30 km/h
30 km/h
10 km/h
ter reconnection of the battery cable, there
may be a case where gear shifts are not
2nd gear
60 km/h
60 km/h
20 km/h
made smoothly. This does not indicate a
3rd gear
100 km/h
100 km/h
35 km/h
faulty transmission.
Gear shifts will become smooth after the
4th gear
140 km/h
transmission has been shifted several times
110 km/h
50 km/h
by the electronic control system.
5th gear
170 km/h
Use 6th gear whenever vehicle speed allows,
Selector lever operation
for maximum fuel economy.
The transmission has 6 forward gears and 1
4N15
reverse gear.
Starting and driving
6-31

Automatic transmission Sports Mode 6A/T*
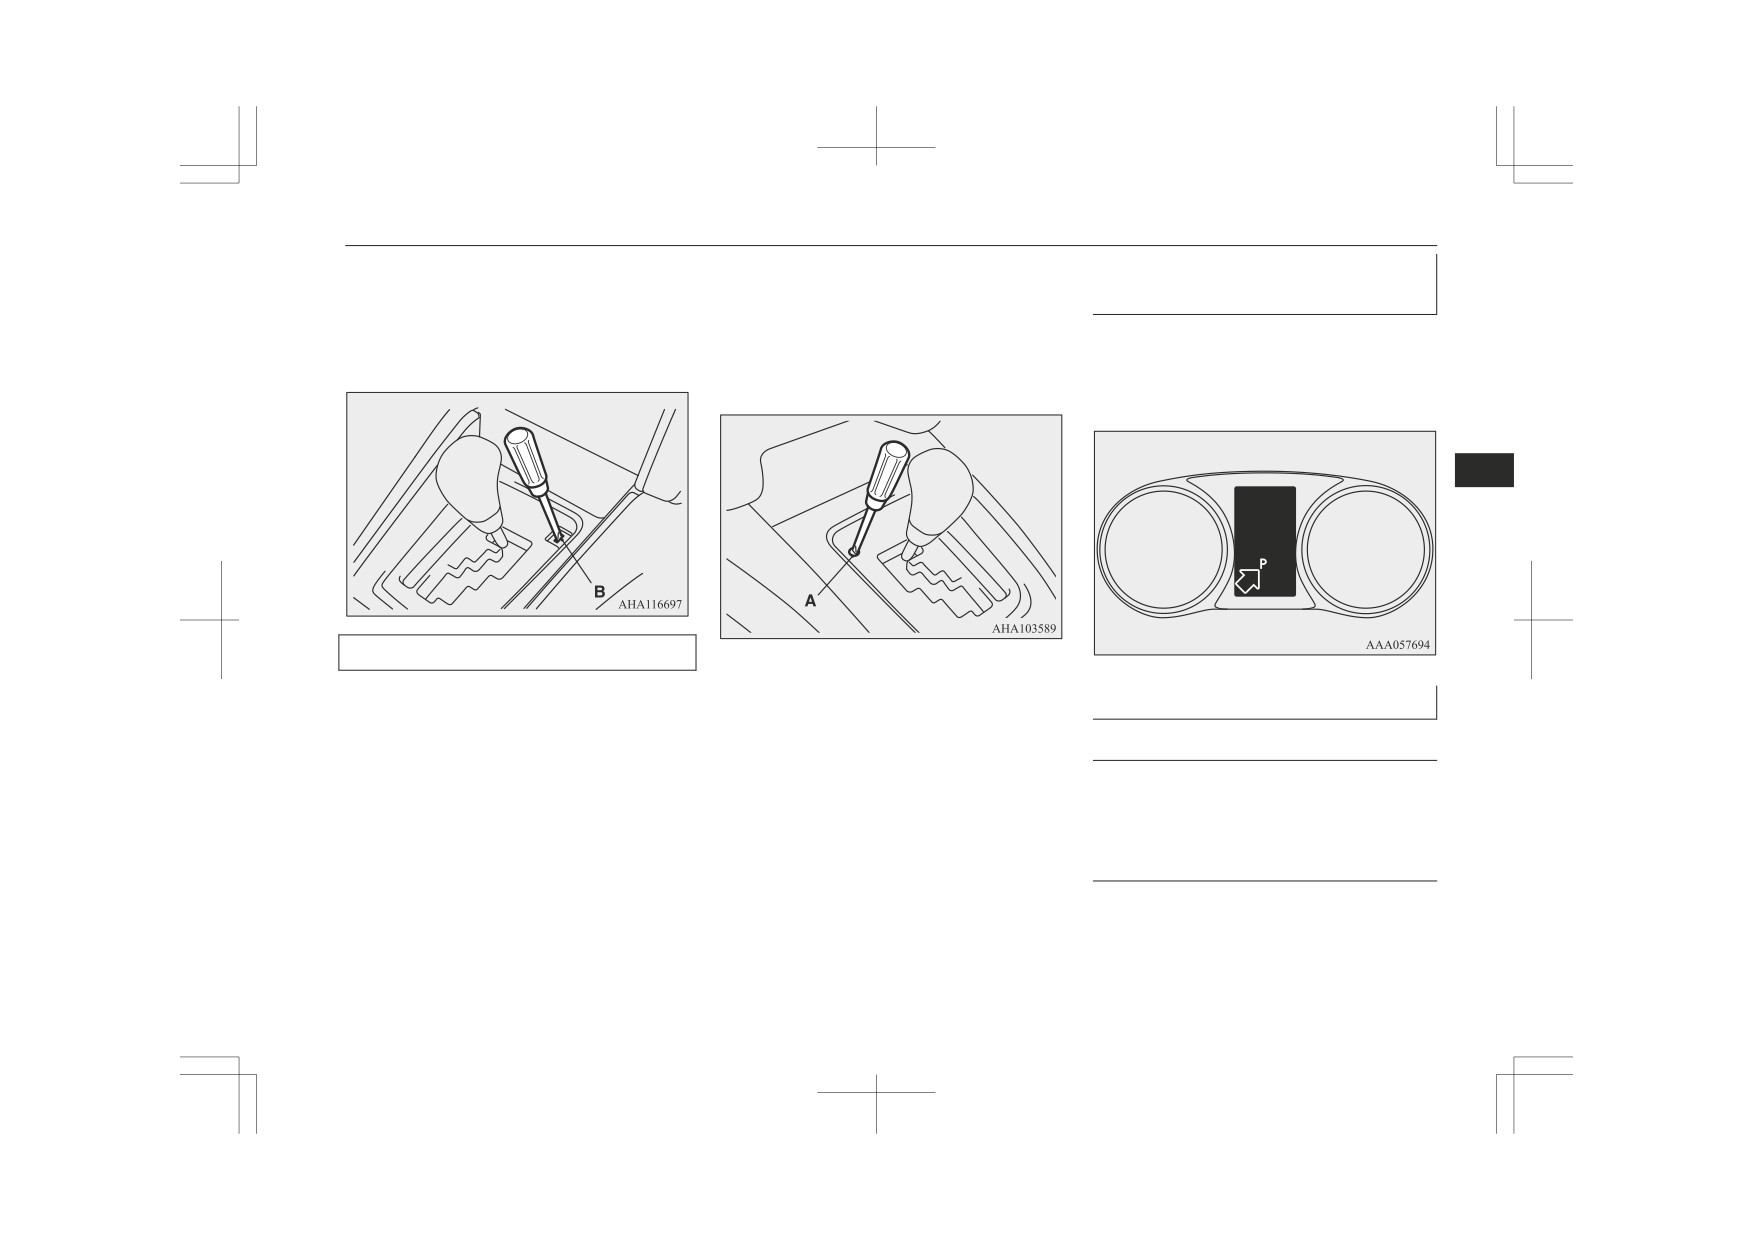
3. Insert a straight blade (or minus) screw-
LHD
NOTE
driver with a cloth over its tip into notch
z To avoid erroneous operation, move the se-
(A) or the cover. Pry gently as shown to
lector lever firmly into each position and
remove the cover.
briefly hold it there. Always check the posi-
tion shown by the selector lever position dis-
play after moving the selector lever.
If the brake pedal is not depressed and held,
z
the shift-lock device activates to prevent the
RHD
selector lever from being moved from the
“P” (PARK) position.
6
When the selector lever cannot
be shifted from the “P” (Park)
position
While depressing the brake pedal,
When the selector lever cannot be shifted
from the “P” (PARK) position to another po-
move the selector lever through
4. Depress the brake pedal with the right
sition while the brake pedal is pressed and
the gate.
foot.
held down with the ignition switch at the
Move the selector lever through
“ON” position or the operation mode in ON,
the gate.
the battery may be flat or the shift-lock
mechanism may be malfunctioning. Immedi-
ately have your vehicle checked by a
WARNING
MITSUBISHI MOTORS Authorized Service
z
Always depress the brake pedal when
Point.
shifting the selector lever into a gear from
If you need to move the vehicle, shift the se-
the “P” (PARK) or “N” (NEUTRAL) po-
lector lever as follows.
sition.
Never put your foot on the accelerator
pedal while shifting the selector lever
For LHD vehicles
from the
“P”
(PARK) or “N” (NEU-
1. Make sure the parking brake is applied.
TRAL) position.
2. Stop the engine if it is running.
6-32
Starting and driving
Automatic transmission Sports Mode 6A/T*
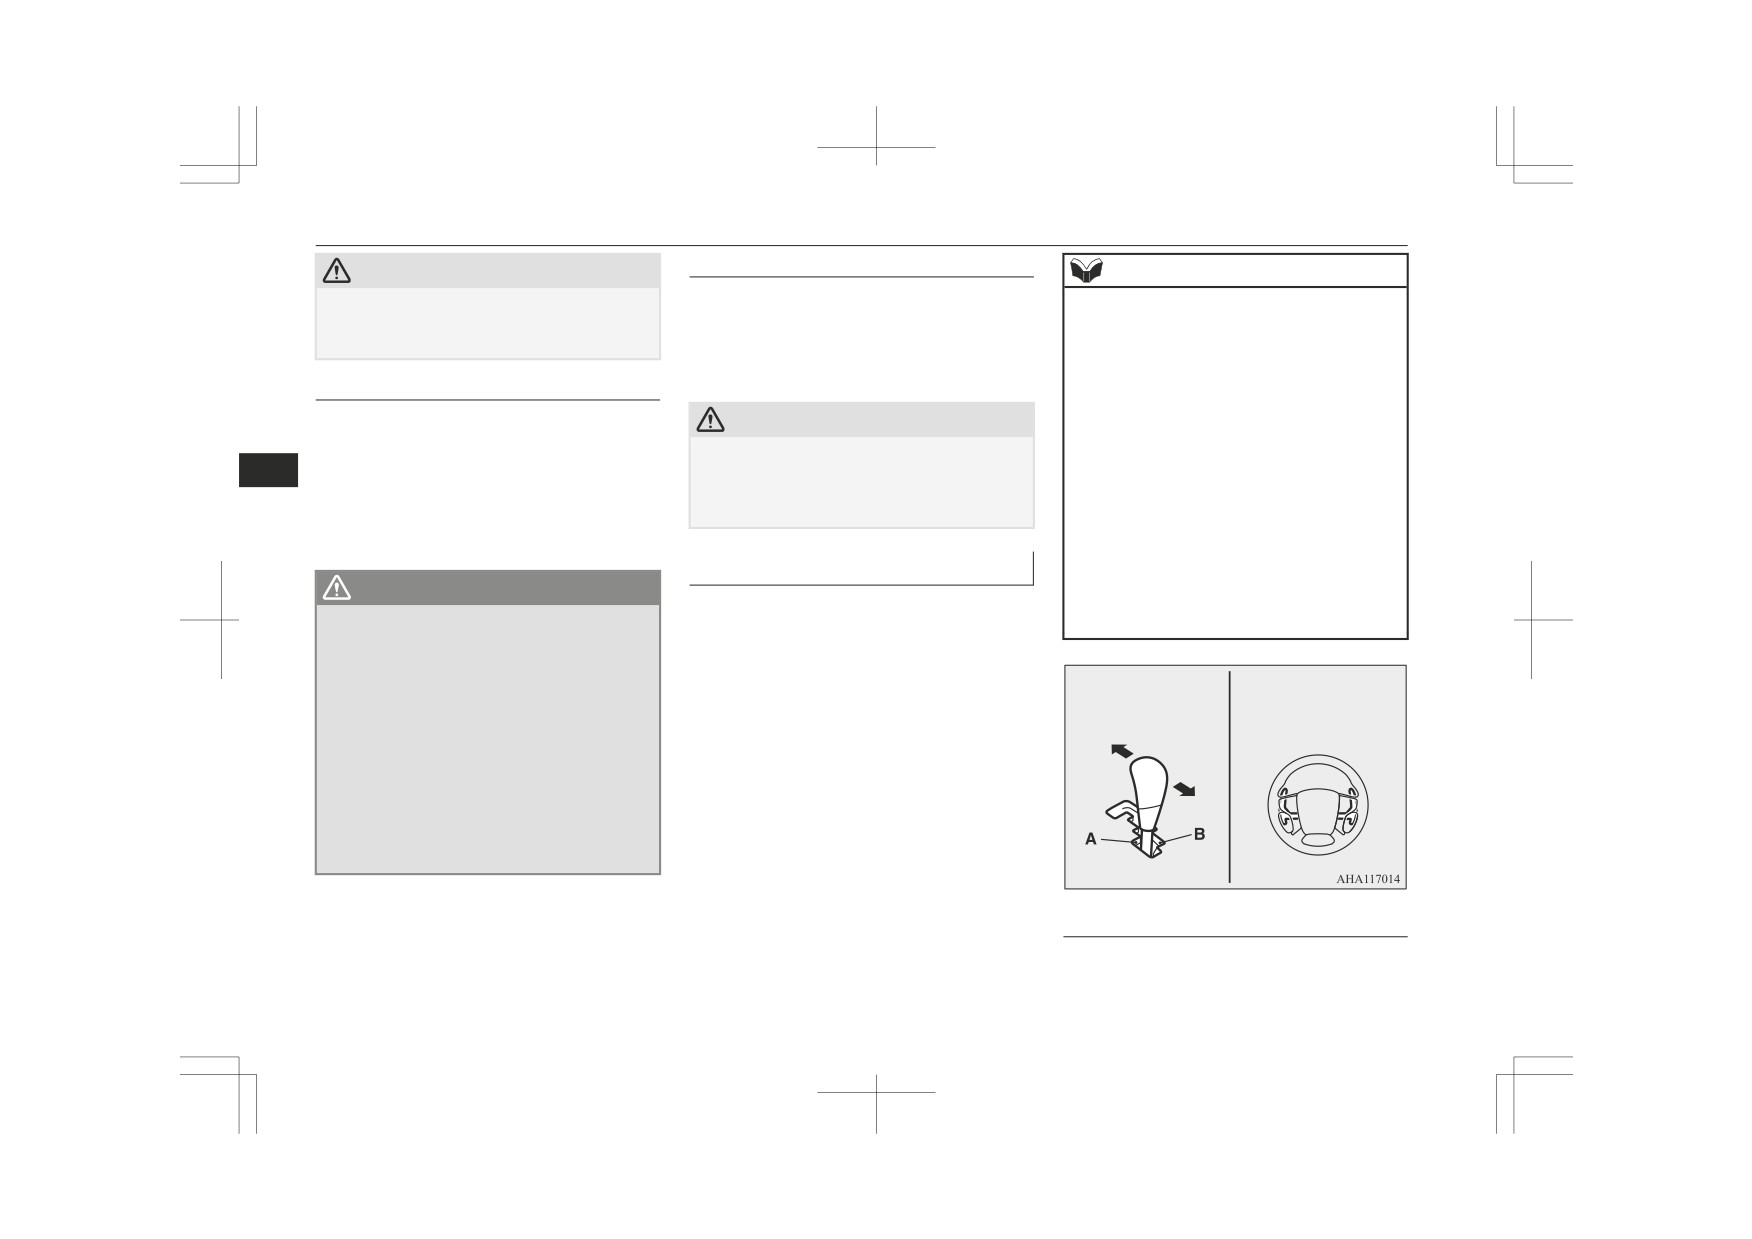
5. Insert a straight blade (or minus) screw-
4. Insert a straight blade (or minus) screw-
Selector lever position indica-
driver in the shiftlock release hole (B).
driver in the shift-lock release hole (A).
tor display
Shift the selector lever to the “N” (Neu-
Shift the selector lever to the “N” (NEU-
When the ignition switch is turned to the
tral) position while pressing the straight
TRAL) position while pressing the
“ON” position or the operation mode is put in
blade (or minus) screwdriver down
straight blade
(or minus) screwdriver
ON, the position of the selector lever is indi-
down.
cated in the multi information display.
6
For RHD vehicles
1. Make sure the parking brake is applied.
2. Stop the engine if it is running.
Selector lever positions
3. Depress the brake pedal with the right
foot.
“P” PARK
This position locks the transmission to pre-
vent the vehicle from moving. The engine
can be started in this position.
“R” REVERSE
This position is to back up.
Starting and driving
6-33
Automatic transmission Sports Mode 6A/T*
“D” DRIVE
CAUTION
NOTE
This position is used for most city and high-
z Never shift into the “P” (PARK) or “R” (RE-
z If your vehicle is equipped with shift pad-
VERSE) position while the vehicle is in mo-
way driving. The transmission will automati-
dles, you can shift into sports mode with
tion to avoid a transmission damage.
cally change its gear depending on road and
shift paddles when the selector lever is in the
driving conditions.
main gate as well. Also, you can return to
the “D” range operation in any of following
“N” NEUTRAL
ways.
At this position the transmission is disengag-
CAUTION
When returning to “D” range operation, the
ed. It is the same as the neutral position on a
selector lever position display will change to
z To prevent transmission damage, never shift
“D” (DRIVE) position.
6
manual transmission, and should only be
into the “D” (Drive) position from the “R”
• Pull the + (SHIFT UP) side shift paddle
used when the vehicle is stationary for an ex-
(Reverse) position while the vehicle is in
forward (towards the driver) for over 2
tended length of time during driving, such as
motion.
seconds.
in a traffic jam.
• Stop the vehicle.
Sport mode
• Push the selector lever from the
“D”
(DRIVE) position into the manual gate
WARNING
Whether the vehicle is stationary or in mo-
(A) and push the selector lever back into
z Never move the selector lever to the “N”
tion, sports mode is selected by gently push-
the main gate (B).
(Neutral) position while driving. A serious
ing the selector lever from the “D” (DRIVE)
accident could occur since you could acci-
position into the manual gate (A).
dentally move the lever into the
“P”
To return to “D” range operation, gently push
(Park) or “R” (Reverse) position or you
the selector lever back into the main gate (B).
will lose engine braking.
SHIFT
SHIFT
SHIFT
UP
SHIFT
DOWN
UP
z On a gradient, the engine should be star-
In sports mode, gear shifts can be made rap-
DOWN
ted in the “P” (PARK) position, not in the
“N” (NEUTRAL) position.
idly simply by moving the selector lever
z To prevent rolling, always keep your foot
backward and forward. For vehicles equipped
on the brake pedal when the vehicle is in
with the shift paddles, shift paddles at the
“N” (Neutral) position, or when shifting
steering wheel can also be used to perform
into or out of “N” (Neutral) position.
the gearshift. In contrast to a manual trans-
mission, the sports mode allows gear shifts
with the accelerator pedal depressed.
+ (SHIFT UP)
The transmission shifts up by one gear with
each operation.
6-34
Starting and driving

Automatic transmission Sports Mode 6A/T*
- (SHIFT DOWN)
NOTE
Sports mode indicator
The transmission shifts down by one gear
To maintain good running performance, the
In sports mode, the currently selected posi-
z
with each operation.
transmission may refuse to perform an up-
tion is indicated by the indicator (A) shown
shift when the selector lever or the shift pad-
on the instrument panel.
dles are operated to the “+ (SHIFT UP)” po-
CAUTION
sition at certain vehicle speeds. Also, to pre-
vent over-revving of the engine, the trans-
z In sports mode, the driver must execute up-
mission may refuse to perform a downshift
ward shifts in accordance with prevailing
road conditions, taking care to keep the en-
when the selector lever or the shift paddles
are operated to the “— (SHIFT DOWN)”
gine speed below the red zone.
6
position at certain vehicle speeds. When this
z Repeated continuous operation of the selec-
happens, a buzzer sounds to indicate that a
tor lever or the shift paddles will continuous-
ly switch shift position.
downshift is not going to take place.
z
Downward shifts are made automatically
z For vehicles equipped with the shift paddles,
do not use the left- and right-hand shift pad-
when the vehicle slows down. When the ve-
dles at the same time. Doing so could cause
hicle stops, 1st gear is automatically selected.
a shift of gear ratio that you do not expect.
z
When driving away on a slippery road, push
the selector lever forward into the
“+
(SHIFT UP)” position. This cause the trans-
When a malfunction occurs in
NOTE
mission to shift into the 2nd gear which is
the A/T
better for smooth driving away on a slippery
z Only the 6 forward gears can be selected. To
road. Push the selector lever to the
“—
There could be a system malfunction if the
reverse or park the vehicle, move the selec-
(SHIFT DOWN)” side to shift back to the 1st
warning display or the warning display is
tor lever to the “R” (Reverse) or “P” (Park)
gear.
displayed on the information screen in the
position as required.
multi information display.
or
NOTE
z The buzzer may sound at the time of
warning display appears.
Starting and driving
6-35
Automatic transmission Sports Mode 6A/T*
NOTE
CAUTION
Operation of the A/T
z
The selector lever position indicator blinks
z
If malfunction occurs in the A/T while driv-
at the time of warning display appears.
ing, the
warning display or the warning
CAUTION
z
The “A” indicator on the selector lever posi-
display appears on the information screen in
tion display will only blink if there is a prob-
the multi information display.
z
Before selecting a gear with the engine run-
lem with the A/T position switch.
In this case, immediately park your vehicle
ning and the vehicle stationary, fully depress
It is not seen during normal driving.
in a safe place and follow these procedures:
the brake pedal to prevent the vehicle from
creeping.
The vehicle will begin to move as soon as
When warning display is showing
the gear is engaged, especially when the en-
The A/T fluid is overheating. The engine
6
gine speed is high, at fast idle or with the air
control may activate to lower the A/T fluid
conditioning operating, the brakes should
temperature, causing the engine revolutions
only be released when you are ready to drive
and vehicle speed to decrease, or the gear
away.
shift timing may change by activating the
A/T control. In this case, take one of the fol-
z
Depress the brake pedal with the right foot at
all times.
lowing measures.
Using the left foot could cause driver move-
• Slow down your vehicle.
ment delay in case of an emergency.
• Stop your vehicle in a safe place, put the
z
To prevent sudden acceleration, never race
selector lever in the “P” (Park) position,
the engine when shifting from the
“P”
and open the bonnet with the engine run-
(PARK) or “N” (NEUTRAL) position.
ning to allow the engine to cool down.
z
Operating the accelerator pedal while the
After a while, confirm that the
warning
other foot is resting on the brake pedal will
display is no longer showing. It is safe to
affect braking efficiency and may cause pre-
continue driving if the display is no longer
mature wear of brake pads.
showing. If the warning display remains or
z
Use the selector lever in the correct shift po-
appears frequently, we recommend you to
sition in accordance with driving conditions.
have your vehicle inspected.
Never coast downhill backward with the se-
When warning display is showing
lector lever in the {“D” (DRIVE) or sports
It may be that there is something unusual
mode} or coast forward with the selector
happening in the A/T, causing a safety de-
lever in the “R” (REVERSE) position.
vice to activate. We recommend you to have
The engine may stop and the unexpected in-
your vehicle inspected immediately.
crease in brake pedal effort and steering
wheel weight could lead to an accident.
6-36
Starting and driving

Easy Select 4WD*
CAUTION
CAUTION
When the A/T makes no speed
change
z Do not race the engine with brake pedal
z Never hold the vehicle stationary on a hill
pressed when the vehicle is stationary.
using the accelerator pedal (without using
If the transmission does not change speeds
This can damage the A/T.
the brake pedal). Always apply the parking
while driving, or your vehicle does not pick
Also, when you depress the accelerator ped-
brake and/or service brakes.
up enough speed when starting on an uphill
al while holding down the brake pedal with
slope, it may be that there is something un-
the selector lever in the “P” (PARK), “N”
(NEUTRAL) or “D” (DRIVE) position, the
Parking
usual happening in the transmission, causing
engine revolutions may not rise as high as
To park the vehicle, first bring it to a com-
a safety device to activate. We recommend
when performing the same operation with
you to have your vehicle checked immediate-
plete stop, fully engage the parking brake,
6
the selector lever in the “N” (NEUTRAL)
ly.
and then move the selector lever to the “P”
position.
(PARK) position.
If you are going to leave the vehicle unatten-
Easy Select 4WD*
Passing acceleration
ded, always switch off the engine and carry
the key.
Shifting to rear-wheel drive or 4-wheel drive
To gain extra acceleration in “D” (DRIVE)
can be made by operating the drive modese-
position, push the accelerator to the floor.
lector (A). Set the drive mode-selector to an
The A/T will automatically downshift.
NOTE
appropriate position according to the road
z On a slope, be sure to apply the parking
surface conditions.
NOTE
brake before moving the selector lever to the
“P” (Park) position. If you move the selector
z In sports mode, downshifts do not take place
lever to the “P” (Park) position before apply-
when the accelerator is depressed all the way
ing the parking brake, it may be difficult to
to the floor.
disengage the selector lever from the “P”
(Park) position when next you drive the ve-
hicle, requiring application of a strong force
Waiting
to the selector lever to move from the “P”
For short waiting periods, such as at traffic
(Park) position.
signals, the vehicle can be left in gear and
held stationary with the service brake.
For longer waiting periods with the engine
running, place the selector lever in the “N”
(NEUTRAL) position and apply the parking
brake, while holding the vehicle stationary
with the service brake.
Starting and driving
6-37

Easy Select 4WD*
The Drive mode indicator display and the
2WD/4WD operation indication lamp/display
indicate the drive mode-selector setting state.
Refer to “Indication lamp/display” on page
6-41.
6
Drive mode-selector position, drive mode indicator display, 2WD/4WD operation indication lamp/
display and low-range indicator lamp
Indication lamp/display
Drive mode-selector position
Mono-colour liquid crystal dis-
Driving conditions
Colour liquid crystal display
play
2H
Rear-wheel drive
When driving on dry paved road.
When driving on rough, sand or
4H
4-wheel drive
snow covered roads.
6-38
Starting and driving

Easy Select 4WD*
Indication lamp/display
Drive mode-selector position
Mono-colour liquid crystal dis-
Driving conditions
Colour liquid crystal display
play
When driving up or down steep
hills, on rough or muddy roads
4L
Low range 4-wheel drive
and
(especially when increased tor-
que is required).
6
: Illuminate
: Remain off
CAUTION
z The “4L” range gives maximum torque for low-speed driving on steep slopes, as well as sandy, muddy, and other difficult surfaces.
Vehicles with 4N14 engine, do not exceed speeds of approximately 50 km/h (30 mph) in “4L” range.
z Vehicles with 4N14 engine, do not exceed speeds of approximately 110km/h (68 mph) in “4H” range.
z Do not drive your vehicle in the “4H” or “4L” on dry paved roads and highways. Doing so may result in excessive tyre wear, increased fuel consumption,
and possible noise generation. It may also increase the differential oil temperature, which may damage the drive system. Further, the drive train will be
subjected to excessive loading, resulting in oil leakage, component seizure, or other serious problems. On dry paved roads and highways, drive the vehicle in
“2H” only.
Starting and driving
6-39
Easy Select 4WD*
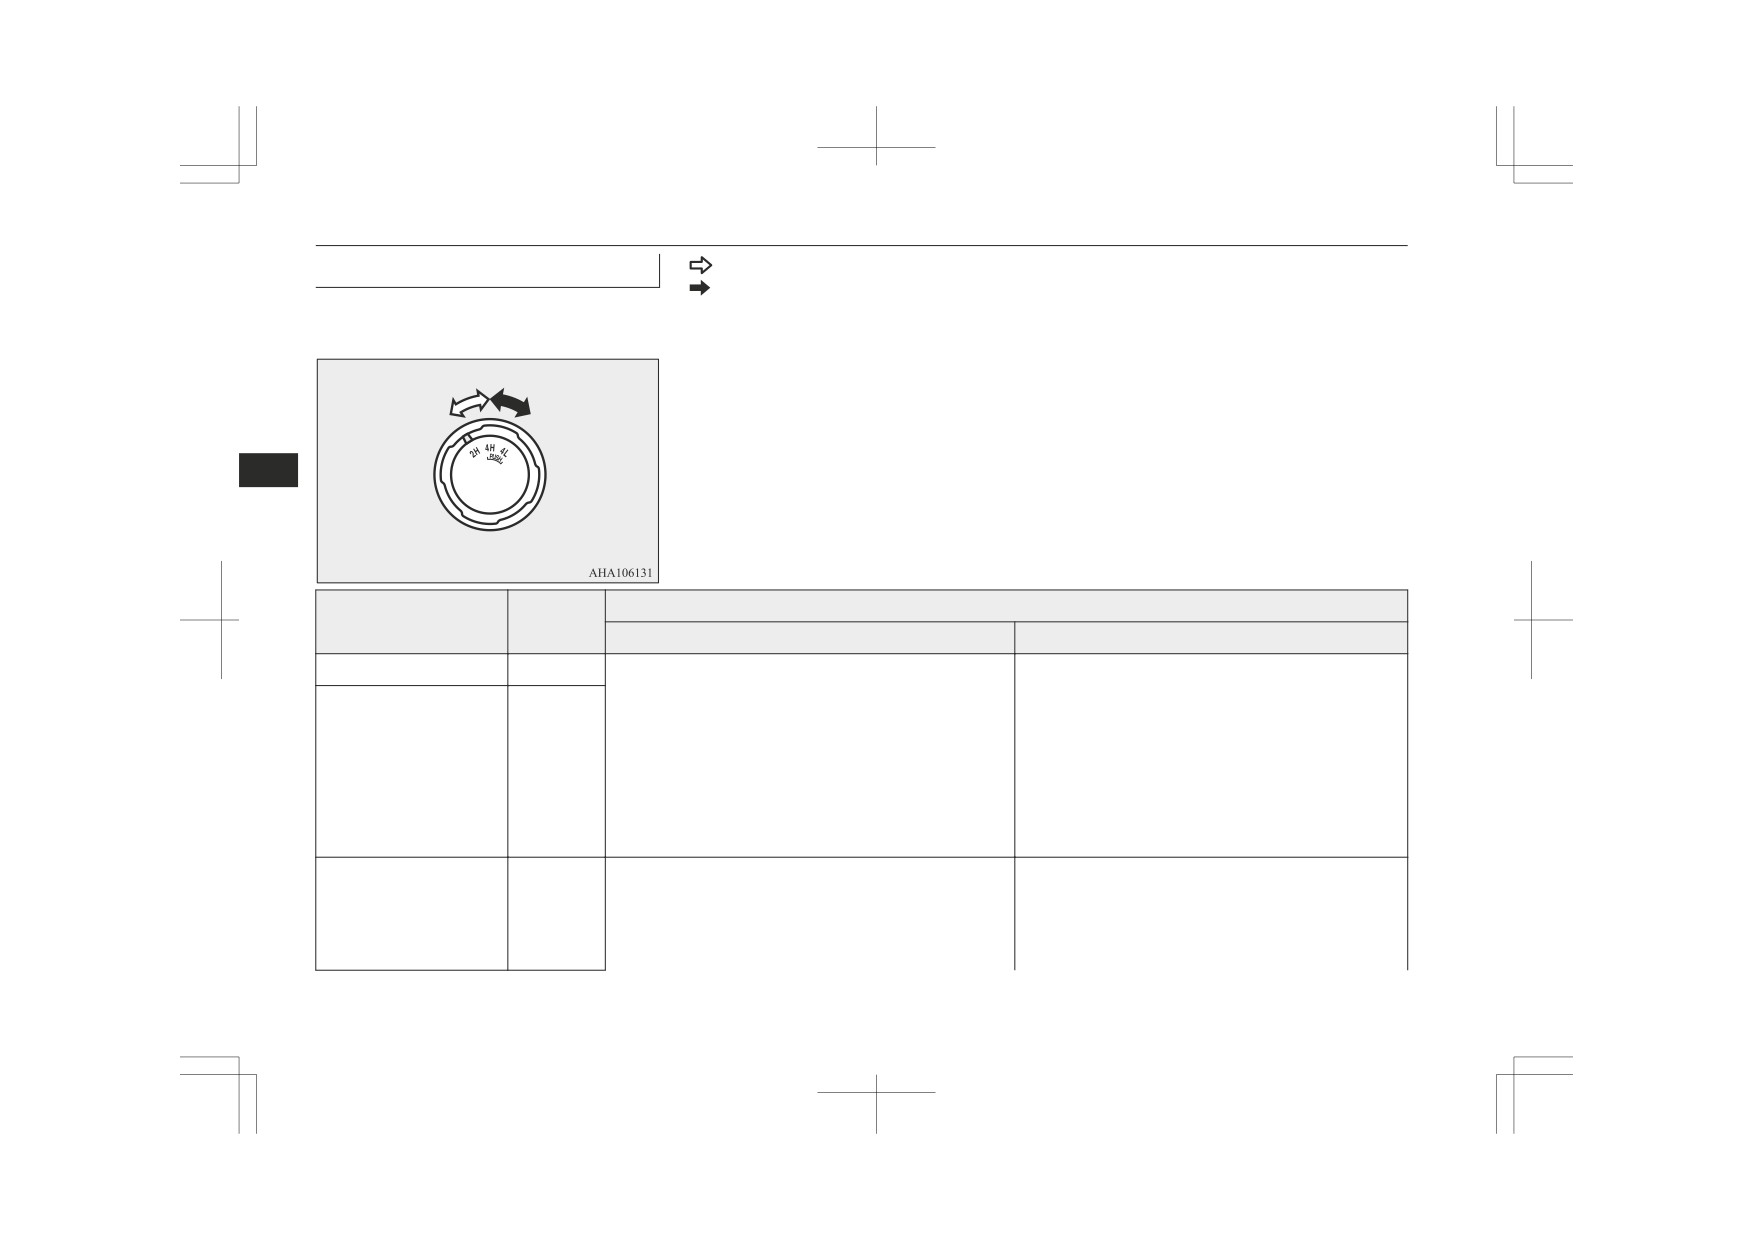
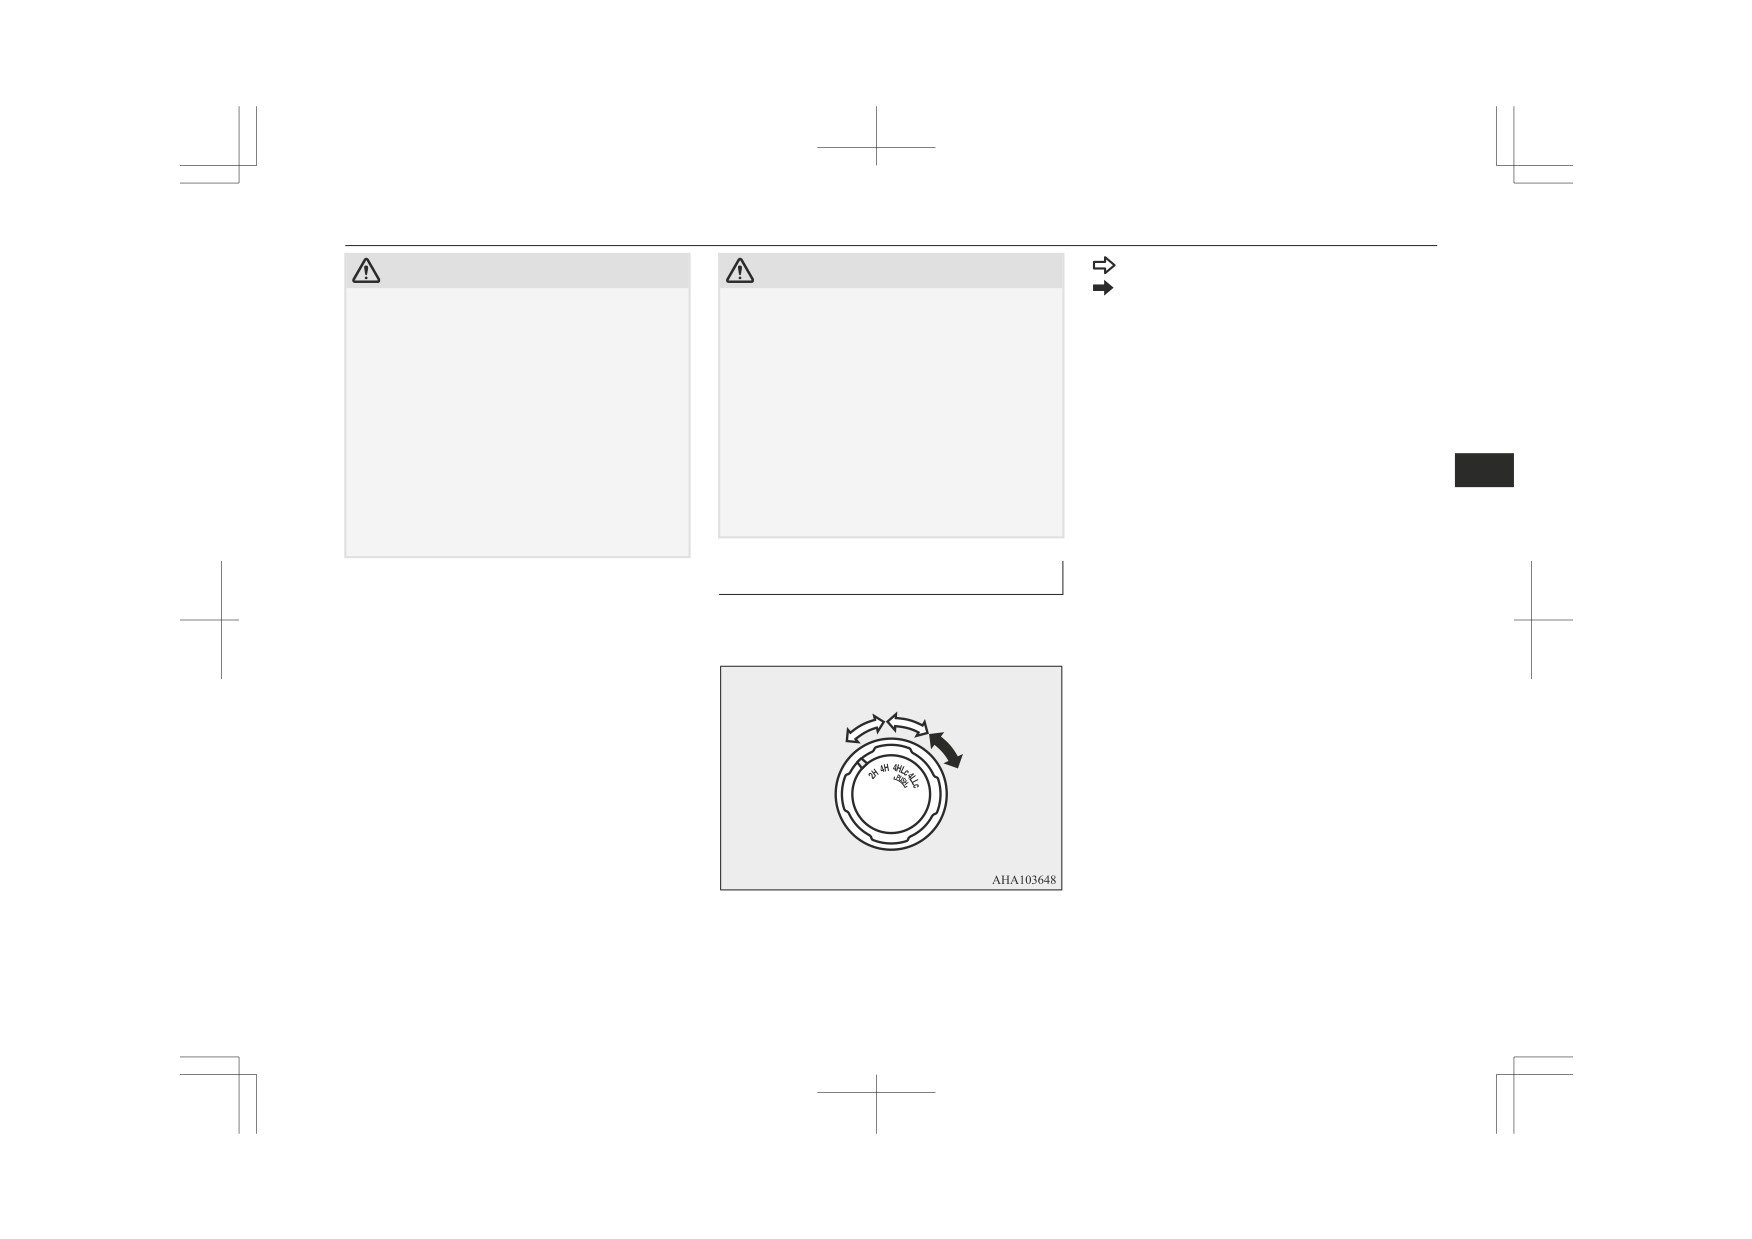
Drive mode-selector operation
: Turn the drive mode-selector
: Turn the drive mode-selector while hold-
The drive mode is shown on the drive mode-
ing it down
selector.
The drive mode-selector should be positioned
in accordance with the following operating
conditions:
6
Procedure
To shift from
To
Vehicles with M/T
Vehicles with A/T
2H
4H
The drive mode-selector can be operated while the
The drive mode-selector can be operated while the ve-
vehicle is either moving or stationary.
hicle is either moving or stationary.
When the vehicle is not in motion, shift the selector
When the vehicle is not in motion, shift the gearshift
lever to the “N” (NEUTRAL) position before oper-
lever to the “N” (Neutral) position before operating
ating the drive mode-selector.
4H
2H
the drive mode-selector.
When the vehicle is moving, and only while it can
When the vehicle is moving, and only while it can be
be steered straight ahead, shift the selector lever to
steered straight ahead, release the accelerator pedal
the “D” (DRIVE) position, and release the accelera-
before operating the drive mode-selector.
tor pedal before operating the drive mode-selector.
Stop the vehicle, shift the selector lever to the “N”
Stop the vehicle, depress the clutch pedal to the floor
(NEUTRAL) position, and operate the drive mode-
and operate the drive mode-selector.
4H
4L
selector.
Keep depressing the clutch pedal while 2WD/4WD
If operation is made with the selector lever placed
operation indication lamp continues to blink.
in any other position than “N” (NEUTRAL) posi-
6-40
Starting and driving

Easy Select 4WD*
Procedure
To shift from
To
Vehicles with M/T
Vehicles with A/T
tion, a gear noise may be generated, with a possible
4L
4H
failure to shift into a proper gear.
NOTE
NOTE
2WD/4WD operation indica-
tion lamp and low-range indi-
z
Shifting of setting of the drive mode-selector
z When the drive mode-selector is set be-
between “2H” ↔ “4H” should only be done
tween“4H” ↔ “4L” in cold weather, its se-
cation lamp
at speeds below 100 km/h (62 mph).
lection may not complete. Return the drive
Vehicles with 4N14 engine, when you want
mode-selector to its previous position. After
6
z
the vehicle speeds to exceed speeds of
the engine is warmed up, make the range se-
110km/h (68 mph), set the drive mode-selec-
lection again.
tor to “2H”.
z
During driving, never attempt to shift from
“4H” to “4L”.
CAUTION
z
When shifting from “2H” to “4H” in cold
z Do not operate the drive mode-selector
weather while the vehicle is in motion, the
while the rear wheels of the vehicle are slip-
transfer gear may make some noise. In cold
ping on snow or ice.
weather, try to shift the gear while the vehi-
cle is stopped.
z
When shifting between “4H” and “4L”, the
Indication lamp/display
transfer gear may make some noise.
When the drive mode-selector is set between
Vehicles equipped with the mono-colour liq-
z
“2H” ↔ “4H” while the vehicle is stopped,
uid crystal display, refer to “2WD/4WD oper-
When the ignition switch is in the “ON” posi-
the
2WD/4WD operation indication lamp/
ation indication lamp and low-range indica-
tion, the
2WD/4WD operation indication
display blinks while the selection is in proc-
lamp (1) and the low-range indication lamp
tion lamp” on page 6-41.
ess.
(2) shows the shifting condition. The
Vehicles equipped with the colour liquid
Drive slowly and normally after confirming
crystal display, refer to “Drive mode indica-
2WD/4WD operation indication lamp comes
that the lamp/display is illuminated. Refer to
tor display and 2WD/4WD operation indica-
on at each drive mode-selector position as
“Indication lamp/display” on page 6-41.
follows:
When the drive mode-selector is set between
tor display” on page 6-43.
z
“2H” ↔ “4H” while the cruise control is ac-
tivated, the transfer gear may make some
noise.
Starting and driving
6-41

Easy Select 4WD*
“2H” ↔ “4H”
Drive mode-se-
Indication lamp
NOTE
lector position
Drive mode-selector
Indication lamp
• Keep the steering wheel in the straight
position
ahead position while making range selec-
tions. If you attempt to drive forward with
the steering wheel turned, gear rattling or
shocks may occur, cornering may not be
smooth and the desired range may not ac-
Drive mode
2H
tually be selected.
switching in pro-
and
• When the drive mode-selector is set be-
gress
tween “2H” ↔ “4H” while the vehicle is
6
stopped, the 2WD/4WD operation indica-
tion lamp blinks while the selection is in
process. Drive slowly and normally after
Drive mode switch-
confirming that the lamp is switched.
ing in progress
• If the
2WD/4WD operation indication
lamp continues blinking after a “2H” ↔
“4H” selection has been made with the
vehicle moving, hold the steering wheel
4L
in the straight ahead position and slowly
and
and
depress the accelerator pedal several
4H
times.
“4H” ↔ “4L”
: Blink
: Blink
: Illuminate
Drive mode-se-
Indication lamp
: Illuminate
: Remain off
lector position
: Remain off
NOTE
4H
z When the drive mode-selector is set between
2H ↔ 4H, the 2WD/4WD operation indica-
tion lamp blinks while the selection is in
process. Take the following precautions
when the indication lamp is blinking.
6-42
Starting and driving

Easy Select 4WD*
NOTE
NOTE
Drive mode indicator display
and 2WD/4WD operation indi-
z
The 2WD/4WD operation indication lamp
z
The Active Stability Control function is sus-
will blink during shifting process from “4H”
pended while “4L” is selected. The
indi-
cator display
to “4L” or vice versa, as the transfer passes
cation lamp illuminates while these func-
through the neutral position.
tions are suspended. It does not indicate a
Be sure to operate the drive mode-selector
problem. When “2H” or “4H” is selected,
until the
2WD/4WD operation indication
this lamp goes out and function again. Refer
lamp illuminates again.
to “ASTC indication lamp, ASTC OFF indi-
z
When parking, apply the parking brake be-
cation lamp” on page 6-78.
fore stopping the engine and make sure that
6
the
2WD/4WD operation indicator is not
blinking during shifting process between
CAUTION
“4H” ↔ “4L”. Otherwise, the vehicle could
z
If a problem is detected in the transfer sys-
unexpectedly move.
tem, a safety device will activate. The
z
If, after a “4H” ↔ “4L” selection has been
2WD/4WD operation indicator blinks (twice
made, the
2WD/4WD operation indicator
per second), and transfer shifting will be-
continues blinking and the desired range is
come impossible. Park your vehicle in a safe
not actually selected, return the drive mode
place, turn off the engine for a few moments.
A- Drive mode indicator display
selector to its previous position. Place the
steering wheel in the straight ahead position,
Restart the engine. The lamp should resume
B- Front wheel indicator display
normal operation. If the lamps continue to
drive the vehicle forward, and release the ac-
C- Rear wheel indicator display
blink, have the vehicle checked by a
celerator pedal. Next, hold down the clutch
D- Low-range indicator display
MITSUBISHI MOTORS Authorized Serv-
pedal and make the range selection again.
ice Point as soon as possible.
z
If the 2WD/4WD operation indication lamp
blinks when you attempt to make a “4H” ↔
When the ignition switch is in the “ON” posi-
“4L” selection, a “4H” ↔ “4L” selection
tion or the operation mode is put in ON, drive
cannot be made. Stop the vehicle and release
the accelerator pedal. Next, hold down the
mode indicator display (A) and 2WD/4WD
clutch pedal and make the range selection
operation indicator display (B, C, D) shows
again.
the shifting condition. The drive mode indi-
cator display and 2WD/4WD operation indi-
cator display comes on at each drive modese-
lector position as follows:
Starting and driving
6-43
Easy Select 4WD*
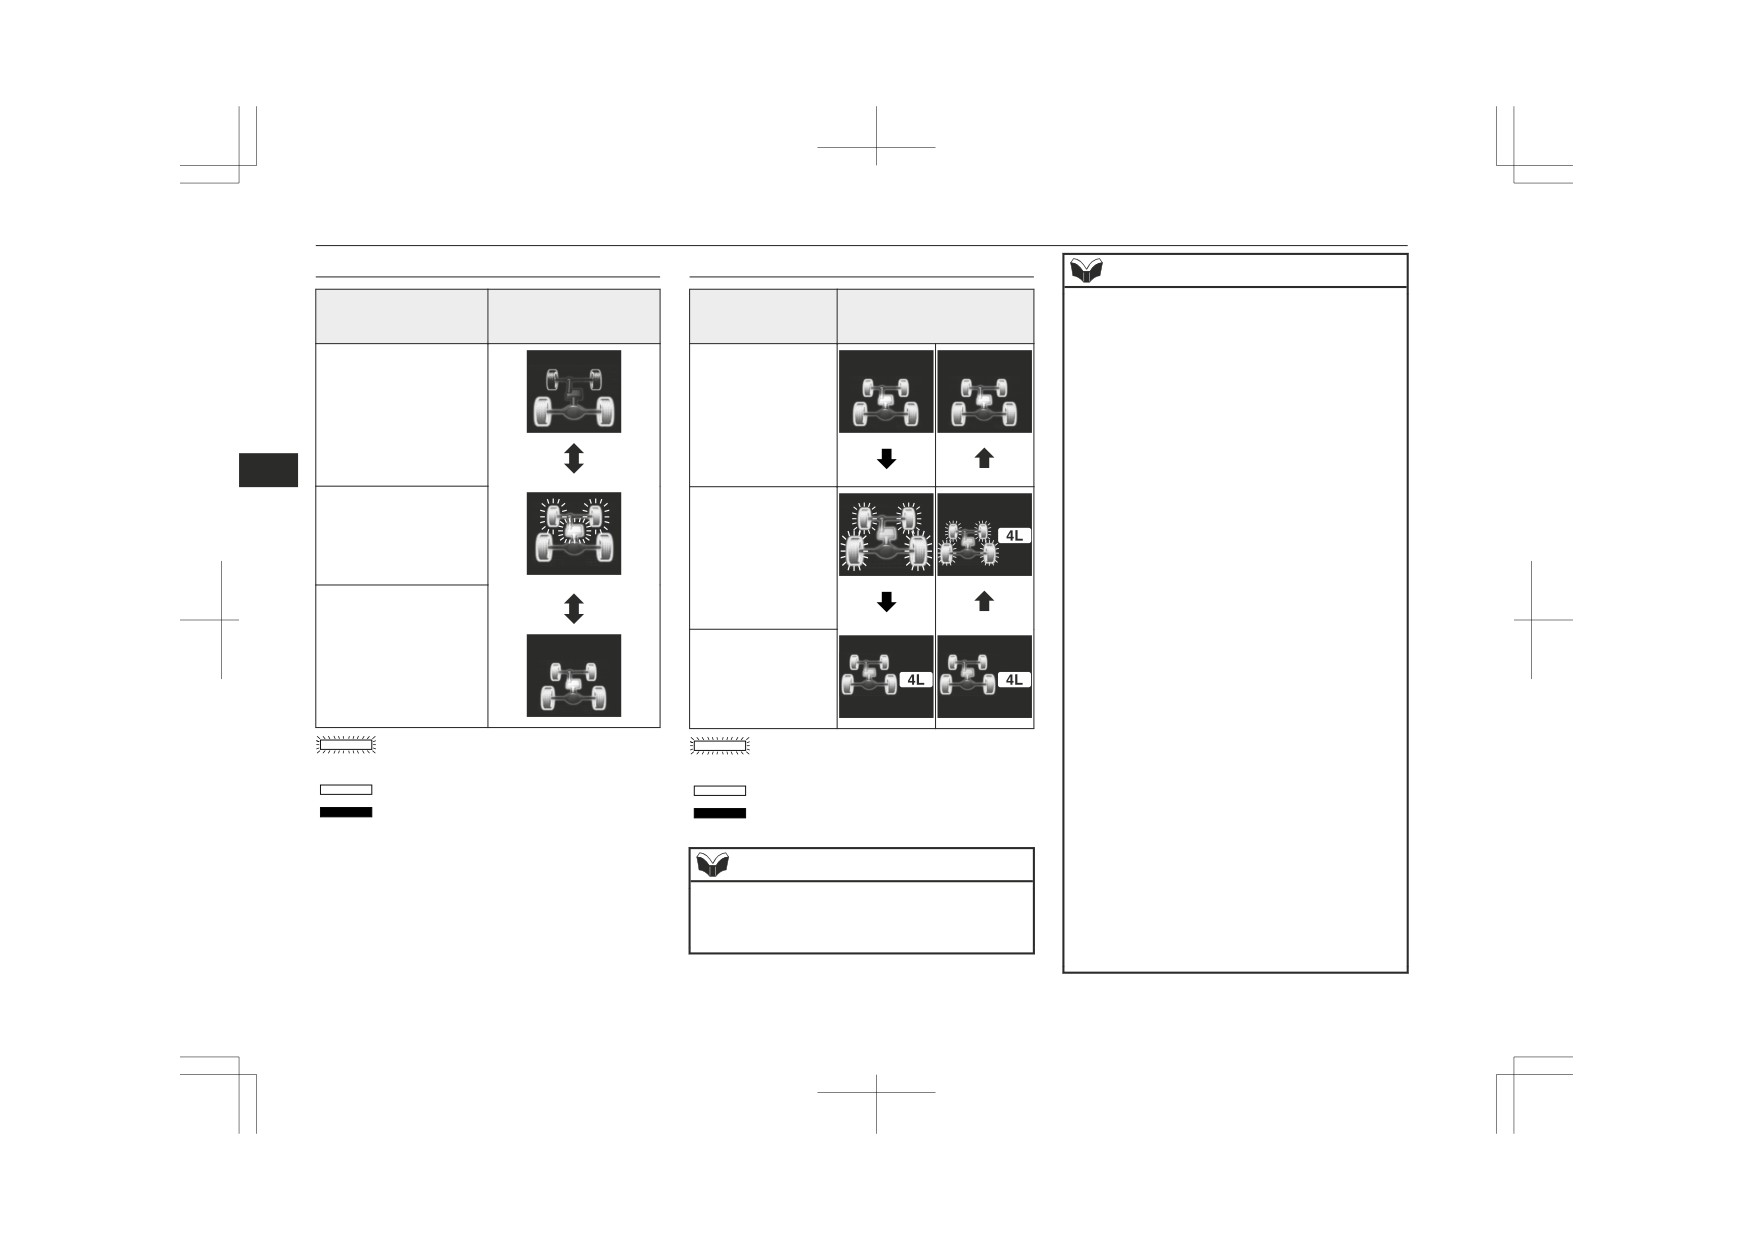
“2H” ↔ “4H”
“4H” ↔ “4L”
NOTE
Drive mode-selector
Indicator display
Drive mode-se-
Indicator display
Take the following precautions when the in-
position
lector position
dicator display is blinking.
• Keep the steering wheel in the straight
ahead position while making range selec-
tions. If you attempt to drive forward with
the steering wheel turned, gear rattling or
2H
4H
shock may occur, cornering may not be
smooth and the desired range may not ac-
tually be selected.
6
• When the drive mode-selector is set be-
tween “2H” ↔ “4H”, while the vehicle is
Drive mode switch-
stopped, the front wheel indicator display
Drive mode
blinks while the selection is in process.
ing in progress
switching in pro-
Drive slowly and normally after confirm-
gress
ing that the display is switched.
• If the front wheel indicator display blink-
ing after a “2H” ↔ “4H” selection has
been made with the vehicle moving, hold
4H
the steering wheel in the straight ahead
4L
position and slowly depress the accelera-
tor pedal several times.
The front and the rear wheel displays will
z
blink during shifting process from “4H” to
: Blink (Drive mode indicator display
: Blink (Drive mode indicator display
“4L” or vice versa, as the transfer passes
also blinks)
also blinks)
through the neutral position. Be sure to oper-
: Illuminate
: Illuminate
ate the drive mode-selector until the front
: Remain off
: Remain off
and the rear wheel displays illuminate again.
z
When parking, apply the parking brake be-
fore stopping the engine and make sure that
NOTE
the front and the rear wheel displays are not
z When the drive mode-selector is set between
blinking during shifting process between
“2H” ↔ “4H”, the front wheel indicator dis-
“4H” ↔ “4L”. Otherwise, the vehicle could
play blinks while the selection is in process.
unexpectedly move even if the A/T is in the
“P” (PARK) position.
6-44
Starting and driving
Easy Select 4WD*
NOTE
NOTE
CAUTION
z
If, after a “4H” ↔ “4L” selection has been
z
If the clutch pedal is released during shifting
z
If the warning display is displayed on the in-
made, front and the rear wheel displays con-
process between “4H ↔ 4L”, the warning
formation screen in the multi information
tinue blinking and the desired range is not
display will appear and the shifting process
display, a problem has occurred with the
actually selected, return the drive modese-
will be stopped (M/T).
Easy Select 4WD and the safety device has
lector to its previous position. Place the
activated. If this happens, please contact
steering wheel in the straight ahead position,
your nearest MITSUBISHI MOTORS Au-
drive the vehicle forward, and release the ac-
thorized Service Point for inspection as soon
celerator pedal. Next, hold down the clutch
as possible.
pedal (with M/T) or place the selector lever
6
in the “N” (NEUTRAL) position (with A/T),
depress and hold the brake pedal and make
the range selection again.
z
The Active Stability Control function is sus-
z
If the front and the rear wheel displays blink
pended while “4L” is selected. indication
when you attempt to make a “4H” ↔ “4L”
lamp is illuminated while these functions are
selection, a “4H” ↔ “4L” selection cannot
suspended. It does not indicate a problem.
be made. Stop the vehicle and release the ac-
When “2H” or “4H” is selected, this lamp
celerator pedal. Next, hold down the clutch
goes out and function again. Refer to “ASTC
pedal (with M/T) or place the selector lever
indication lamp or ASTC OFF indication
in the “N” (NEUTRAL) position (with A/T),
lamp” on page 6-78.
depress and hold the brake pedal and make
z
Vehicles with 4N14 engine, when the vehi-
the range selection again.
cle speeds near to 110 km/h (68 mph) while
If the selector lever is shifted from the “N”
the drive mode-selector is set
“4H”, the
z
(NEUTRAL) position to the other position
warning display will appear.
or release the brake pedal during shifting
When you want the vehicle speeds to exceed
process between “4H ↔ 4L”, the warning
speeds of 110 km/h (68 mph), set the drive
display will appear and the shifting process
modeselector to “2H”.
will be stopped (A/T).
Starting and driving
6-45
Super Select 4WD II*
Super Select 4WD II*
Drive mode-selector position,
Drive
drive mode indicator display
mode in-
Shifting to rear-wheel drive or 4-wheel drive
dicator
and 2WD/4WD operation indi-
can be made by operating the drive modese-
display
cator display
lector (A). Set the drive mode-selector to an
Drive mode-selec-
and
Driving
appropriate position according to the road
tor position
2WD/4W
conditions
Drive
surface conditions. The Drive mode indicator
D opera-
mode in-
display and the 2WD/4WD operation indica-
tion indi-
dicator
tor display indicate the drive mode-selector
cator dis-
display
6
setting state. Refer to “Drive mode indicator
play
Drive mode-selec-
and
Driving
display and 2WD/4WD
operation indicator
tor position
2WD/4W
conditions
Centre dif-
When
display” on page 6-49.
ferential
driving on
D opera-
lock en-
rough,
tion indi-
4HLc
gaged 4-
sand
or
cator dis-
play
wheel
snow cov-
drive
ered roads.
When
Rear-
When
driving on
2H
wheel
dry paved
driving up
drive
road.
or
down
Low range
steep hills,
The basic
centre dif-
on rough
position
ferential
or muddy
for Super
4LLc
lock en-
roads
(es-
Select
gaged 4-
Full-time
pecially
4WD II.
wheel
4H
4-wheel
when in-
When
drive
drive
creased
driving on
torque is
dry paved
required).
or slippery
roads.
: Illuminate
: Remain off
6-46
Starting and driving
Super Select 4WD II*
: Turn the drive mode-selector
CAUTION
CAUTION
: Turn the drive mode-selector while hold-
z The “4LLc” range gives maximum torque
z Do not drive your vehicle in the “4HLc” or
ing it down
for low-speed driving on steep slopes, as
“4LLc” position on dry paved roads and
The drive mode-selector should be positioned
well as sandy, muddy, and other difficult sur-
highways. Doing so may result in excessive
in accordance with the following operating
faces.
tyre wear, increased fuel consumption, and
Vehicles with 4N14 engine, do not exceed
possible noise generation. It may also in-
conditions:
speeds of approximately 50 km/h (30 mph)
crease the differential oil temperature, which
in the “4LLc” range.
may damage the drive system. Further, the
Vehicles with an 4N15 engine and A/T, do
drive train will be subjected to excessive
not exceed speeds of approximately 70 km/h
loading, resulting in oil leakage, component
6
(43 mph) in the “4LLc” range.
seizure, or other serious problems. On dry
z Vehicles with 4N14 engine, do not exceed
paved roads and highways, drive the vehicle
speeds of approximately 110 km/h (68 mph)
in “2H” or “4H” only.
in the “4HLc” range.
Drive mode-selector operation
The drive mode is shown on the drive mode-
selector knob.
Starting and driving
6-47

Super Select 4WD II*
Procedure
To shift from
To
Vehicles with M/T
Vehicles with A/T
2H
4H
The drive mode-selector can be operated while the ve-
The drive mode-selector can be operated while the ve-
hicle is either moving or stationary.
4H
2H or 4HLc
hicle is either moving or stationary.
When the vehicle is not in motion, shift the selector
When the vehicle is not in motion, shift the gearshift
lever to the “N” (NEUTRAL) position before operating
lever to the “N” (Neutral) position before operating the
the drive mode-selector.
drive mode-selector.
When the vehicle is moving, and only while it can be
4HLc
4H
When the vehicle is moving, and only while it can be
steered straight ahead, shift the selector lever to the “D”
6
steered straight ahead, release the accelerator pedal be-
(DRIVE) position, and release the accelerator pedal be-
fore operating the drive mode-selector.
fore operating the drive mode-selector.
4HLc
4LLc
Stop the vehicle, shift the selector lever to the “N”
(NEUTRAL) position, and operate the drive mode-se-
Stop the vehicle, depress the clutch pedal to the floor
lector.
and operate the drive mode-selector.
If operation is made with the selector lever placed in
Keep depressing the clutch pedal while the 2WD/4WD
4LLc
4HLc
any other position than “N” (NEUTRAL) position, a
operation indicator display continues to blink.
gear noise may be generated, with a possible failure to
shift into a proper gear.
NOTE
NOTE
NOTE
z
Setting of the drive mode-selector between
z When shifting between
“2H”,
“4H” and
z When the drive mode-selector is set between
“2H”,
“4H” and “4HLc” should only be
“4HLc” in cold weather while the vehicle is
“2H”, “4H” and “4HLc” while the vehicle is
done at speeds below 100 km/h (62 mph).
in motion, the transfer gear may make some
stopped, the 2WD/4WD operation indicator
z
For vehicles with 4N14 engine, when you
noise. In cold weather, try to shift the gear
display blinks while the selection is in proc-
want the vehicle speeds to exceed speeds of
while the vehicle is stopped.
ess. Drive slowly and normally after con-
110km/h (68 mph), set the drive mode-selec-
z When shifting between “4LLc” and “4HLc”,
firming that the display is illuminated. (Re-
tor to “2H” or “4H”.
the transfer gear may make some noise.
fer to “2WD/4WD operation indicator dis-
z
During driving, never attempt to shift from
play” on page 6-49.)
“4HLc” to “4LLc”.
z When the drive mode-selector is set between
“2H”, “4H” and “4HLc” while the cruise
control is activated, the transfer gear may
make some noise.
6-48
Starting and driving