Mitsubishi Outlander (2003+). Manual - part 314
DOOR
BODY
42-31
DOOR GLASS AND REGULATOR
REMOVAL AND INSTALLATION
M1429001300393
Pre-removal Operation
•
Door Trim Assembly Removal (Refer to GROUP 52A,
Door Trim
•
Waterproof Film Removal (Refer to
).
Post-installation Operation
•
Door Window Glass Adjustment (Refer to
•
Waterproof Film Installation (Refer to
•
Door Trim Assembly Installation (Refer to GROUP 52A,
Door Trim
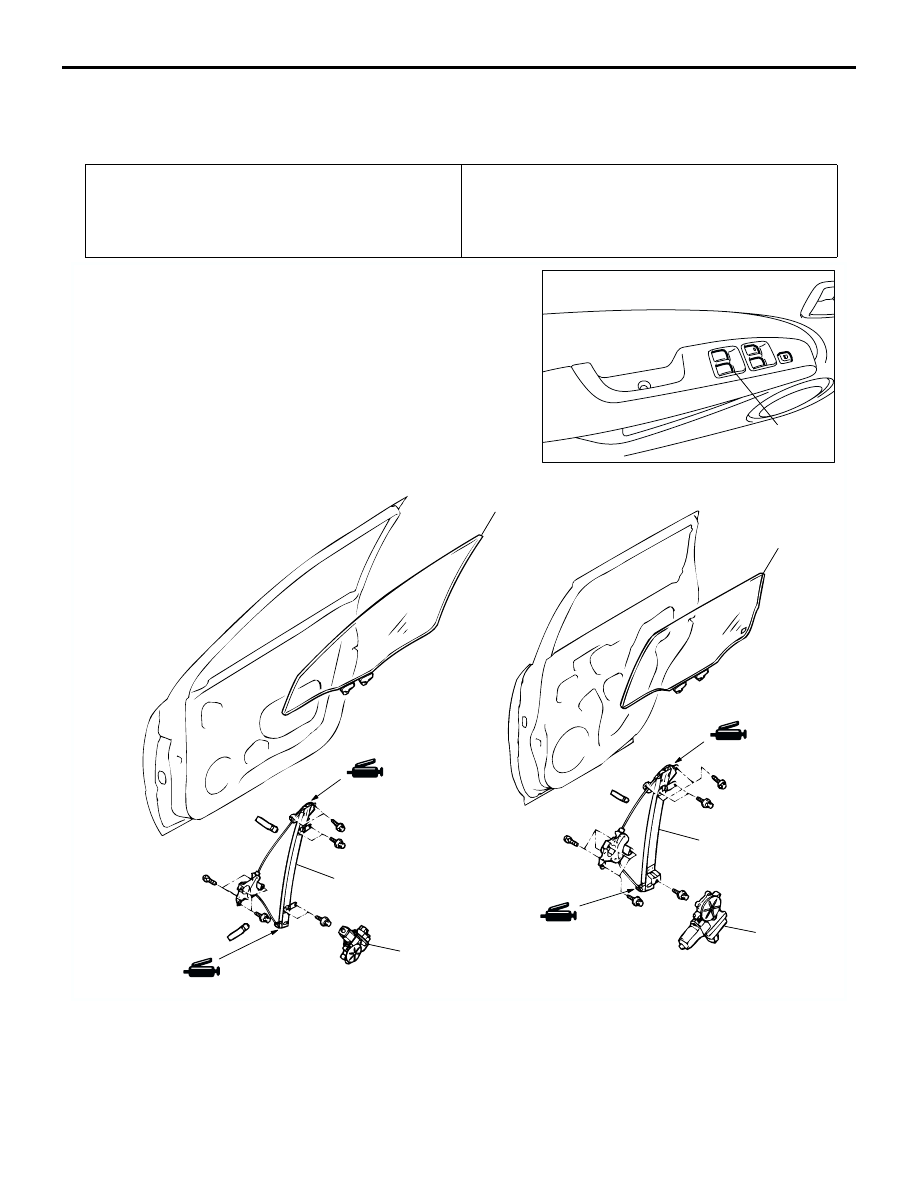
AC300452
AC101370
AB
<Front door>
<Rear door>
3
2
4
1
2
3
4
Power window switch removal steps
>>B<<
•
Post-installation operation check
1. Power window switch (Refer to
GROUP 52A, Door trim
Door window regulator assembly
removal steps
>>B<<
•
Post-installation operation check
<<A>> >>A<<
2. Window regulator assembly
<<A>>
3. Power window motor assembly