Mitsubishi Galant. Manual - part 59
OIL PAN
TSB Revision
ENGINE MECHANICAL <3.0L>
11C-21
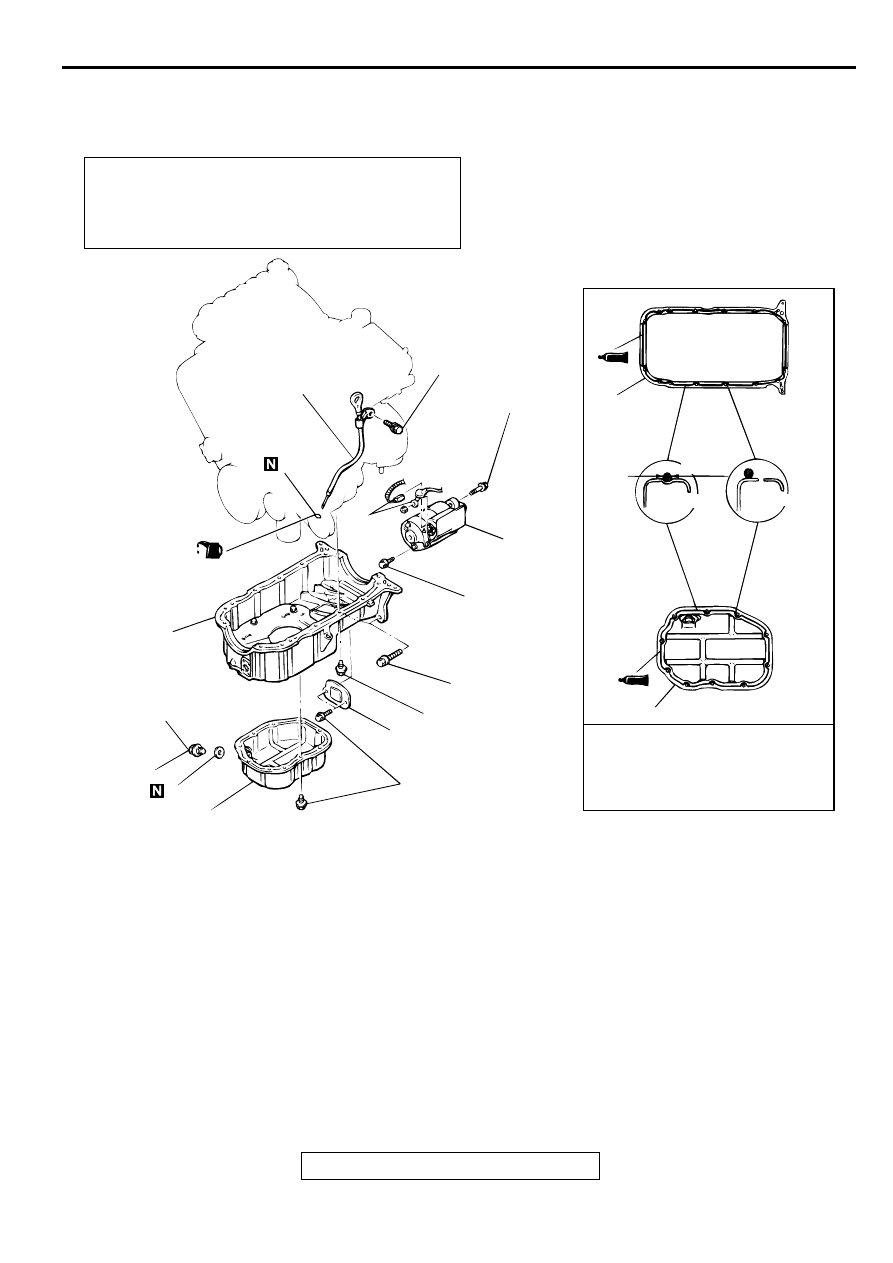
O IL PA N
REMOVAL AND INSTALLATION
M1112002800086
REMOVAL SERVICE POINTS
<<A>> LOWER OIL PAN REMOVAL
1. Remove the oil pan, lower mounting bolts.
Pre-removal and Post-installation operation
•
Engine Oil Draining and Refilling (Refer to GROUP 12,
On-vehicle Service
−
Engine Oil Replacement
.)
•
Front Exhaust Pipe Removal and Installation (Refer to
GROUP 15, Exhaust Pipe and Main Muffler
.)
AC001723 AC
48 N·m
35 ft-lb
26 – 33 N·m
19 – 24 ft-lb
26 – 33 N·m
19 – 24 ft-lb
35 N·m
26 ft-lb
5.9 N·m
52 in-lb
9.8 – 12 N·m
87 – 106 in-lb
39 N·m
29 ft-lb
1
2
3
4
5
6
7
8
9
7
9
SEALANT:
MITSUBISHI GENUINE PART
NO. MD970389 OR
EQUIVALENT
(ENGINE OIL)
GROOVE
BOLT HOLE
Ø 4 mm
(0.2 in)
LOWER OIL PAN REMOVAL
STEPS
1.
DRAIN PLUG
>>C<<
2.
DRAIN PLUG GASKET
<<A>>
>>B<<
7.
LOWER OIL PAN
UPPER OIL PAN REMOVAL
STEPS
1.
DRAIN PLUG
>>C<<
2.
DRAIN PLUG GASKET
3.
STARTER CONNECTOR
4.
STARTER
5.
OIL DIPSTICK AND DIPSTICK
GUIDE
6.
O-RING
<<A>>
>>B<<
7.
LOWER OIL PAN
8.
COVER
<<B>>
>>A<<
9.
UPPER OIL PAN
UPPER OIL PAN REMOVAL
STEPS (Continued)