Mitsubishi Lancer Evolution 7. Manual - part 295
WHEEL AND TYRE -
Troubleshooting
31-3
TROUBLESHOOTING
Symptom
Probable cause
Remedy
Reference page
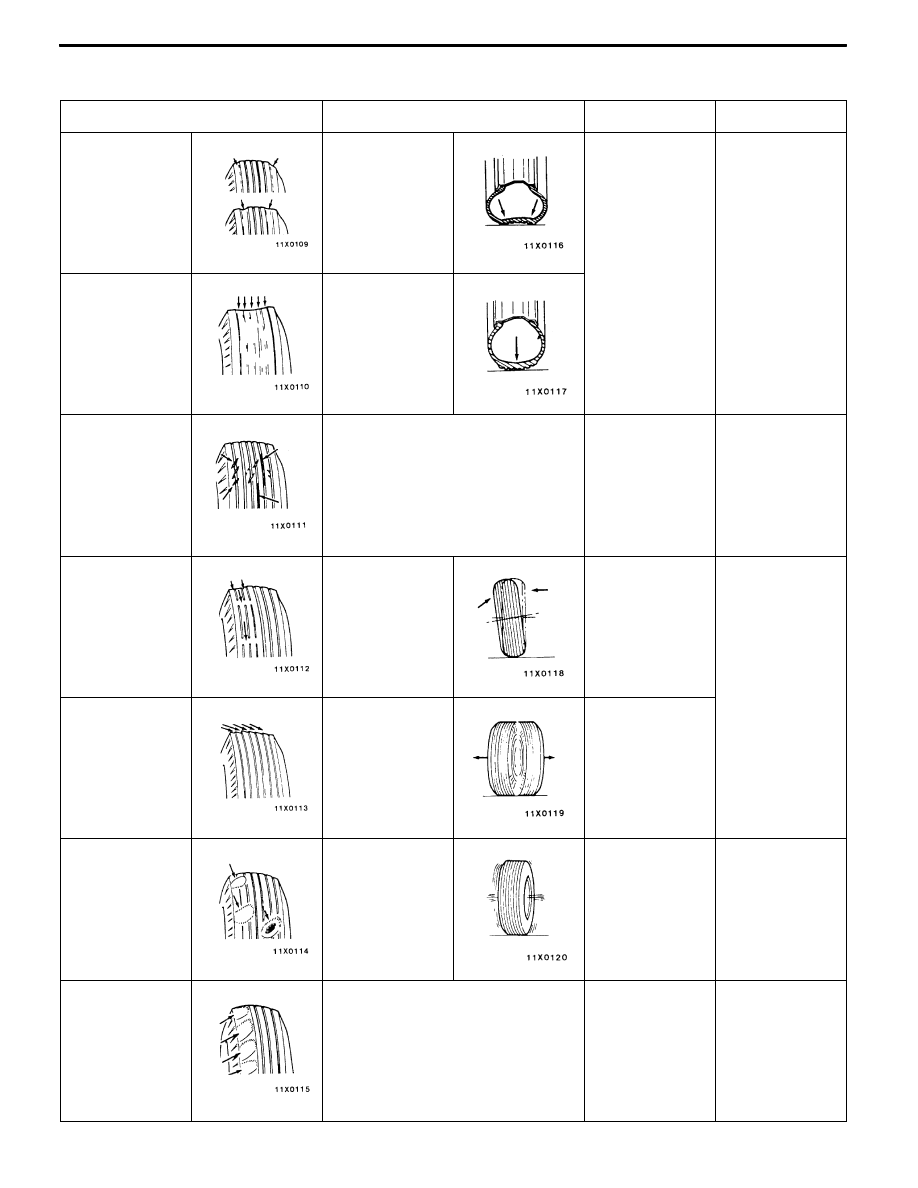
Rapid wear at
shoulders
Under-inflation
or lack of rotation
Adjust the tyre
pressure.
31-6
Rapid wear at
centre
Over-inflation or
lack of rotation
Cracked treads
Under-inflation
Adjust the tyre
pressure.
31-6
Wear on one
side
Excessive
camber
Inspect the
camber.
Refer to
GROUP 33A -
On-vehicle
Service.
Feathered edge
Incorrect toe-in
Adjust the toe-in.
Bald spots
Unbalanced
wheel
Adjust the
imbalanced
wheels.
31-4
Scalloped wear
Lack of rotation of tyres or worn or
out-of-alignment suspension
Rotate the tyres
and check the
front suspension
alignment.
Refer to
GROUP 33A -
On-vehicle
Service.