Mitsubishi Lancer Evolution VI. Manual - part 81
STEERING –
Power Steering Gear Box
37A-16
2.
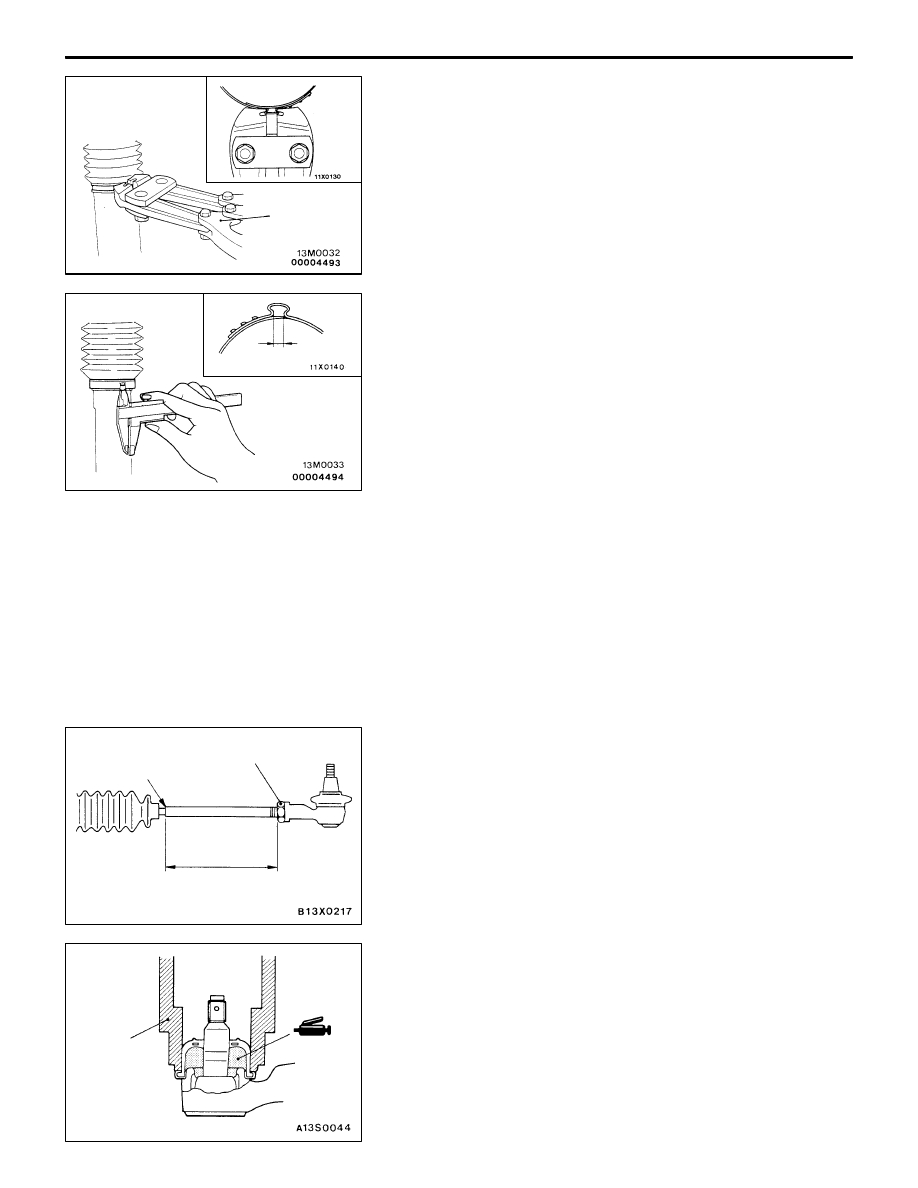
Use the special tool to crimp the bellows band.
Caution
(1) Hold the rack housing, and use the special tool
to crimp the bellows band securely.
(2) Crimp the bellows band until the special tool
touches the stopper.
3.
Check that the crimped width (A) is within the standard
value.
Standard value (A): 2.4 – 2.8 mm
<When more than 2.8 mm>
Readjust the dimension (W) of step (1) to the value
calculated by the following equation, and repeat
step (2).
W = 5.5 mm – A [Example: If (A) is 2.9 mm, (W)
is 2.6 mm.]
<When less than 2.4 mm>
Remove the bellows band, readjust the dimension
(W) of step (1) to the value calculated by the
following equation, and use a new bellows band
to repeat steps (2) to (3).
W = 5.5 mm – A [Example: If (A) is 2.3 mm, (W)
is 3.2 mm.]
"
N
A
TIE-ROD END / TIE-ROD END LOCKING NUT
INSTALLATION
Screw in the tie-rod end until the dimension shown is achieved.
Then, temporarily tighten with the locking nut.
NOTE
The locking nut must be tightened securely only after the
power steering gear box and linkage are installed to the vehicle
and toe-in is adjusted.
TIE-ROD END BALL JOINT DUST COVER
REPLACEMENT
Only when the dust cover is damaged accidentally during
service work, replace the dust cover as follows:
1.
Apply grease inside a new dust cover.
2.
Using the special tool, press in the dust cover to the
tie rod end.
3.
Check the dust cover for cracks or damage by pushing
it with finger.
MB991561
A
212 mm
Edge of bellows
assembly groove
Lock nut
MB990776