Mitsubishi Eclipse. Manual - part 911


  Index      Mitsubishi     Mitsubishi Eclipse - service repair manual 2004 year


Search            


Content   ..  909  910  911  912   ..


Mitsubishi Eclipse. Manual - part 911


TRANSAXLE

TSB Revision

AUTOMATIC TRANSAXLE OVERHAUL

23B-27

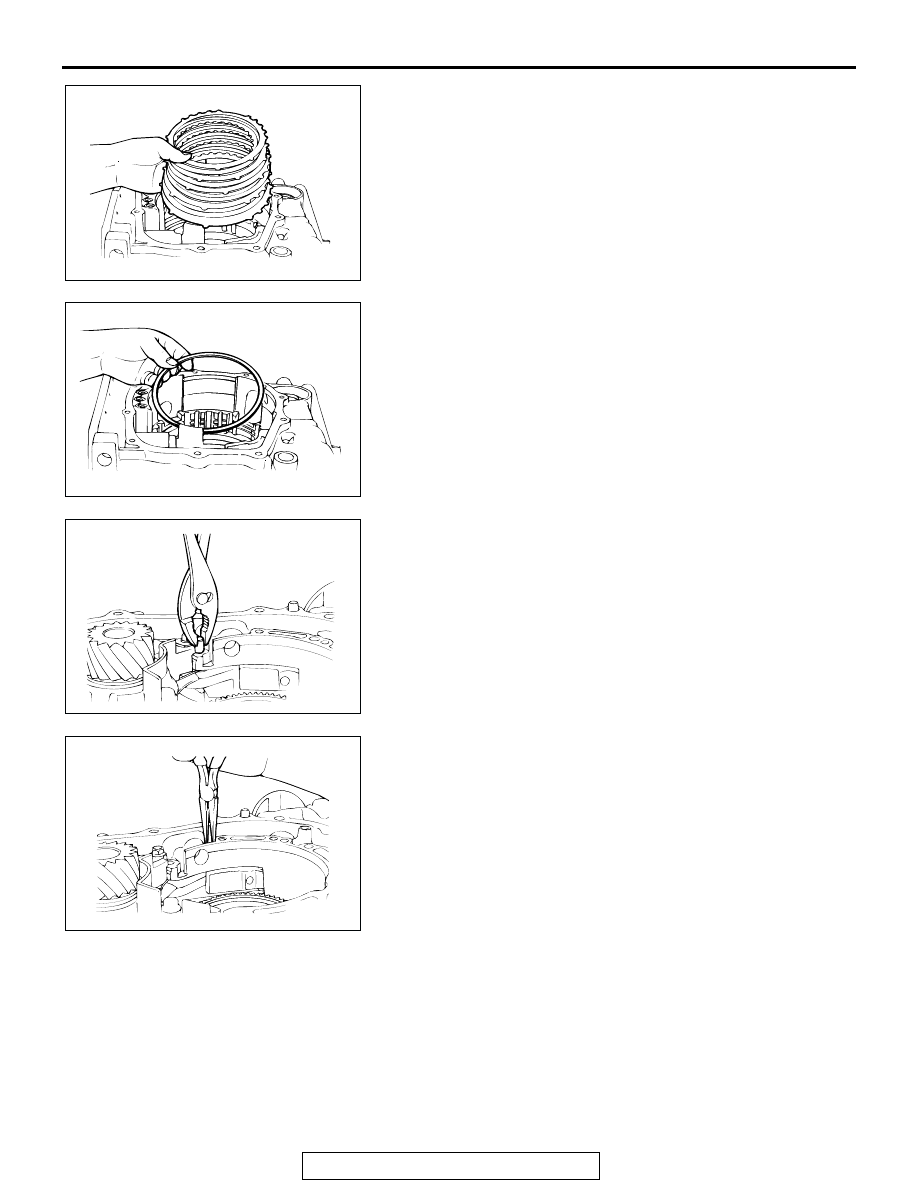
48.Remove the brake plates (five pieces), brake discs (six 

pieces) and pressure plate.

49.Remove the wave spring.

50.Remove the parking pawl shaft, and then remove the spacer 

and spring.

51.Remove the two parking roller support shafts, and then 

remove the parking roller support.

AKX01022

AKX01023

AKX01033

AKX01034

TRANSAXLE

TSB Revision

AUTOMATIC TRANSAXLE OVERHAUL

23B-28

52.Remove the one-way clutch inner race and low-reverse 

brake piston as follows:

(1) Using special tools MD998903 <F4A42> or MD998338 

<F4A51> and MD998924, compress the one-way clutch 
inner race.
NOTE: This illustration shows F4A51.

(2) Remove the snap ring.
(3) Remove the special tools.
(4) Remove the one-way clutch inner race, O-ring, spring 

retainer, return spring and low-reverse brake piston.

53.Remove the four <F4A51> or three <F4A42> transfer drive 

gear bearing mounting bolts.
Then, turn the gear 1/8 turn (45 degree angle) and remove 
the remaining bolts.
F4A42 = seven mounting bolts
F4A51 = eight mounting bolts

54.Remove the transfer drive gear.

AKX01107AB

MD998924

MD998903 
<F4A42> OR
MD998338
<F4A51>

AK101766AC

BOLT
(FOUR)

  BOLT
(THREE)

<F4A42>

AK101775 AB

BOLT (FOUR)

BOLT
(FOUR)

<F4A51>

AKX01110

TRANSAXLE

TSB Revision

AUTOMATIC TRANSAXLE OVERHAUL

23B-29

55.Remove the cap by jabbing a screw driver into the center of 

the cap and prying it up.

56.Using a chisel, straighten the staked portions from the 

output shaft nut.

CAUTION

The jam nut is reverse threaded.
57.Use special tools MB991625 and MB990607 to remove the 

output shaft jam nut.

58.Remove the bearing retainer mounting bolt.

AKX01036

AKX01082

AKX01037

MB990607

AB

MB991625

AKX01038

TRANSAXLE

TSB Revision

AUTOMATIC TRANSAXLE OVERHAUL

23B-30

59.Tap on the rear end of the output shaft to remove the output 

shaft, taper roller bearing and collar.

60.Tap out the outer race and the spacer.
61.Remove the snap ring.

ASSEMBLY

CAUTION

• Do not reuse the gasket, O-ring, oil seal. Always 

replace with a new one when assembling.

• Do not use grease, use petroleum jelly (i.e. Vaseline).
• Apply ATF to friction components, rotating parts, and 

sliding parts before installation. Immerse a new clutch 
discs or brake discs in ATF for at least two hours 
before assembling them.

• When replacing a bushing, replace the assembly which 

it belongs to.

• Do not use cloth gloves or shop towels during assem-

bly. Use nylon cloth or other lint-free material.

1. Install special tool MD998412 in the installation screw hole 

of the transfer drive gear bearing located in the transaxle 
case. Using this as a guide, install the transfer drive gear 
bearing and gear in the transaxle case.

AKX01039

AKX01040

AKX01088AB

MD998412


Content   ..  909  910  911  912   ..