Mitsubishi Eclipse. Manual - part 862
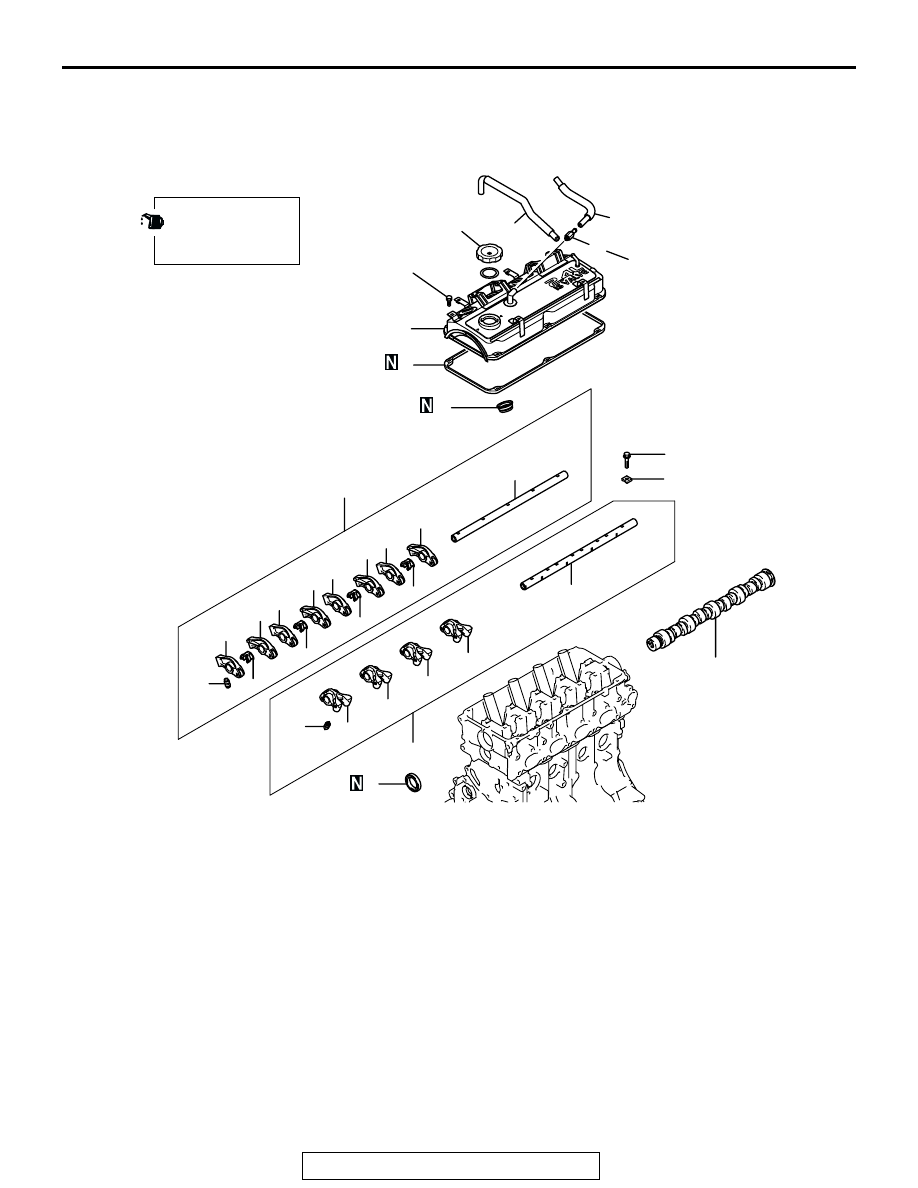
ROCKER ARMS AND CAMSHAFT
TSB Revision
ENGINE OVERHAUL <2.4L>
11B-25
ROCKER ARMS AND CAMSHAFT
REMOVAL AND INSTALLATION
M1113005400198
AK101647
APPLY ENGINE OIL
TO ALL MOVING
PARTS BEFORE
INSTALLATION.
1
2
4
3
5
6
7
15
9
10
14
13
14
13
14
12
18
13
14
12
13
12
17
20
16
12
17
17
19
17
11
8
AC
10 ± 2 N·m
87 ± 17 in-lb
3.4 ± 0.5 N·m
30 ± 4 in-lb
31 ± 3 N·m
23 ± 2 ft-lb
REMOVAL STEPS
1. BREATHER HOSE
2. PCV HOSE
3. PCV VALVE
4. OIL FILLER CAP
5. ROCKER COVER
6. ROCKER COVER GASKET
7. OIL SEAL
>>C<<
8. OIL SEAL
9. ROCKER SHAFT CAP
<<A>> >>B<<
10.ROCKER ARMS AND ROCKER
ARM SHAFT
<<A>> >>B<<
11.ROCKER ARMS AND ROCKER
ARM SHAFT
>>B<<
12.ROCKER SHAFT SPRING
13.ROCKER ARM "B"
14.ROCKER ARM "A"
15.ROCKER ARM SHAFT
(INTAKE SIDE)
>>A<<
16.LASH ADJUSTER
17.ROCKER ARM "C"
18.ROCKER ARM SHAFT
(EXHAUST SIDE)
>>A<<
19.LASH ADJUSTER
20.CAMSHAFT
REMOVAL STEPS (Continued)