Mitsubishi Grandis. Manual - part 367


  Index      Mitsubishi     Mitsubishi Grandis - service repair manual


Search            


Content   ..  365  366  367  368   ..


Mitsubishi Grandis. Manual - part 367


HEADLAMP

CHASSIS ELECTRICAL

54A-87

NOTE: 

.

1. When measuring the intensity, maintain an 

engine speed of 2,000 r/min, with the battery in 
the charging condition.

2. There may be special local regulations pertaining 

to headlamp intensity, be sure to make any 
adjustments necessary to satisfy such 
regulations.

3. If an illuminometer is used to make the 

measurements, convert its values to photometer 
values by using the following formula.
I = Er

2

 Where:

I=intensity (cd)
E=illumination (Iux)
r=distance (m) from headlamps to 

illuminometer

BULB REPLACEMENT

M1542001300818

HEADLAMP BULB <LOW BEAM> 
REPLACEMENT

1. Disconnect the connector.

2. Twist the cover to remove.
3. Withdraw the socket from the bulb.

CAUTION

Don't touch the bulb surface with bare hands or 
dirty gloves. if the bulb surface (glass part) gets 
dirty, clean it with alcohol or thinner immediately 
and dry well, and then install it.
4. Remove the spring to withdraw the bulb.

HEADLAMP BULB <HIGH BEAM> 
REPLACEMENT

1. Disconnect the connector.

2. Twist the cover to remove.

CAUTION

Don't touch the bulb surface with bare hands or 
dirty gloves. if the bulb surface (glass part) gets 
dirty, clean it with alcohol or thinner immediately 
and dry well, and then install it.
3. Twist the socket to remove.

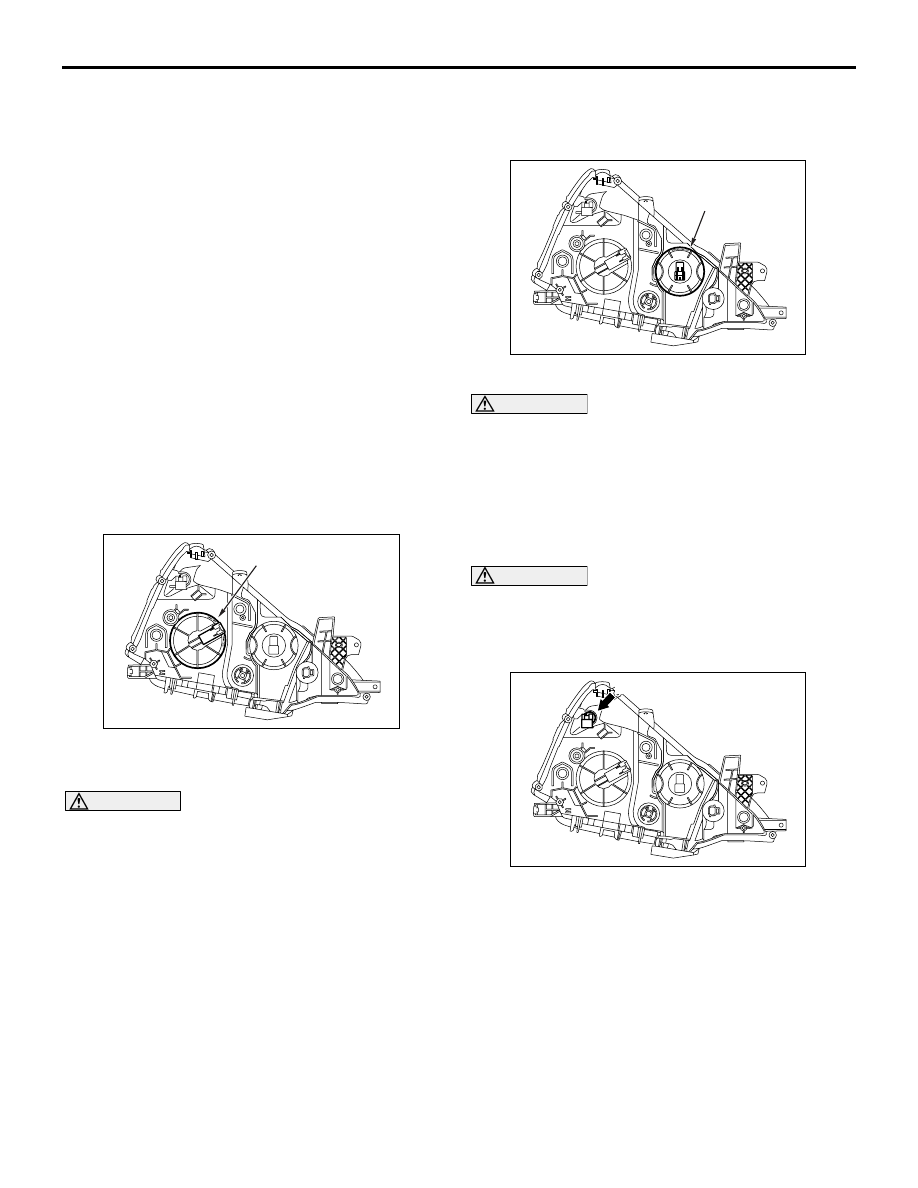
POSITION LAMP BULB REPLACEMENT 

CAUTION

Don't touch the bulb surface with bare hands or 
dirty gloves. if the bulb surface (glass part) gets 
dirty, clean it with alcohol or thinner immediately 
and dry well, and then install it.

Disconnect the connector, and twist the position 
lamp socket to remove it.

AC301627

AD

Cover

AC301626

AC

Cover

AC301625

AC

Position lamp

HEADLAMP

CHASSIS ELECTRICAL

54A-88

FRONT TURN SIGNAL LAMP BULB 
REPLACEMENT

CAUTION

Don't touch the bulb surface with bare hands or 
dirty gloves. if the bulb surface (glass part) gets 
dirty, clean it with alcohol or thinner immediately 
and dry well, and then install it.

Disconnect the connector, and twist the front turn 
signal lamp socket to remove it.

 HEADLAMP AUTOMATIC-SHUTDOWN 
FUNCTION CHECK

M1542011201194

Confirm that the headlamp turns off when the ignition 
switch is ON and the driver's door is opened and 
when the ignition key is pulled out with the lighting 
switch at ON (HEAD) position and the driver's door is 
opened. If not, carry out the troubleshooting. (Refer 
to GROUP 54B, Troubleshooting 

P.54B-276

 or 

GROUP 54C, Troubleshooting

P.54C-280

).

AC301624

AC

Front turn-signal lamp

HEADLAMP

CHASSIS ELECTRICAL

54A-89

HEADLAMP

REMOVAL AND INSTALLATION

M1542001800318

AC312842 AB

1

2

3

4

2.5 ± 0.3 N·m

4.9 ± 0.7 N·m

4.9 ± 0.7 N·m

4.9 ± 0.7 N·m

Headlamp levelling switch 
removal steps

Lower panel (Refer to GROUP 52A, 
Instrument Panel Assembly 

P.52A-2

).

1.

Headlamp levelling switch

Headlamp removal steps

2.

Air guide panel

<<A>>

3.

Headlamp assembly

4.

Headlamp bracket

FRONT FOG LAMP

CHASSIS ELECTRICAL

54A-90

REMOVAL SERVICE POINTS
<<A>> HEADLAMP ASSEMBLY 
REMOVAL

1. Remove the splash shield assembling clips as 

shown.

2. Remove the front bumper assembling bolts and 

clips as shown.

3. Remove the headlamp assembly by sliding out 

the front bumper.

INSPECTION

M1542011201224

HEADLAMP LEVELLING SWITCH CHECK

FRONT FOG LAMP

SERVICE SPECIFICATIONS

M1542000300525

AC303130

AC312846

Switch position

Resistance value 
between 4 TAG 5

0

120 

1

300 

2

620 

3

1.1 k

4

2  k

AC302750AB

Item

Standard value

Fog lamp aiming

Vertical direction

100 mm below horizontal (H)

Horizontal direction

Parallel to direction of vehicle 
travel


Content   ..  365  366  367  368   ..