Mazda CX-9 (2019 year). Instruction - part 34
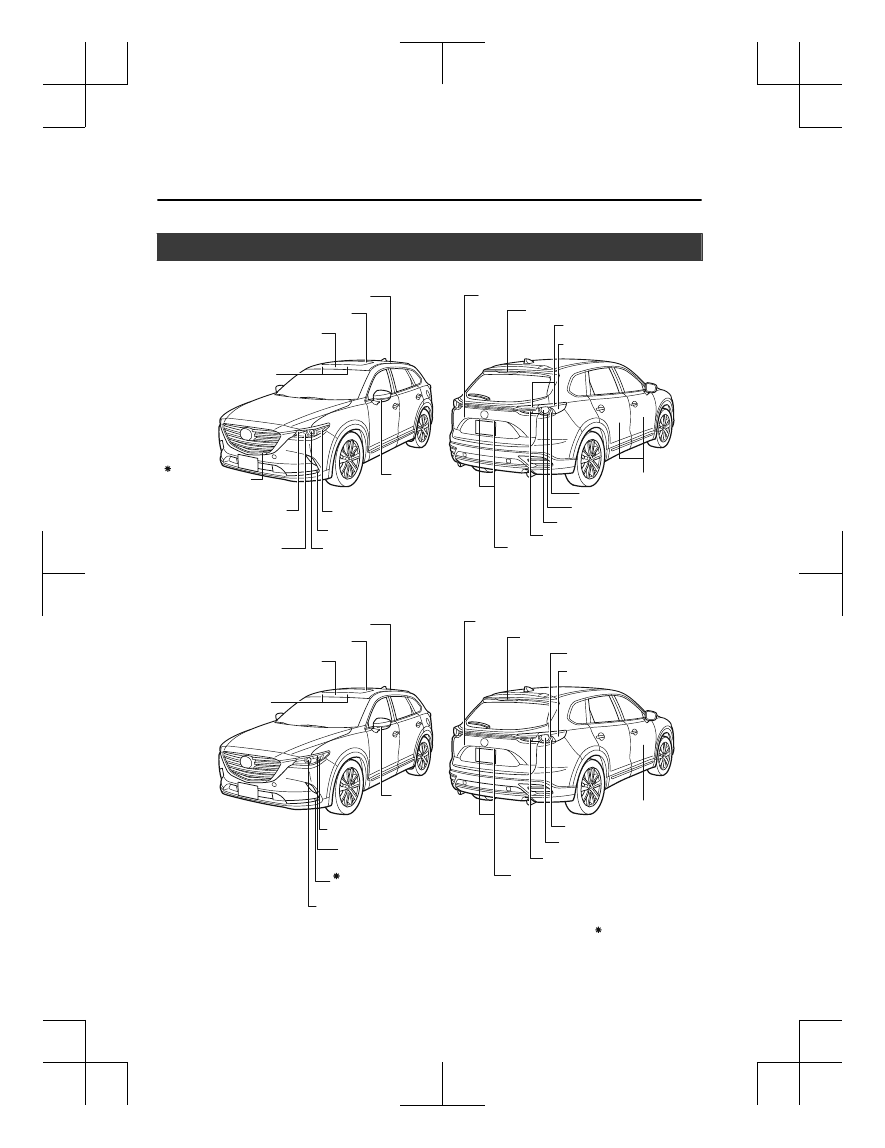
Light Bulbs
Type A (With Adaptive Front Lighting System (AFS))
Type B (Without Adaptive Front Lighting System (AFS))
Rear side-marker lights
Rear turn signal lights
Brake lights
License plate lights
Headlights (Low/High beam)
High-mount brake light
Overhead lights (Front)/
Map lights (Front)
Luggage compartment light
Vanity mirror lights
Daytime running lights/
Parking lights
Taillights
Ambient lights
Reverse lights
Fog lights
Front turn signal lights
Fog lights
Map lights (Center)
Overhead light (Rear)
Rear side-marker lights
Rear turn signal lights
Brake lights
License plate lights
Headlights (Low/High beam)/
Daytime running lights
High-mount brake light
Overhead lights (Front)/
Map lights (Front)
Luggage compartment light
Vanity mirror lights
Reverse lights
Front turn signal lights
Map lights (Center)
Overhead light (Rear)
Parking lights/Front
side-marker lights
Front side-marker lights
Some models.
Side turn
signal lights
Side turn
signal lights
Signature wing
illumination
Brake lights/Taillights
Brake lights/Taillights
Ambient lights
Maintenance and Care
Owner Maintenance
6-42
CX-9_8HB2-EA-18G_Edition1
2018-5-11 13:09:27