Mercury Cougar (2002 year). Manual - part 8


  Index      Mercury     Mercury Cougar (2002 year) - manual in english


Search            copyright infringement  


Content      ..     6      7      8      9     ..


Mercury Cougar (2002 year). Manual - part 8


If you smell exhaust fumes inside your vehicle, have your dealer
inspect your vehicle immediately. Do not drive if you smell

exhaust fumes.

Important safety precautions

A computer system controls the engine’s idle revolutions per minute
(RPM). When the engine starts, the idle RPM runs faster to warm the
engine. If the engine idle speed does not slow down automatically, have
the vehicle checked. Do not allow the vehicle to idle for more than 10
minutes at the higher RPM.

Before starting the vehicle:

1. Make sure all vehicle occupants have buckled their safety belts. For
more information on safety belts and their proper usage, refer to the
Seating and safety restraints chapter.

2. Make sure the headlamps and vehicle accessories are off.

3. Make sure the parking brake is
set.

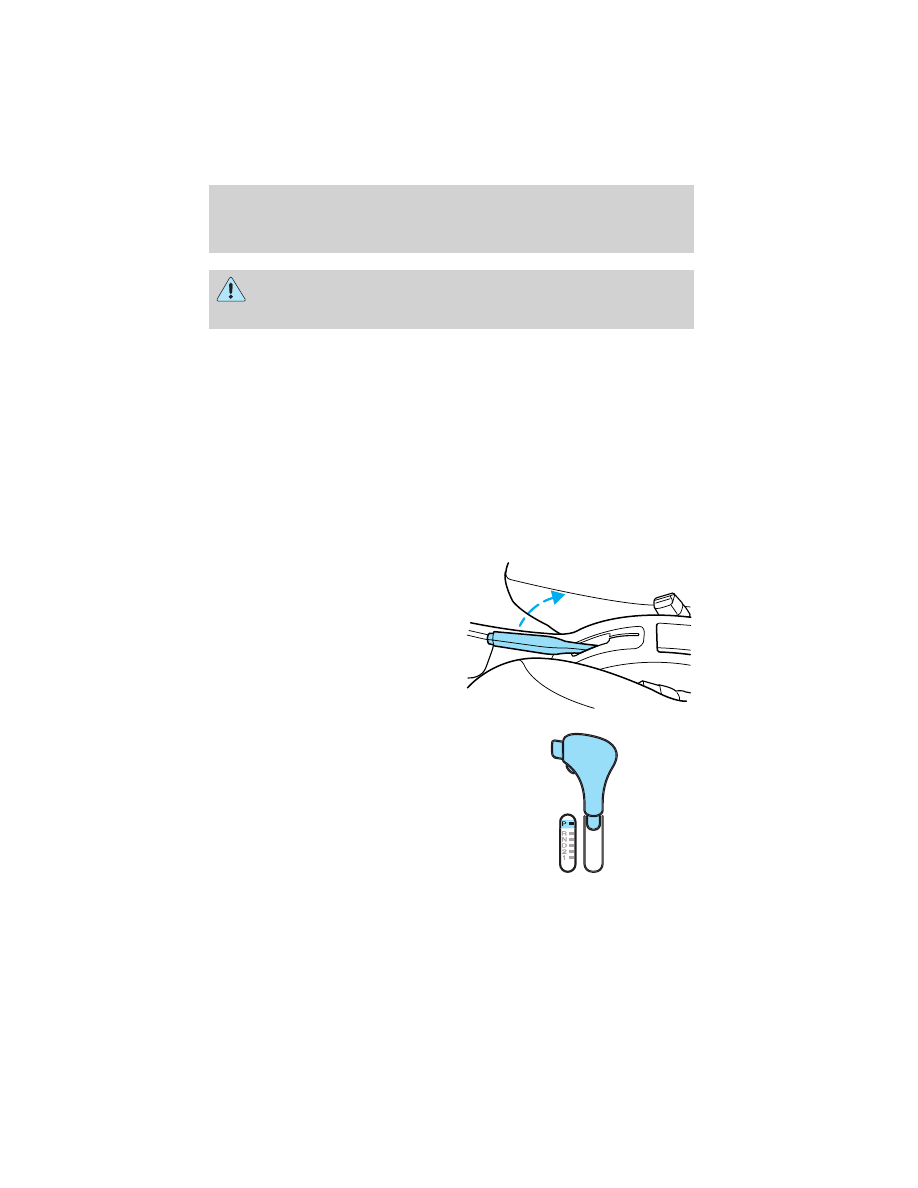
If starting a vehicle with an
automatic transaxle:
• Make sure the gearshift is in P

(Park).

Driving

113

-------------------------------------------------------------------------------------------------------------------------------------------------------------

If starting a vehicle with a manual
transaxle:
• Push the clutch pedal to the

floor, put the gearshift in neutral.

4. Turn the key to 3 (ON) without
turning the key to 4 (START).

If there is difficulty in turning the
key, firmly rotate the steering wheel
left and right until the key turns
freely. This condition may occur
when:
• front wheels are turned
• front wheel is against the curb
• steering wheel is turned when

getting in or out of the vehicle

Make sure the corresponding lights illuminate or illuminate briefly. If a
light fails to illuminate, have the vehicle serviced.

Driving

114

-------------------------------------------------------------------------------------------------------------------------------------------------------------

• If the driver’s safety belt is fastened, the

light may not illuminate.

Starting the engine

Note: Whenever you start your vehicle, release the key as soon as the
engine starts. Excessive cranking could damage the starter.

1. Turn the key to 4 (START)
without pressing the accelerator
pedal and release as soon as the
engine starts. The key will return to
3 (ON).

2. If the temperature is above –12°
C (10° F) and the engine does not
start within five seconds on the first
try, turn the key to OFF, wait 10
seconds and try again.

3. If the temperature is below -12° C (10° F) and the engine does not
start in 15 seconds on the first try, turn the key OFF and wait 10
seconds and try again. If the engine does not start in two attempts, Press
the accelerator pedal all the way to floor and hold. Turn the key to
START position.

4. When the engine starts, release the key, then release the accelerator
pedal gradually as the engine speeds up.

5. After idling for a few seconds, apply the brake, shift into gear and
drive.

Using the engine block heater (if equipped)

An engine block heater warms the engine coolant, which improves
starting, warms up the engine faster and allows the heater-defroster
system to respond quickly. Use of an engine block heater is strongly
recommended if you live in a region where temperatures reach -23° C
(-10° F) or below.

For best results, plug the heater in at least three hours before starting
the vehicle. Using the heater for longer than three hours will not harm
the engine, so the heater can be plugged in the night before starting the
vehicle.

To prevent electrical shock, do not use your heater with
ungrounded electrical systems or two-pronged (cheater)

adapters.

Driving

115

-------------------------------------------------------------------------------------------------------------------------------------------------------------

Guarding against exhaust fumes

Although odorless and colorless, carbon monoxide is present in exhaust
fumes. Take precautions to avoid its dangerous effects.

If you ever smell exhaust fumes of any kind inside your vehicle,
have your dealer inspect and fix your vehicle immediately. Do

not drive if you smell exhaust fumes. These fumes are harmful and
could kill you.

Have the exhaust and body ventilation systems checked whenever:
• the vehicle is raised for service.
• the sound of the exhaust system changes.
• the vehicle has been damaged in a collision.

WARNING: Engine exhaust, some of its constituents, and
certain vehicle components contain or emit chemicals known to

the State of California to cause cancer and birth defects or other
reproductive harm. In addition, certain fluids contained in vehicles and
certain products of component wear contain or emit chemicals known
to the State of California to cause cancer and birth defects or other
reproductive harm.

Important ventilating information

If the engine is idling while the vehicle is stopped in an open area for
long periods of time, open the windows at least 2.5 cm (one inch).

Adjust the heating or air conditioning (if equipped) to bring in fresh air.

Improve vehicle ventilation by keeping all air inlet vents clear of snow,
leaves and other debris.

BRAKES

Your service brakes are self-adjusting. Refer to the scheduled
maintenance guide for scheduled maintenance.

Occasional brake noise is normal and often does not indicate a
performance concern with the vehicle’s brake system. In normal
operation, automotive brake systems may emit occasional or intermittent
squeal or groan noises when the brakes are applied. Such noises are
usually heard during the first few brake applications in the morning;
however, they may be heard at any time while braking and can be
aggravated by environmental conditions such as cold, heat, moisture,

Driving

116

-------------------------------------------------------------------------------------------------------------------------------------------------------------

road dust, salt or mud. If a “metal-to-metal,” “continuous grinding” or
“continuous squeal” sound is present while braking, the brake linings
may be worn-out and should be inspected by a qualified service
technician.

If you are driving down a long or steep hill, shift to a lower gear.
Do not apply your brakes continuously, as they may overheat

and become less effective.

Anti-lock brake system (ABS) (if equipped)

On vehicles equipped with an anti-lock braking system (ABS), a noise
from the hydraulic pump motor and pulsation in the pedal may be
observed during ABS braking events. Pedal pulsation coupled with noise
while braking under panic conditions or on loose gravel, bumps, wet or
snowy roads is normal and indicates proper functioning of the vehicle’s
anti-lock brake system. The ABS performs a self-check after you start
the engine and begin to drive away. A brief mechanical noise may be
heard during this test. This is normal. If a malfunction is found, the ABS
warning light will come on. If the vehicle has continuous vibration or
shudder in the steering wheel while braking, the vehicle should be
inspected by a qualified service technician.

The ABS operates by detecting the
onset of wheel lockup during brake
applications and compensates for
this tendency. The wheels are
prevented from locking even when
the brakes are firmly applied. The
accompanying illustration depicts
the advantage of an ABS equipped
vehicle (on bottom) to a non-ABS
equipped vehicle (on top) during hard braking with loss of front braking
traction.

ABS warning lamp

ABS

The

ABS

warning lamp in the instrument cluster momentarily illuminates

when the ignition is turned to the ON position. If the light does not
illuminate momentarily at start up, remains on or continues to flash, the
ABS needs to be serviced.

Driving

117

-------------------------------------------------------------------------------------------------------------------------------------------------------------

With the ABS light on, the anti-lock
brake system is disabled and normal
braking is still effective unless the
brake warning light also remains
illuminated with parking brake
released. (If your brake warning lamp illuminates, have your vehicle
serviced immediately.)

Using ABS

• In an emergency or when maximum efficiency from the four-wheel

ABS is required, apply continuous force on the brake. The four wheel
ABS will be activated immediately, thus allowing you to retain full
steering control of your vehicle and, providing there is sufficient
space, will enable you to avoid obstacles and bring the vehicle to a
controlled stop.

• The anti-lock system does not reduce stopping distance. Always leave

enough room between your vehicle and the vehicle in front of you to
stop.

• We recommend that you familiarize yourself with this braking

technique. However, avoid taking any unnecessary risks.

Parking brake

Apply the parking brake whenever
the vehicle is parked. To set the
parking brake, pull the handle up as
far as possible.

The BRAKE warning lamp in the
instrument cluster illuminates and
remains illuminated (when the
ignition is turned ON) until the
parking brake is released.
The parking brake is not recommended to stop a moving vehicle.
However, if the normal brakes fail, the parking brake can be used to stop
your vehicle in an emergency. Since the parking brake applies only the
rear brakes, the vehicle’s stopping distance will increase greatly and the
handling of your vehicle will be adversely affected.

P

!

BRAKE

P

!

BRAKE

Driving

118

-------------------------------------------------------------------------------------------------------------------------------------------------------------

Always set the parking brake fully and make sure that the
gearshift is securely latched in P (Park) (automatic transaxle) or

in 1 (First) (manual transaxle).

Push the button on the end of the
parking brake and push the handle
down as far as possible to release
the brake. Driving with the parking
brake on will cause the brakes to
wear out quickly and reduce fuel
economy.

TRACTION CONTROL

Y

Your vehicle is equipped with a Traction Control

y system. This system

helps you maintain the stability and steerability of your vehicle. It is
especially useful on slippery road surfaces. The system operates by
detecting and controlling wheel spin. The system borrows many of the
electronic and mechanical elements already present in the anti-lock
braking system (ABS).

Wheel-speed sensors allow excess rear wheel spin to be detected by the
Traction Control

y portion of the ABS computer. Any excessive wheel

spin is controlled by automatically applying and releasing the rear brakes
in conjunction with engine torque reductions. Engine torque reduction is
realized via the fully electronic spark and fuel injection systems. This
process is very sensitive to driving conditions and very fast acting. The
rear wheels “search” for optimum traction several times a second and
adjustments are made accordingly.

The Traction Control

y system will allow your vehicle to make better use

of available traction on slippery surfaces. The system is a driver aid
which makes your vehicle easier to handle primarily on snow, ice covered
and gravel roads.

During Traction Control

y operation, the traction control active light will

illuminate, you may hear an electric motor type of sound coming from
the engine compartment and the engine will not “rev-up” when you push
further on the accelerator. This is normal system behavior.

Driving

119

-------------------------------------------------------------------------------------------------------------------------------------------------------------

The Traction Control

y on/off

switch, located in the center of the
instrument panel illuminates when
the system is OFF. The Traction
Control

y system will revert to the

ON position every time the ignition
is turned OFF and ON.

If you should become stuck in snow
or ice or on a very slippery road surface, try switching the Traction
Control

y system off. This may allow excess wheel spin to “dig” the

vehicle out and enable a successful “rocking” maneuver.

If a system fault is detected the OFF indicator lamp on the traction
control switch will be illuminated and your vehicle should be serviced.

STEERING

Your vehicle is equipped with power steering. Power steering uses energy
from the engine to decrease the driver’s effort in steering the vehicle.

To prevent damage to the power steering pump:
• Never hold the steering wheel to the extreme right or the extreme left

for more than a few seconds when the engine is running.

• Do not operate the vehicle with the power steering pump fluid level

below the MIN mark on the reservoir.

If the power steering system breaks down (or if the engine is turned
off), you can steer the vehicle manually, but it takes more effort.

If the steering wanders or pulls, the condition could be caused by any of
the following:
• Underinflated tire(s) on any wheel(s)
• Uneven vehicle loading
• High crown in center of road
• High crosswinds
• Wheels out of alignment
• Loose or worn suspension components

AUTOMATIC TRANSMISSION OPERATION (IF EQUIPPED)

Brake-shift interlock

If you cannot move the gearshift lever out of P (Park) with the brake
pedal depressed:

Driving

120

-------------------------------------------------------------------------------------------------------------------------------------------------------------

1. Turn the ignition off and remove
the key.

2. Apply the parking brake and the
brake pedal.

3. Insert a screwdriver or similar
item about 5 cm (2 inches) into the
square opening to the right of the
gearshift at the base of the console.

On vehicles without the opening, insert a screwdriver or similar item
about 5 cm (2 inches) inward, directly below the arrow symbol located
to the right of the gearshift at the base of the console.

4. Rotate the screwdriver point
rearward.

5. Push and hold the thumb button
and move the gearshift.

6. Remove the screwdriver when the
gearshift moves from the P (Park)
position.

This procedure may have to be
repeated each time the gearshift is
placed in P (Park) until repairs are
completed.

The brake-shift interlock feature is designed to further enhance
the safety of the vehicle occupants when the vehicle is placed

into gear. To preserve the benefits of this feature, have any repairs
completed promptly.

Driving

121

-------------------------------------------------------------------------------------------------------------------------------------------------------------

The console-mounted gearshift will lock when you turn the key to the
LOCK position. When the gearshift is in any position except P (Park),
the ignition key cannot be turned to LOCK or removed from the steering
column. To remove the key, the gearshift lever must be in P (Park).

Once the gearshift is secure in the desired position, release the brake
pedal and use the accelerator as necessary.

Understanding gearshift positions

Hold the brake pedal down while you move the gearshift lever
from P (Park) to another position. If you do not hold the brake

pedal down, your vehicle may move unexpectedly and injure someone.

P (Park)

Always come to a complete stop
before shifting into P (Park). Make
sure that the gearshift lever is
securely latched in P (Park). This
locks the transaxle and prevents the
front wheels from rotating.

Always set the parking
brake fully and make sure

the gearshift lever is latched in P
(Park). Turn off the ignition
whenever you leave your vehicle.

R (Reverse)

With the gearshift lever in R
(Reverse), the vehicle will move
backward. You should always come
to a complete stop before shifting in
and out of R (Reverse).

Driving

122

-------------------------------------------------------------------------------------------------------------------------------------------------------------

N (Neutral)

With the gearshift lever in the N
(Neutral) position, the vehicle can
be started and is free to roll. Hold
the brake pedal down while in this
position.

(Overdrive)

The normal driving position for the
best fuel economy. Transaxle
operates in gears one through four.

(Overdrive) can be deactivated

by pressing the transaxle control
switch (TCS) on the underside of
the gearshift handle.

The transaxle control indicator light
(TCIL) (O/D OFF) in the
instrument cluster will illuminate.

Driving

123

-------------------------------------------------------------------------------------------------------------------------------------------------------------

Drive – Not shown on the display. Activate by pressing the transaxle
control switch (TCS) on the underside of the gearshift handle with the
gearshift in the

position. The TCIL (O/D OFF) will illuminate in the

instrument cluster. Transaxle operates in gears one through three.
(Drive) provides more engine braking than

(Overdrive) and is useful

when:
• driving with a heavy load.
• towing a trailer up or down steep hills.
• additional engine downhill braking is desired. If towing a trailer, refer

to Driving while you tow in the Trailer towing section.

To return to

(Overdrive) mode, press the transaxle control switch

(TCS). The TCIL (O/D OFF) will no longer be illuminated.

Each time the vehicle is started, the transaxle will automatically return
to normal overdrive mode.

Every time the vehicle is shut off and restarted, you must press the
transaxle control switch to cancel overdrive operation if driving in
overdrive is not desired.

2 (Second)

Use 2 (Second) to start-up on
slippery roads or to provide
additional engine braking on
downgrades.

Driving

124

-------------------------------------------------------------------------------------------------------------------------------------------------------------

1 (First)

Use 1 (Low) to provide maximum
engine braking on steep
downgrades. Upshifts can be made
by shifting to 2 (Second) or to
(Overdrive). Selecting 1 (Low) at
higher speeds causes the transaxle
to shift to a lower gear, and will
shift to 1 (Low) after vehicle
decelerates to the proper speed.

Forced Downshifts

To gain acceleration in

(Overdrive) or Drive (O/D OFF) when

passing another vehicle, push the accelerator to the floor. The transaxle
will downshift to the appropriate gear: third, second or first gear.

MANUAL TRANSMISSION OPERATION (IF EQUIPPED)

Using the clutch

Vehicles equipped with a manual
transaxle have a starter interrupt
interlock that prevents cranking of
the engine unless the clutch pedal is
depressed.

Driving

125

-------------------------------------------------------------------------------------------------------------------------------------------------------------

When starting a vehicle with a manual transaxle:

1. Hold down the brake pedal and
clutch pedal.

2. Put the gearshift lever in neutral.

3. Start the vehicle.

4. Put the gearshift lever in 1 (First) or R (Reverse).

5. Release the clutch slowly while pressing gradually down on the
accelerator pedal.

Do not drive with your foot resting on the clutch pedal and do not use
the clutch pedal to hold your vehicle at a standstill while waiting on a
hill. These actions will seriously reduce clutch life.

Recommended shift speeds

Upshift according to the following charts for best fuel economy:

2.0L engine 5–speed transaxle shift speed schedules

Recommended

upshifts:

During acceleration:

During cruise*:

Shift from:

km/h

mph

km/h

mph

First to second

22

14

19

12

Second to third

40

25

32

20

Third to fourth

53

33

46

29

Fourth to fifth

77

48

64

40

*The vehicle can be shifted at lower speeds to improve fuel economy.

Driving

126

-------------------------------------------------------------------------------------------------------------------------------------------------------------

2.5L engine 5–speed transaxle shift speed schedules

Recommended

upshifts:

During acceleration:

During cruise*:

Shift from:

km/h

mph

km/h

mph

First to second

22

14

16

10

Second to third

40

25

32

20

Third to fourth

53

33

50

31

Fourth to fifth

77

48

64

40

*The vehicle can be shifted at lower speeds to improve fuel economy.

Parking

1. Apply the brake and shift into the neutral position.

2. Engage the parking brake.

3. Shift into 1 (First).

4. Turn ignition off.

Do not park your vehicle in Neutral, it may move unexpectedly
and injure someone. Use 1 (First) gear and set the parking brake

fully.

Reverse

1. Completely stop your vehicle.

2. Depress the clutch pedal to the floor and place the gearshift lever in
the neutral position. Do not release the clutch pedal.

Driving

127

-------------------------------------------------------------------------------------------------------------------------------------------------------------

3. Push the gearshift lever
completely to the right, pull up the
ring on the stalk of the gearshift
lever, and then pull rearward on the
gearshift lever to engage the R
(Reverse) gear.

4. When the R (Reverse) gear is engaged, slowly release the clutch pedal
from the floor.

DRIVING THROUGH WATER

Do not drive quickly through standing water, especially if the depth is
unknown. Traction or brake capability may be limited and if the ignition
system gets wet, your engine may stall. Water may also enter your
engine’s air intake and severely damage your engine.

If driving through deep or standing water is unavoidable, proceed very
slowly. Never drive through water that is higher than the bottom of the
hubs (for trucks) or the bottom of the wheel rims (for cars).

Once through the water, always try the brakes. Wet brakes do not stop
the vehicle as effectively as dry brakes. Drying can be improved by
moving your vehicle slowly while applying light pressure on the brake
pedal.

Driving through deep water where the transmission vent tube is
submerged may allow water into the transmission and cause
internal transmission damage. Have the fluid checked and, if
water is found, replace the fluid.

Driving

128

-------------------------------------------------------------------------------------------------------------------------------------------------------------


Content      ..     6      7      8      9     ..