Content .. 1339 1340 1341 1342 ..
Dodge Caliber. Manual - part 1341
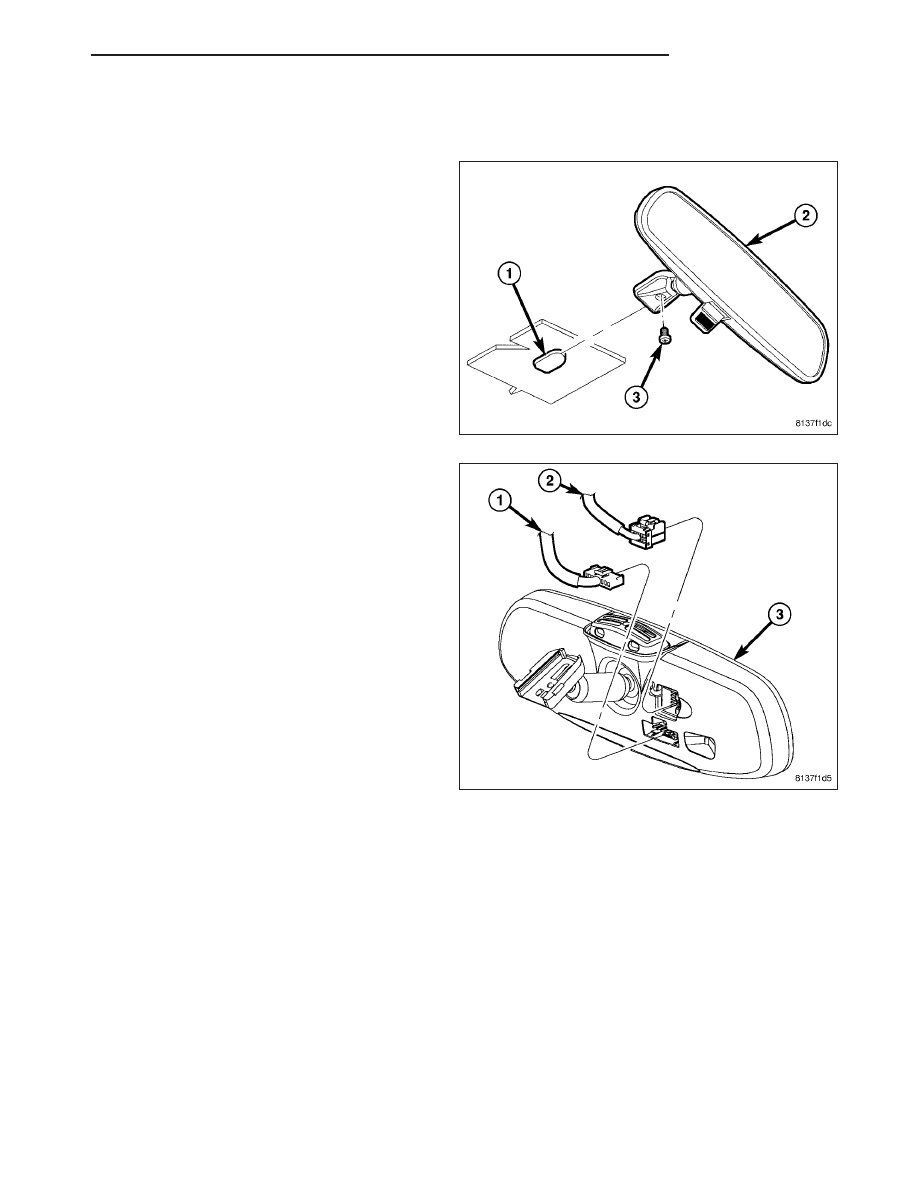
INSTALLATION
MIRROR
1. Position and slide the rear view mirror (2) down-
ward over the support bracket/button (1) on the
inside of the windshield glass.
2. Install and tighten the set screw (3) that secures
the rear view mirror to the support bracket/button.
Tighten the screw to 2 N·m (17 in. lbs.).
3. If the vehicle is so equipped, route the electrochro-
mic (automatic dimming) mirror takeout and con-
nector (1) and/or the telematic (hands-free phone)
mirror takeout and connector (2) of the headliner
wire harness to the left of the mirror support
bracket and reconnect it to the connector recepta-
cle on the back (windshield side) of the mirror
housing (3).
4. If the vehicle is equipped with either the electro-
chromic or the telematic mirror option, reconnect
the battery negative cable.
SUPPORT BRACKET
NOTE: The rear view mirror support bracket (or button) is permanently bonded to the inside of the wind-
shield glass. If the bracket should become separated from the glass, it may be rebonded using the following
procedure. This procedure requires the use of a Rear View Mirror Adhesive kit that is available through
Mopar™ in single application packages that include a two-part adhesive and an accelerant with applicator.
1. Mark the proper position for the mirror bracket on the outside of the windshield glass with a wax pencil. The
residual adhesive on the inside of the glass from the prior mirror bracket installation can be used as a guide.
2. Clean the bracket contact area on the inside of the glass. Use a mild powdered cleanser on a cloth saturated
with isopropyl (rubbing) alcohol. Finally, clean the glass with a paper towel dampened with alcohol.
3. Sand the bonding surface (the smaller side) of the support bracket with fine grit-sandpaper. Wipe the bracket
surface clean with a paper towel.
4. Apply accelerant to the bonding surface of the bracket according to the following instructions:
•
Crush the accelerant vial to saturate the felt applicator.
•
Remove the paper sleeve.
•
Apply accelerant to the bonding surface of the bracket.
PM
INTERIOR
23 - 101