Dodge Caliber. Manual - part 1340


  Index      Dodge     Dodge Caliber - service repair manual 2007 year


Search            


Content   ..  1338  1339  1340  1341   ..


Dodge Caliber. Manual - part 1340


FLOOR CARPET

REMOVAL

1. Remove front seats. (Refer to 23 - BODY/SEATS/

SEAT - REMOVAL)

2. Remove rear seats cushion. (Refer to 23 - BODY/

SEATS/SEAT CUSHION - REMOVAL)

3. Remove rear seat back. (Refer to 23 - BODY/

SEATS/SEAT BACK - REMOVAL)

4. Remove cargo load floor. (Refer to 23 - BODY/IN-

TERIOR/COVER - REMOVAL)

5. Remove center console. (Refer to 23 - BODY/IN-

TERIOR/CENTER CONSOLE - REMOVAL)

6. Remove center console shifter housing. (Refer to

23

-

BODY/INTERIOR/CENTER

CONSOLE

-

REMOVAL)

7. Remove lower B-Pillar trim. (Refer to 23 - BODY/

INTERIOR/B-PILLAR TRIM - REMOVAL)

8. Remove door sill plate. (Refer to 23 - BODY/INTE-

RIOR/DOOR SILL TRIM - REMOVAL)

9. Remove side cowl trim panel. (Refer to 23 - BODY/

INTERIOR/COWL TRIM - REMOVAL)

10. Remove liftgate scuff plate. (Refer to 23 - BODY/INTERIOR/LIFTGATE SCUFF PLATE - REMOVAL)

11. Remove rear quarter trim. (Refer to 23 - BODY/INTERIOR/QUARTER PANEL TRIM - REMOVAL)

12. Remove carpet from vehicle.

INSTALLATION

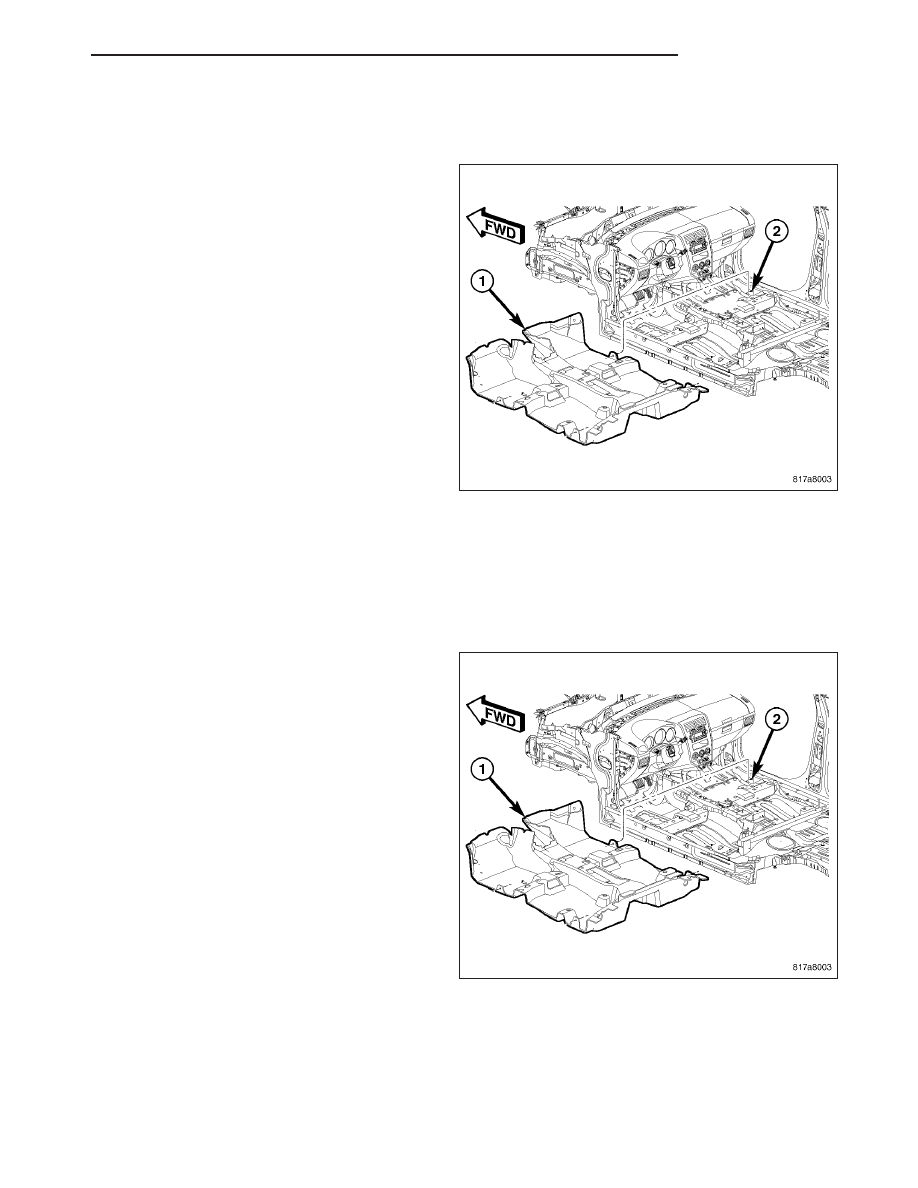
1. Install carpet into vehicle ensuring carpet (1) is

aligned with tabs (2).

2. Install rear quarter panel trim. (Refer to 23 - BODY/

INTERIOR/QUARTER PANEL TRIM - INSTALLA-
TION)

3. Install liftgate scuff plate. (Refer to 23 - BODY/IN-

TERIOR/LIFTGATE SCUFF PLATE - INSTALLA-
TION)

4. Install cargo load floor. (Refer to 23 - BODY/INTE-

RIOR/COVER - INSTALLATION)

5. Install side cowl trim panel. (Refer to 23 - BODY/

INTERIOR/COWL TRIM - INSTALLATION)

6. Install B-pillar lower trim. (Refer to 23 - BODY/IN-

TERIOR/B-PILLAR LOWER TRIM - INSTALLA-
TION)

7. Install door sill scuff plate. (Refer to 23 - BODY/IN-

TERIOR/DOOR SILL TRIM - INSTALLATION)

8. Install center console. (Refer to 23 - BODY/INTE-

RIOR/CENTER CONSOLE - INSTALLATION)

9. Install center console shifter housing. (Refer to 23 - BODY/INTERIOR/CENTER CONSOLE - INSTALLATION)

10. Install rear seat cushion. (Refer to 23 - BODY/SEATS/SEAT CUSHION - INSTALLATION)

11. Install rear seat back. (Refer to 23 - BODY/SEATS/SEAT BACK - INSTALLATION) )

12. Install front seats.

PM

INTERIOR

23 - 97

HEADLINER

REMOVAL

1. Remove front windshield. (Refer to 23 - BODY/

STATIONARY GLASS/WINDSHIELD - REMOVAL)

2. Remove A-pillar trim. (Refer to 23 - BODY/INTERI-

OR/A-PILLAR TRIM - REMOVAL)

3. Disconnect A-pillar trim wire connector (2).

4. Remove sunvisors. (Refer to 23 - BODY/INTERI-

OR/SUN VISOR - REMOVAL)

5. Remove sun visor screws and retainers. (Refer to

23 - BODY/INTERIOR/REAR VIEW MIRROR -
INSTALLATION)

6. Disconnect front washer hose (1).

7. Remove universal homelink module and connector.

(Refer to 8 - ELECTRICAL/MESSAGE CENTER/
UNIVERSAL TRANSMITTER - REMOVAL).

8. Remove and disconnect dome lamp. (Refer to 8 -

ELECTRICAL/LAMPS/LIGHTING

-

INTERIOR/

DOME LAMP - REMOVAL)

9. Remove front and rear grab handles (3).

10. Remove seat belt turning loops.

11. Remove B-pillar upper trim. (Refer to 23 - BODY/

INTERIOR/B-PILLAR TRIM - REMOVAL)

12. Remove B-pillar lower trim. (Refer to 23 - BODY/

INTERIOR/B-PILLAR LOWER TRIM - REMOVAL)

13. Remove fastener attaching cargo loop to rear

quarter trim.

14. Remove rear seat striker bezel.

15. Remove C-pillar trim. (Refer to 23 - BODY/INTE-

RIOR/D-PILLAR TRIM - REMOVAL)

16. Remove rear quarter trim. (Refer to 23 - BODY/INTERIOR/QUARTER PANEL TRIM - REMOVAL)

17. Remove cargo load floor. (Refer to 23 - BODY/INTERIOR/COVER - REMOVAL)

18. Remove liftgate scuff plate. (Refer to 23 - BODY/INTERIOR/LIFTGATE SCUFF PLATE - REMOVAL)

19. Remove rear cargo dome light and disconnect connector.. (Refer to 8 - ELECTRICAL/LAMPS/LIGHTING -

INTERIOR/DOME LAMP - REMOVAL)

20. Remove rear headliner push pins.

21. Disconnect rear washer hose connector

22. Lower headliner.

23. With the help of an assistant, remove headliner through front windshield opening.

23 - 98

INTERIOR

PM

INSTALLATION

1. Before headliner installation, install courtesy lamp, cargo lamp, and Universal transmitter module to headliner.

(Refer to 8 - ELECTRICAL/MESSAGE CENTER/UNIVERSAL TRANSMITTER - INSTALLATION)

2. With the help of an assistant, Install headliner through windshield opening.

3. Connect rear cargo lamp connector. (Refer to 8 - ELECTRICAL/LAMPS/LIGHTING - INTERIOR/CARGO LAMP -

INSTALLATION)

4. Install headliner push pins located at rear of headliner.

5. Connect front dome lamp connector. (Refer to 8 - ELECTRICAL/LAMPS/LIGHTING - INTERIOR/DOME LAMP -

INSTALLATION)

6. If equipped, connect home link module connector. (Refer to 8 - ELECTRICAL/MESSAGE CENTER/UNIVERSAL

TRANSMITTER - INSTALLATION)

7. Connect front rear view mirror hardware. (Refer to 23 - BODY/INTERIOR/REAR VIEW MIRROR - INSTALLA-

TION)

8. Install rear view mirror. (Refer to 23 - BODY/INTERIOR/REAR VIEW MIRROR - INSTALLATION)

9. Install grab handles (3).

10. Connect rear washer hose.

11. Install sunvisor retainers. (Refer to 23 - BODY/IN-

TERIOR/REAR VIEW MIRROR - INSTALLATION)

12. Install sun visors.

13. Connect A-pillar wire connector.

14. Install A-pillar trim. (Refer to 23 - BODY/INTERI-

OR/A-PILLAR TRIM - INSTALLATION)

15. Install scuff plate. (Refer to 23 - BODY/INTERI-

OR/DOOR SILL TRIM - INSTALLATION)

16. Install B-pillar lower trim. (Refer to 23 - BODY/IN-

TERIOR/B-PILLAR LOWER TRIM - INSTALLA-
TION)

17. Install B-pillar upper trim. (Refer to 23 - BODY/IN-

TERIOR/B-PILLAR TRIM - INSTALLATION)

18. Install cargo load floor. (Refer to 23 - BODY/INTE-

RIOR/COVER - INSTALLATION)

19. Install rear quarter trim. (Refer to 23 - BODY/IN-

TERIOR/QUARTER PANEL TRIM - INSTALLA-
TION)

20. Install C-pillar trim. (Refer to 23 - BODY/INTERI-

OR/D-PILLAR TRIM - INSTALLATION)

21. Install rear seat striker bezel.

22. Install seat belt turning loops.

23. Install rear cargo scuff plate. (Refer to 23 - BODY/INTERIOR/REAR VIEW MIRROR - INSTALLATION)

PM

INTERIOR

23 - 99

INSIDE REAR VIEW MIRROR

REMOVAL

1. If the vehicle is equipped with either the electro-

chromic

(automatic

dimming)

or

the

telematic

(hands-free phone) mirror option, disconnect and
isolate the battery negative cable.

2. If the vehicle is so equipped, disconnect the elec-

trochromic mirror takeout and connector (1) and/or
the telematic mirror takeout and connector (2) of
the headliner wire harness from the connector
receptacle on the back (windshield side) of the mir-
ror housing (3).

3. Remove the set screw (3) that secures the rear

view mirror (2) to the support bracket/button (1) on
the inside of the windshield glass.

4. Slide the rear view mirror upward far enough to

disengage it from the support bracket/button.

23 - 100

INTERIOR

PM


Content   ..  1338  1339  1340  1341   ..