Chrysler Town, Dodge Caravan. Manual - part 386
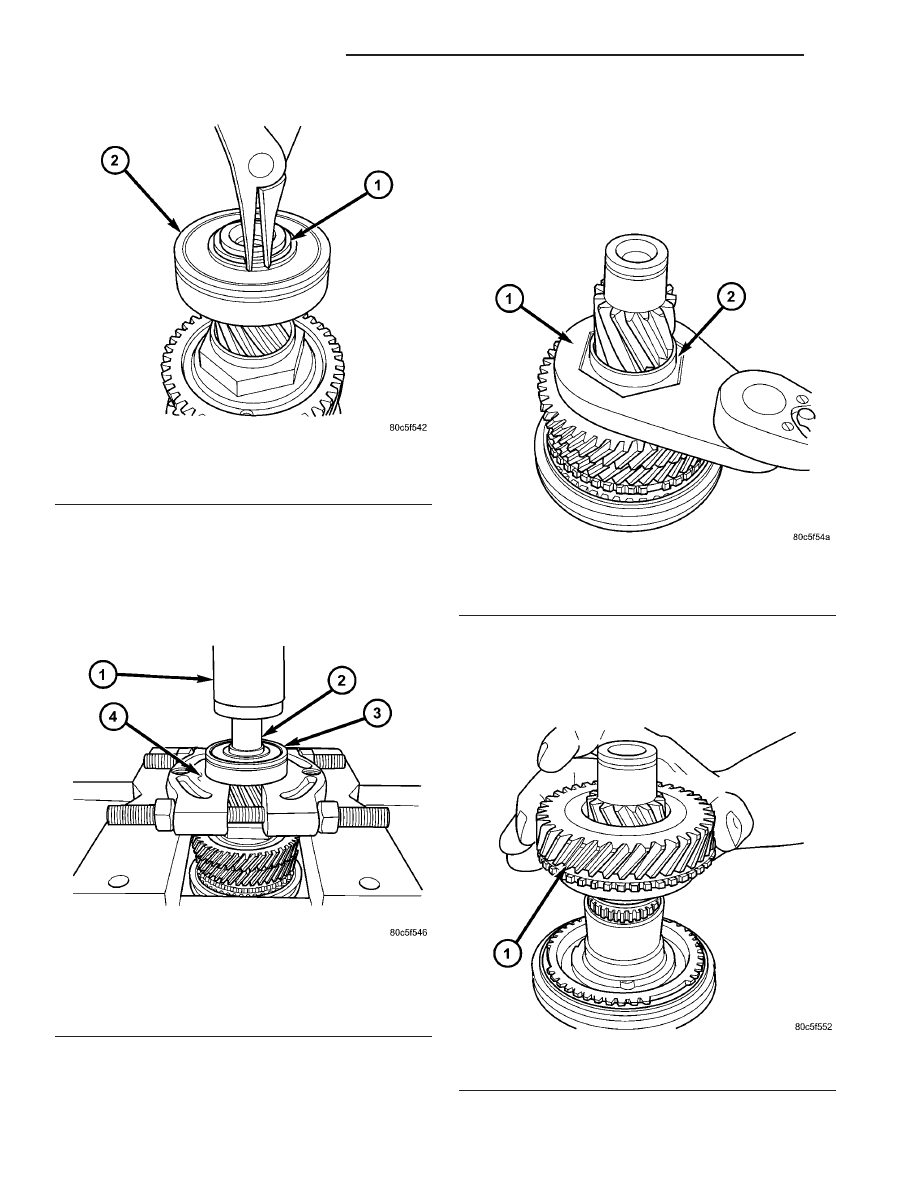
(3) Remove
input
bearing.
Place
input
shaft
assembly onto arbor press table, with the input bear-
ing supported by bearing splitter (Fig. 207). Using
adapter 8486-4, press bearing off of shaft, while
helper supports shaft to prevent dropping.
(4) Place input shaft assembly back into fixture
8487. Secure fixture to bench with fasteners, or
secure to bench vise.
NOTE: 5th gear nut is staked to the shaft. If neces-
sary, grind stake area to ease removal, but use care
not to contact gear.
(5) Remove 5th gear nut with wrench 8478 (Fig.
208). Discard nut and use a new one upon assembly.
(6) Remove 5th gear with arbor press and bearing
splitter.
(7) Remove
4th
gear
and
needle
bearing
(if
equipped) (Fig. 209).
Fig. 206 Input Bearing Snap Ring Removal
1 - SNAP RING
2 - INPUT BEARING
Fig. 207 Input Bearing Removal
1 - ARBOR PRESS RAM
2 - ADAPTER 8486-4
3 - INPUT BEARING
4 - BEARING SPLITTER
Fig. 208 5th Gear Nut Removal/Installation
1 - WRENCH 8478
2 - 5TH GEAR NUT
Fig. 209 4th Gear Removal/Installation
1 - 4th GEAR
21 - 94
T850 MANUAL TRANSAXLE
RS
INPUT SHAFT (Continued)