Chrysler Crossfire. Manual - part 668


  Index      Chrysler     Chrysler Crossfire - service repair manual 2005 year


Search            


Content   ..  666  667  668  669   ..


Chrysler Crossfire. Manual - part 668


8. Remove the vibration damper (Refer to 9 -

ENGINE/ENGINE BLOCK/VIBRATION DAMPER -
REMOVAL).

9. Disconnect lower radiator and heater hoses from the water pump.

10. Remove the power steering pump (Refer to 19 - STEERING/PUMP - REMOVAL).

11. Remove the AIR pump.

12. Remove the cylinder head covers (Refer to 9 - ENGINE/CYLINDER HEAD/CYLINDER HEAD COVER(S) -

REMOVAL).

13. Remove the front cylinder head to timing chain cover retaining bolts.

14. Remove the generator (Refer to 8 - ELECTRICAL/CHARGING/GENERATOR - REMOVAL).

15. Raise and support vehicle.

16. Remove the lower oil pan (Refer to 9 - ENGINE/LUBRICATION/OIL PAN - REMOVAL).

17. Remove the upper oil pan (Refer to 9 - ENGINE/LUBRICATION/OIL PAN - REMOVAL).

18. Remove the starter (Refer to 8 - ELECTRICAL/STARTING/STARTER MOTOR - REMOVAL).

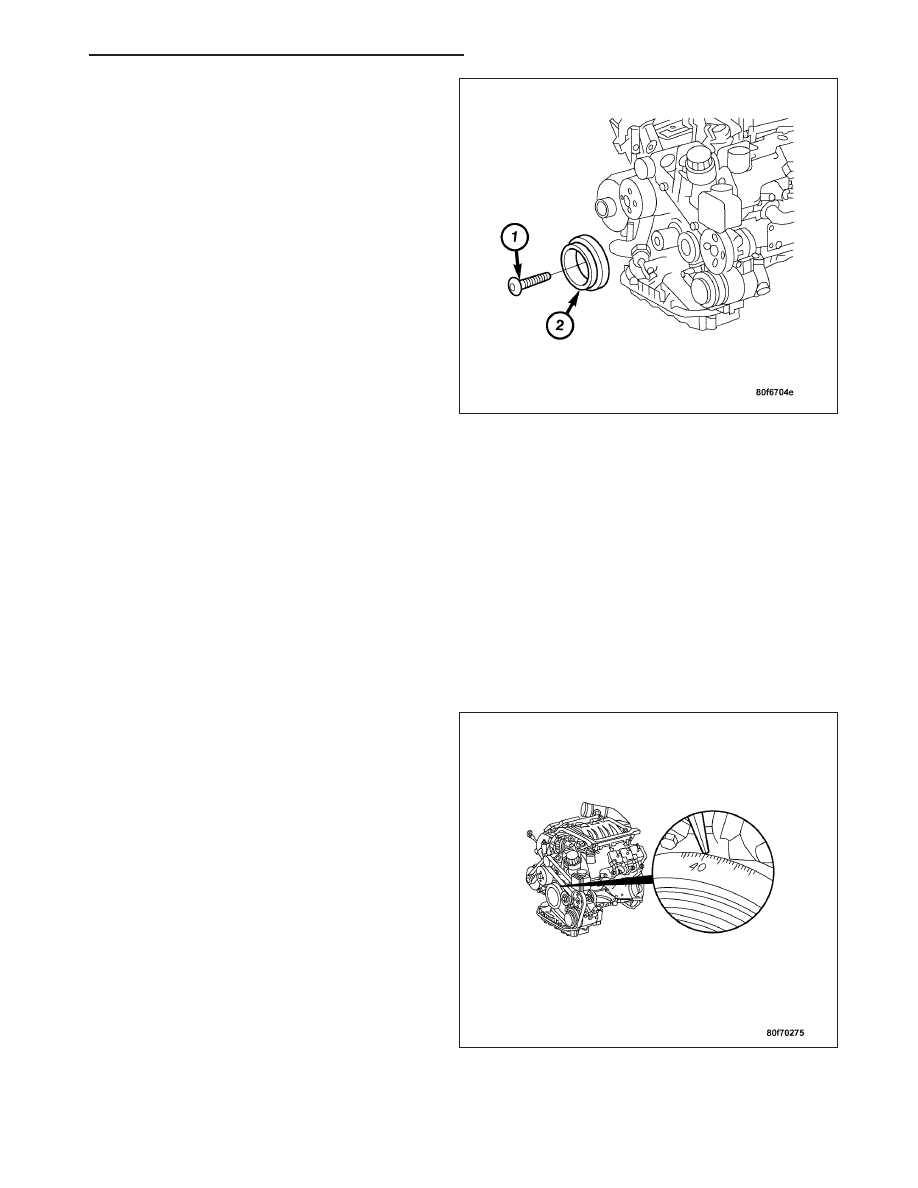
19. Rotate the crankshaft to 40° ATDC.

ZH

ENGINE - 3.2L SERVICE INFORMATION

9 - 817

20. Using Special Tool 9102 (1) Flywheel Locking

Tool, lock the flywheel by inserting the tool into
the starter opening.

21. Remove

the

timing

chain

tensioner

(Refer

to

9

-

ENGINE/VALVE

TIMING/TMNG

BELT/CHAIN

TENSIONER&PULLEY - REMOVAL).

22. Remove the timing chain cover bolts and cover.

INSTALLATION

1. Be sure valve timing is still locked at 40° ATDC

(Refer to 9 - ENGINE/VALVE TIMING/TIMING
BELT/CHAIN

AND

SPROCKETS

-

INSTALLATION).

9 - 818

ENGINE - 3.2L SERVICE INFORMATION

ZH

Note: Apply sealer ONLY to the area marked (1) as
shown. If porous points are visible at the cylinder
heads or at the rear of the engine near the sealing
surface of the cylinder head gasket, apply sealant
at these points. The sealant must be applied only
as a 2.0 mm ± 0.5 mm bead, assembled within 10
minutes, and not be flattened or spread.

Note:

2. Apply a 1.5 to 2.0 mm bead of Loctite 5900 or

equivalent sealer to the area marked (1) as shown.

3. Position the timing chain cover on the front of the

engine.

Note: Ensure that the bolts indicated by the
arrows are installed with thread sealer prior to
assembly.

4. Install the timing chain cover bolts and tighten to

20 N·m (15 ft. lbs.).

ZH

ENGINE - 3.2L SERVICE INFORMATION

9 - 819

5. Install the timing chain tensioner (1). Tighten to 80

N·m (59 ft. lbs.) (Refer to 9 - ENGINE/VALVE TIM-
ING/TMNG BELT/CHAIN TENSIONER&PULLEY -
INSTALLATION).

6. Remove Special Tool 9102 Flywheel Locking Tool

(1) from the engine.

7. Install the starter (Refer to 8 - ELECTRICAL/

STARTING/STARTER MOTOR - INSTALLATION).

8. Install the upper oil pan (Refer to 9 - ENGINE/LUBRICATION/OIL PAN - INSTALLATION).

9. Install the lower oil pan (Refer to 9 - ENGINE/LUBRICATION/OIL PAN - INSTALLATION).

10. Install the generator. (Refer to 8 - ELECTRICAL/CHARGING/GENERATOR - INSTALLATION).

Note: Apply a thin coat of lubricant to head bolt threads before installing.

11. Install the front cylinder head to timing chain cover bolts. Tighten bolts to 20 N·m (7-15 ft. lbs.).

12. Install the cylinder head covers (Refer to 9 - ENGINE/CYLINDER HEAD/CYLINDER HEAD COVER(S) -

INSTALLATION).

13. Install the AIR pump.

9 - 820

ENGINE - 3.2L SERVICE INFORMATION

ZH


Content   ..  666  667  668  669   ..