Content .. 2142 2143 2144 2145 ..
Chrysler 300/300 Touring/300C, Dodge Magnum. Manual - part 2144
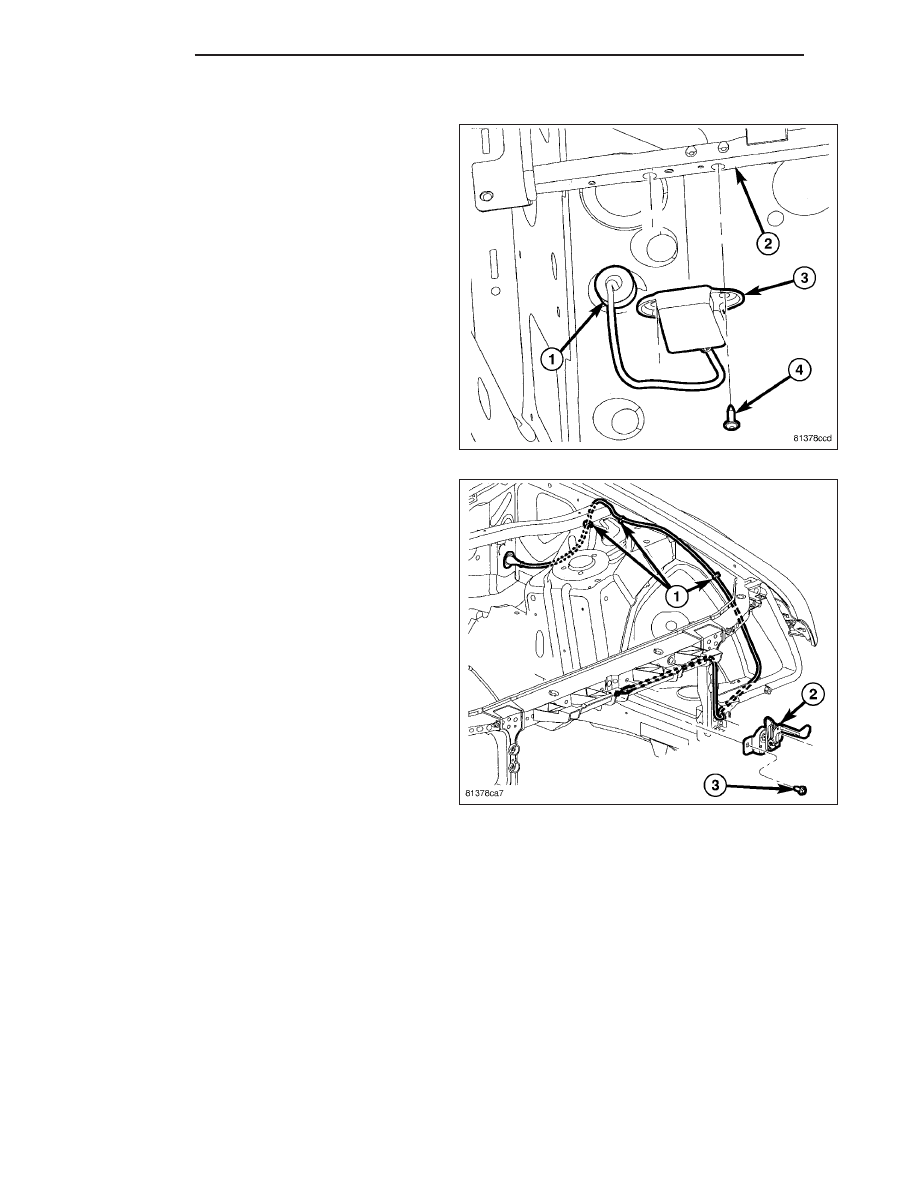
INSTALLATION
1. Position the hood latch release handle and cable
(3) under the left side of the instrument panel in the
passenger compartment of the vehicle.
2. Thread the cable through the appropriate hole in
the dash panel far enough to seat the cable grom-
met (1) into the hole.
3. Position the hood latch release handle to the lower
instrument panel reinforcement (2).
4. Install and tighten the two screws (4) that secure
the handle to the reinforcement. Tighten the screws
to 5 N·m (45 in. lbs.).
5. Reinstall the closeout panel beneath the left side of
the instrument panel. (Refer to 23 - BODY/IN-
STRUMENT
PANEL/INSTRUMENT
PANEL
SILENCER - INSTALLATION).
6. Route the hood latch release cable from the dash
panel along the left side of the engine compartment
to the center of the headlamp mounting crossmem-
ber as shown.
7. Fully engage the cable into the integral routing
clips on the headlamp mounting crossmember and
the routing clips (1) along the left side of the
engine compartment.
8. Reinstall the left headlamp unit to the vehicle.
(Refer to 8 - ELECTRICAL/LAMPS/LIGHTING -
EXTERIOR/HEADLAMP UNIT - INSTALLATION).
9. Reinstall the hood latch (2) to the vehicle. (Refer to
23 - BODY/HOOD/LATCH - INSTALLATION).
23 - 124
HOOD
LX